Build book
Russell Glow
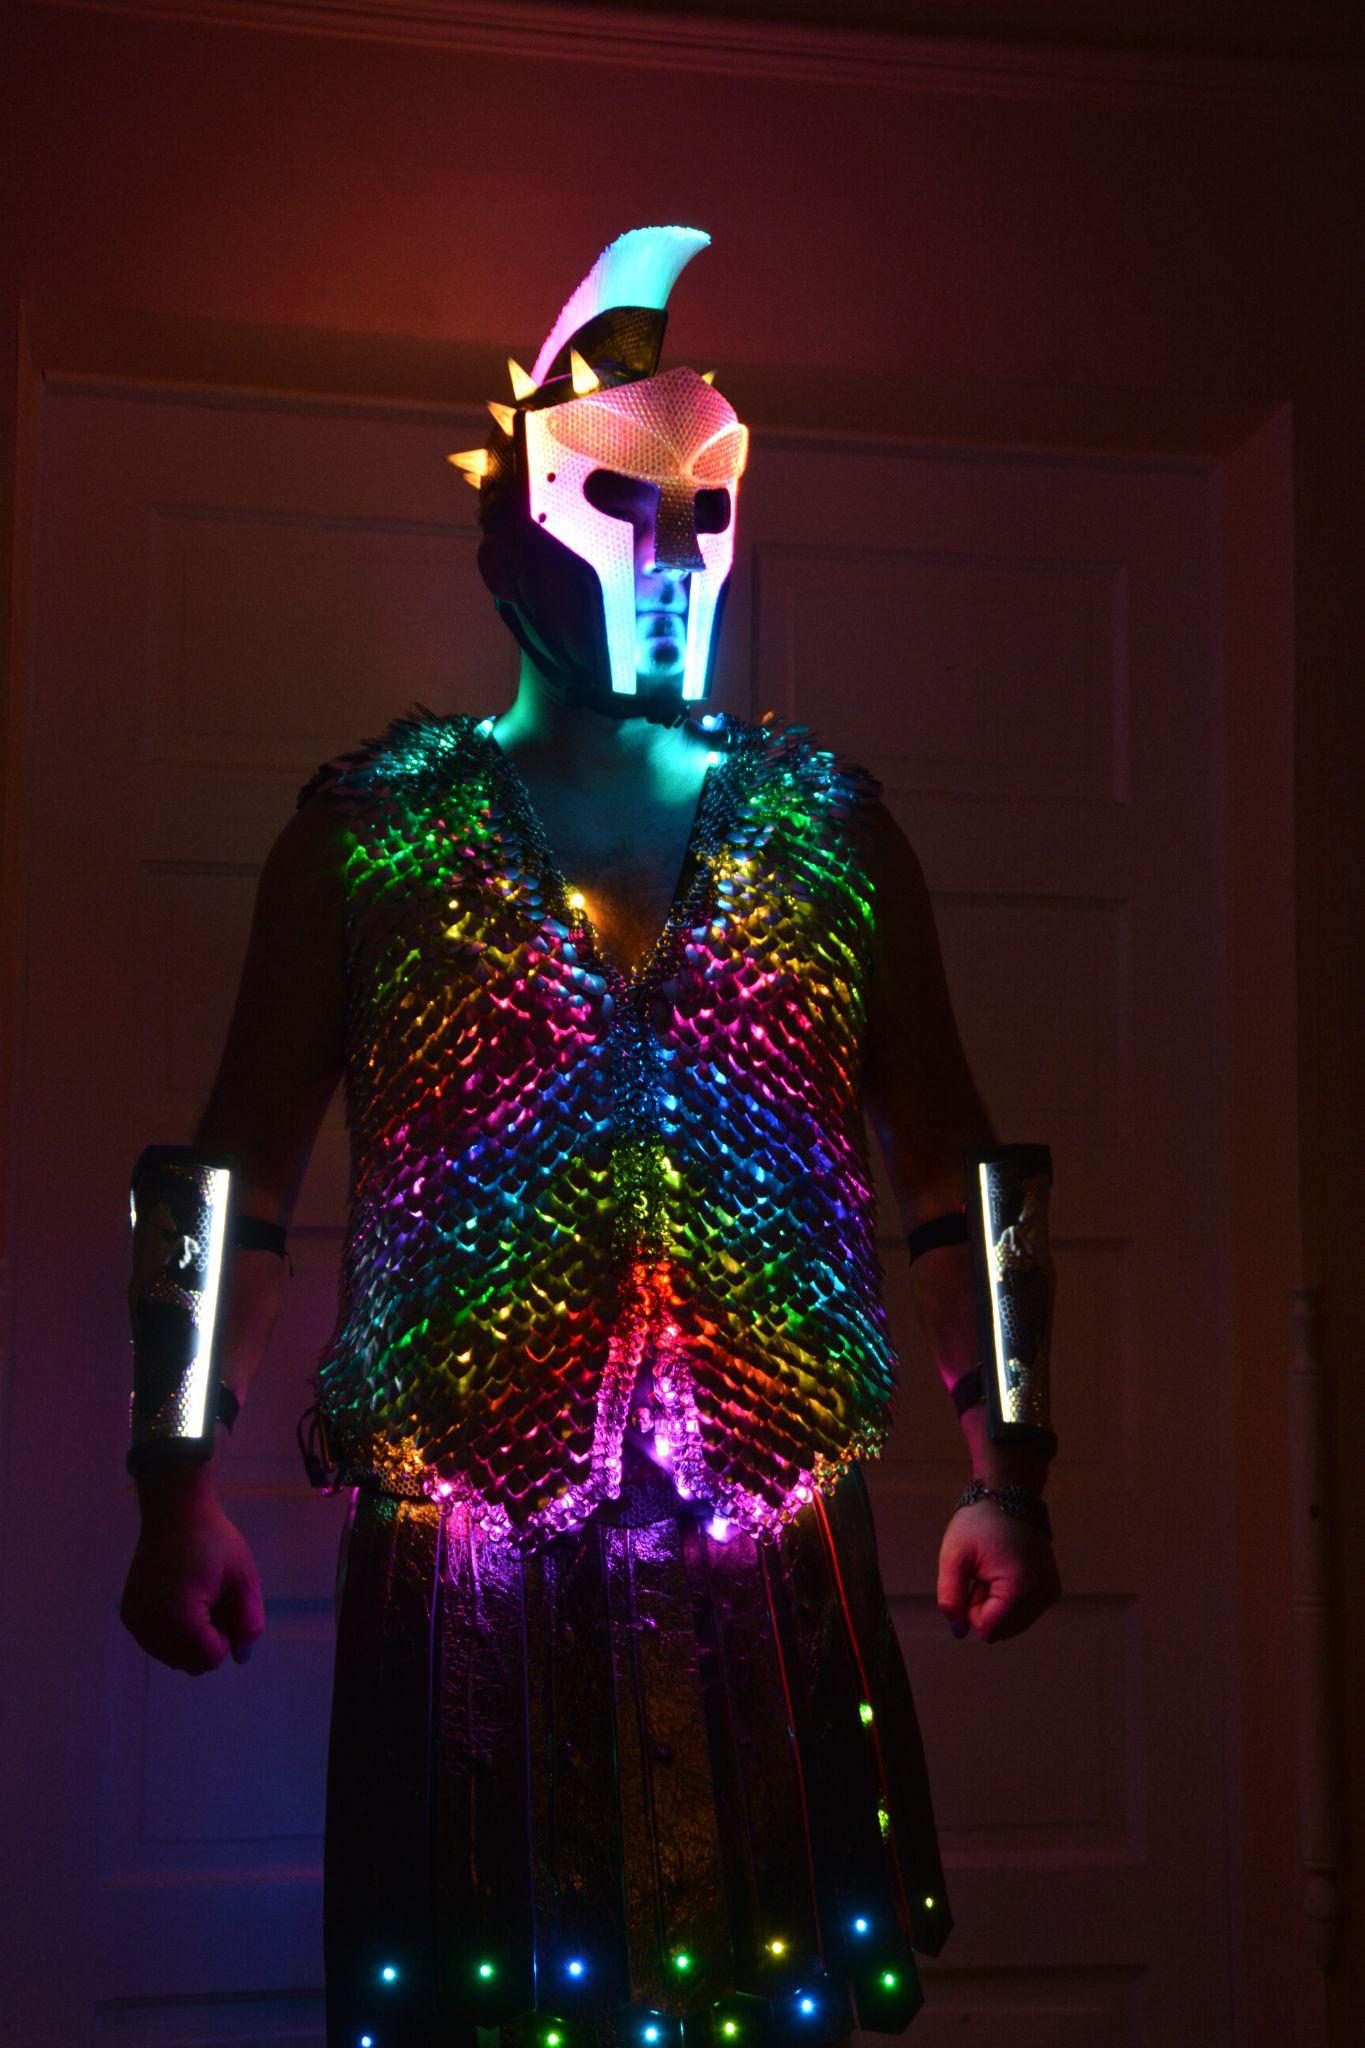
A Gladiator costume rebuilt as a light source: a fibre-optic mohawk, an infinity-mirror shield, 2,200 hand-linked scales, and roughly 10,000 rhinestones, walked two miles of Mardi Gras parade on a baritone saxophone.
01 Build book
Inspiration
Maximus Decimus Meridius — Gladiator (2000), Russell Crowe.
- Started as
- A scale maille vest backed with LEDs
- Built for
- The 8-Bit Brass Band
- Debut
- A 2-mile Mardi Gras parade, on baritone sax
I did not start with the intention to make Russell Glow. I have been making chainmaille and scale maille for 16 years and I have always wanted to make a scale maille vest backed with LEDs. Once I joined the 8-Bit Brass Band I needed to come up with some cosplay for our performances.
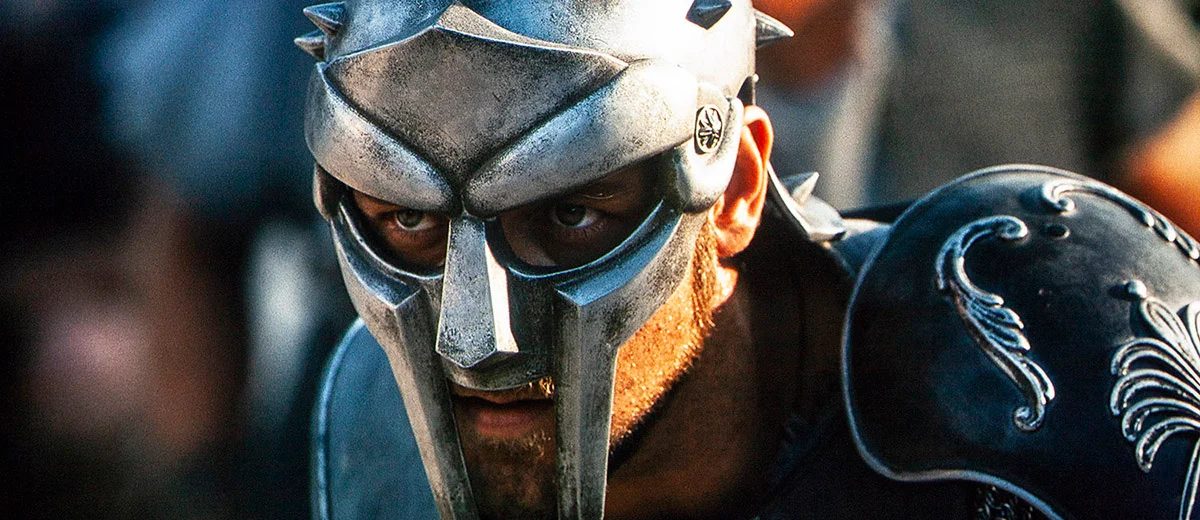
Source Gladiator (2000), dir. Ridley Scott — DreamWorks Pictures / Universal Pictures. Reference image.
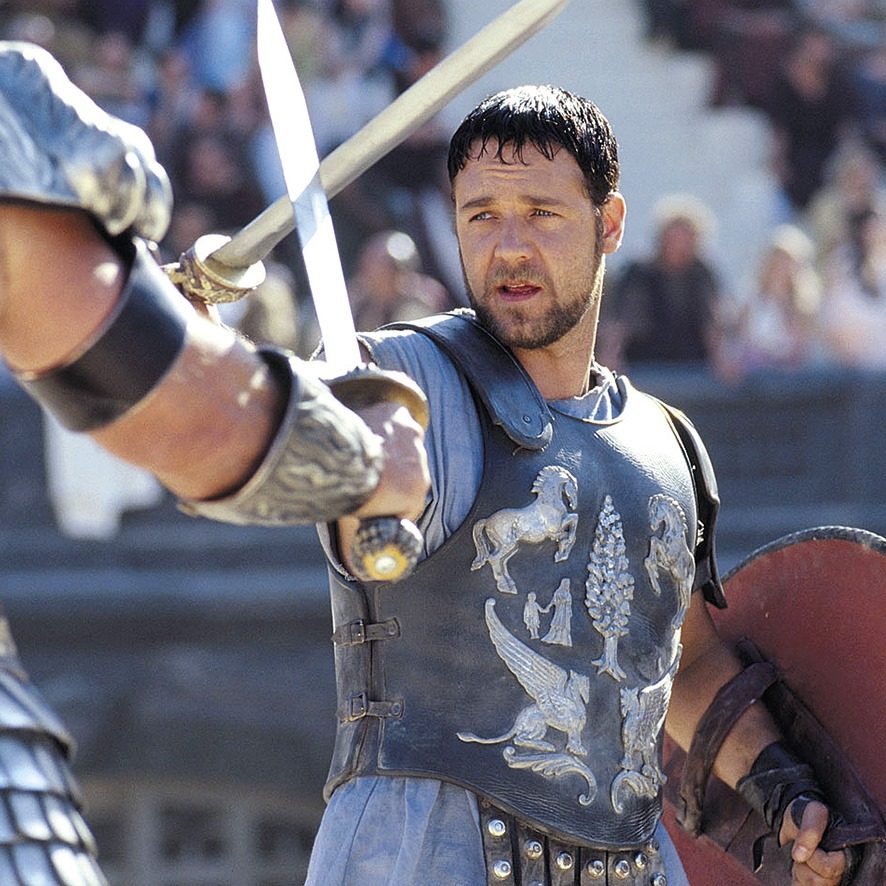
Source Gladiator (2000), dir. Ridley Scott — DreamWorks Pictures / Universal Pictures. Reference image.
This costume was originally designed for a Mardi Gras parade that I attended down in New Orleans, where I walked the entire 2 mile parade with this costume while performing on a baritone saxophone.
02 Build book
Helmet
Paper pattern to fibre-optic mohawk, and the hexagon that took over the costume.
- Rhinestones in the face
- 1,500
- Rhinestones in the costume
- ~10,000, hand placed
- Lights under the horns
- 10
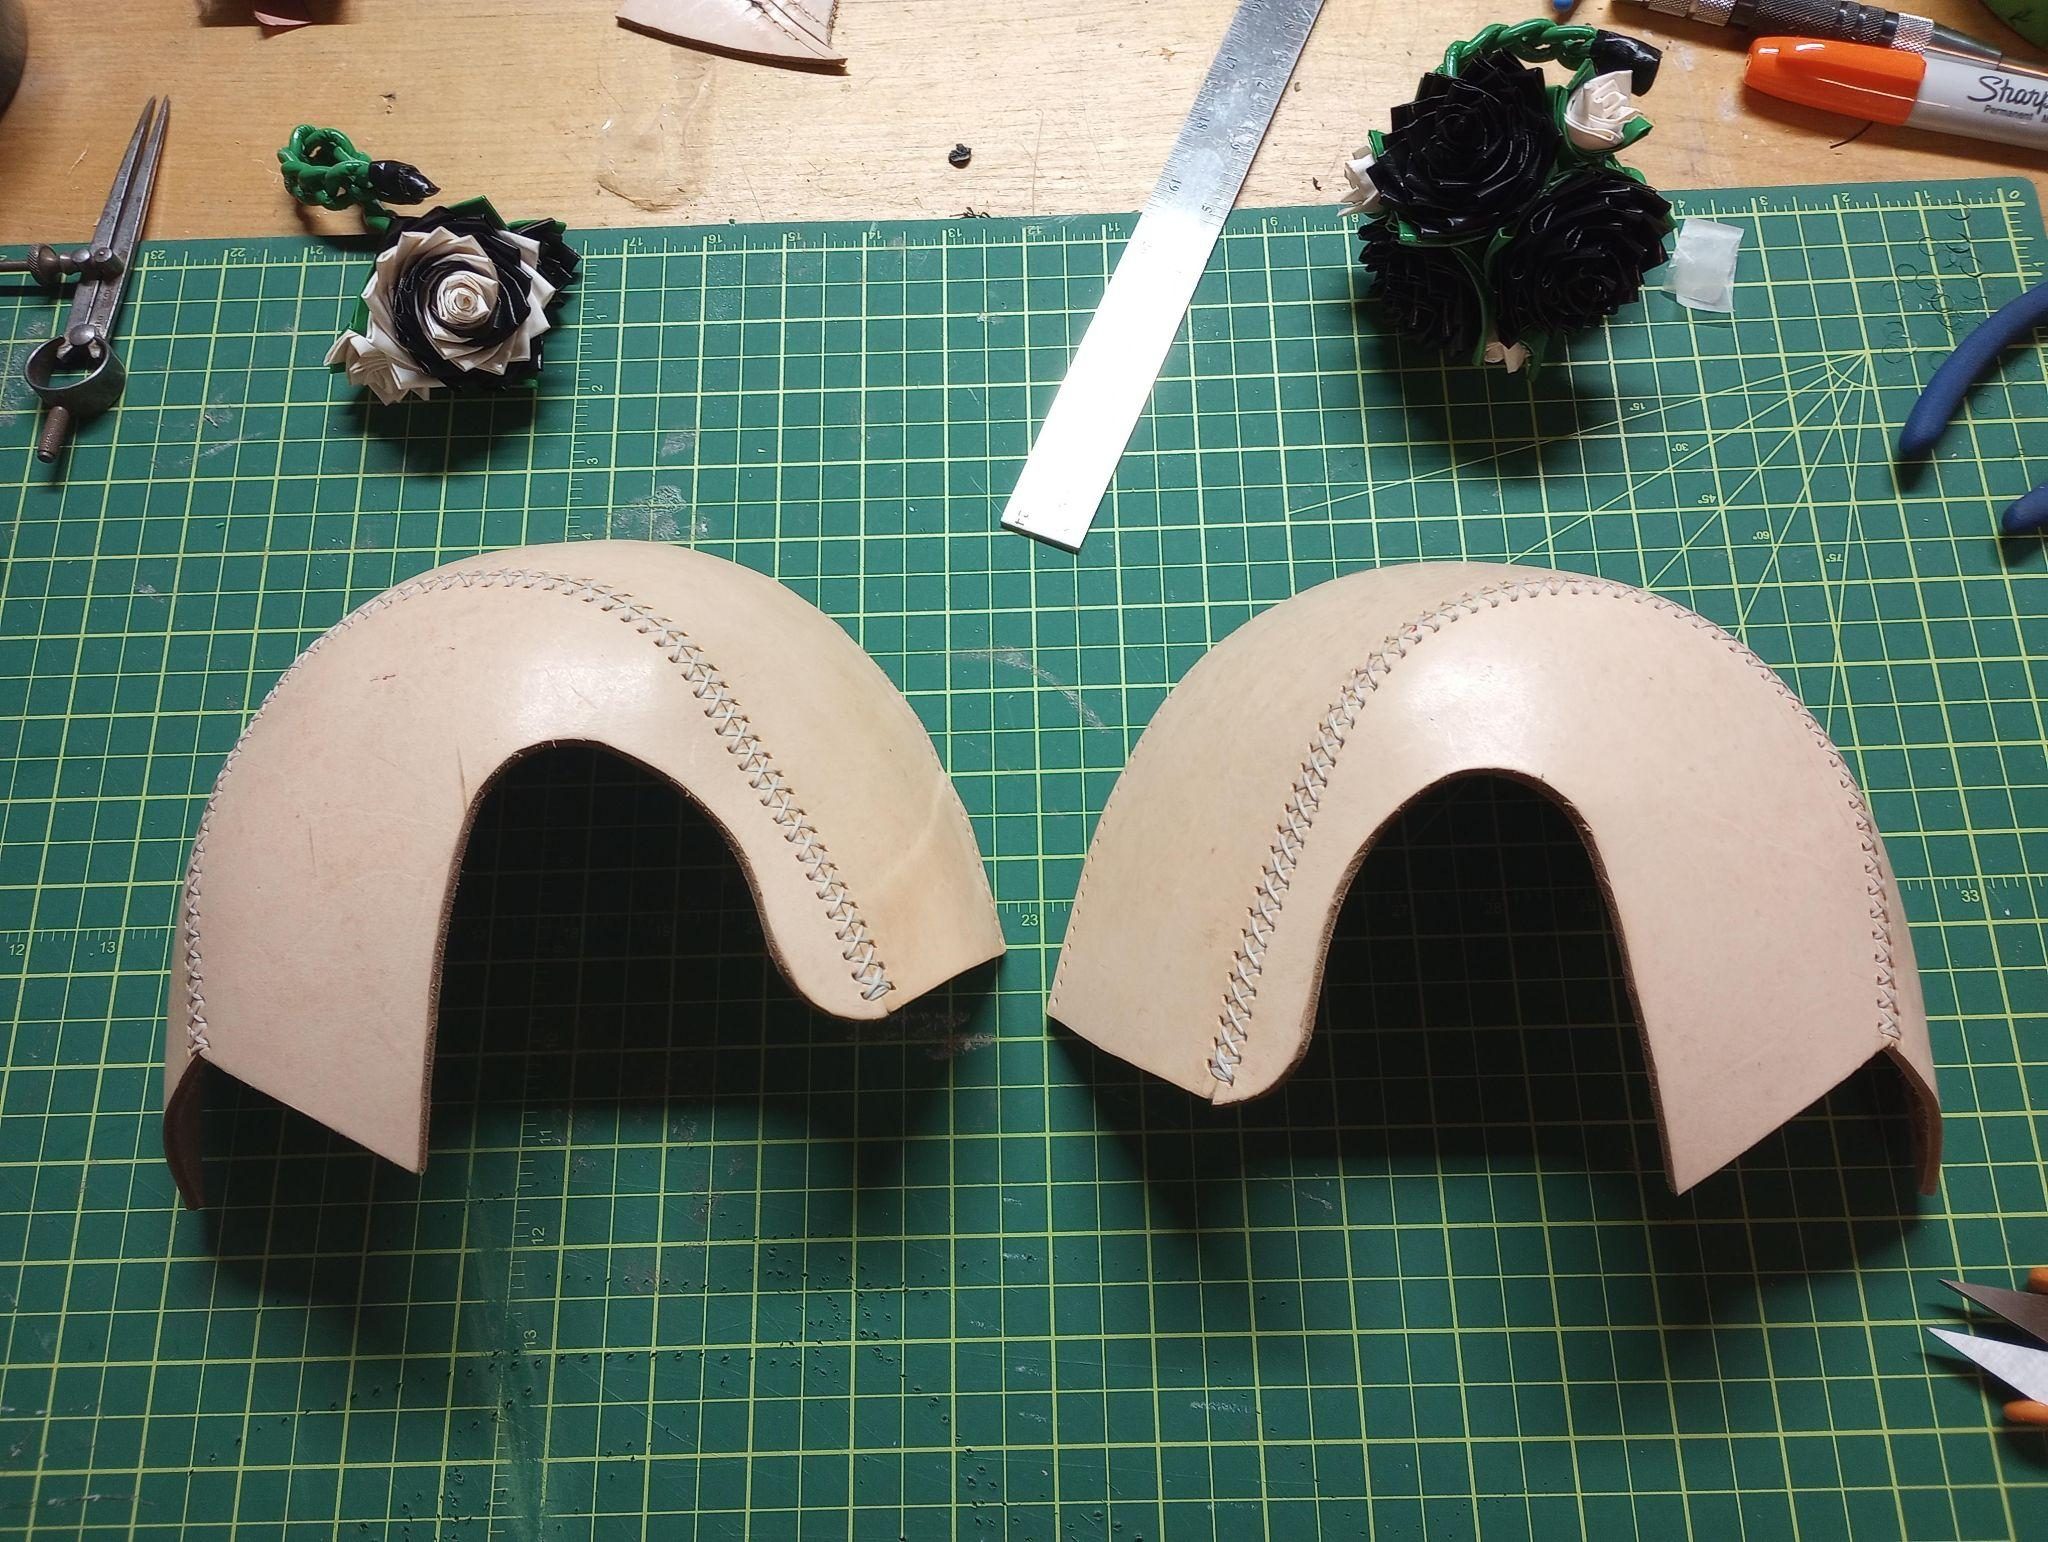
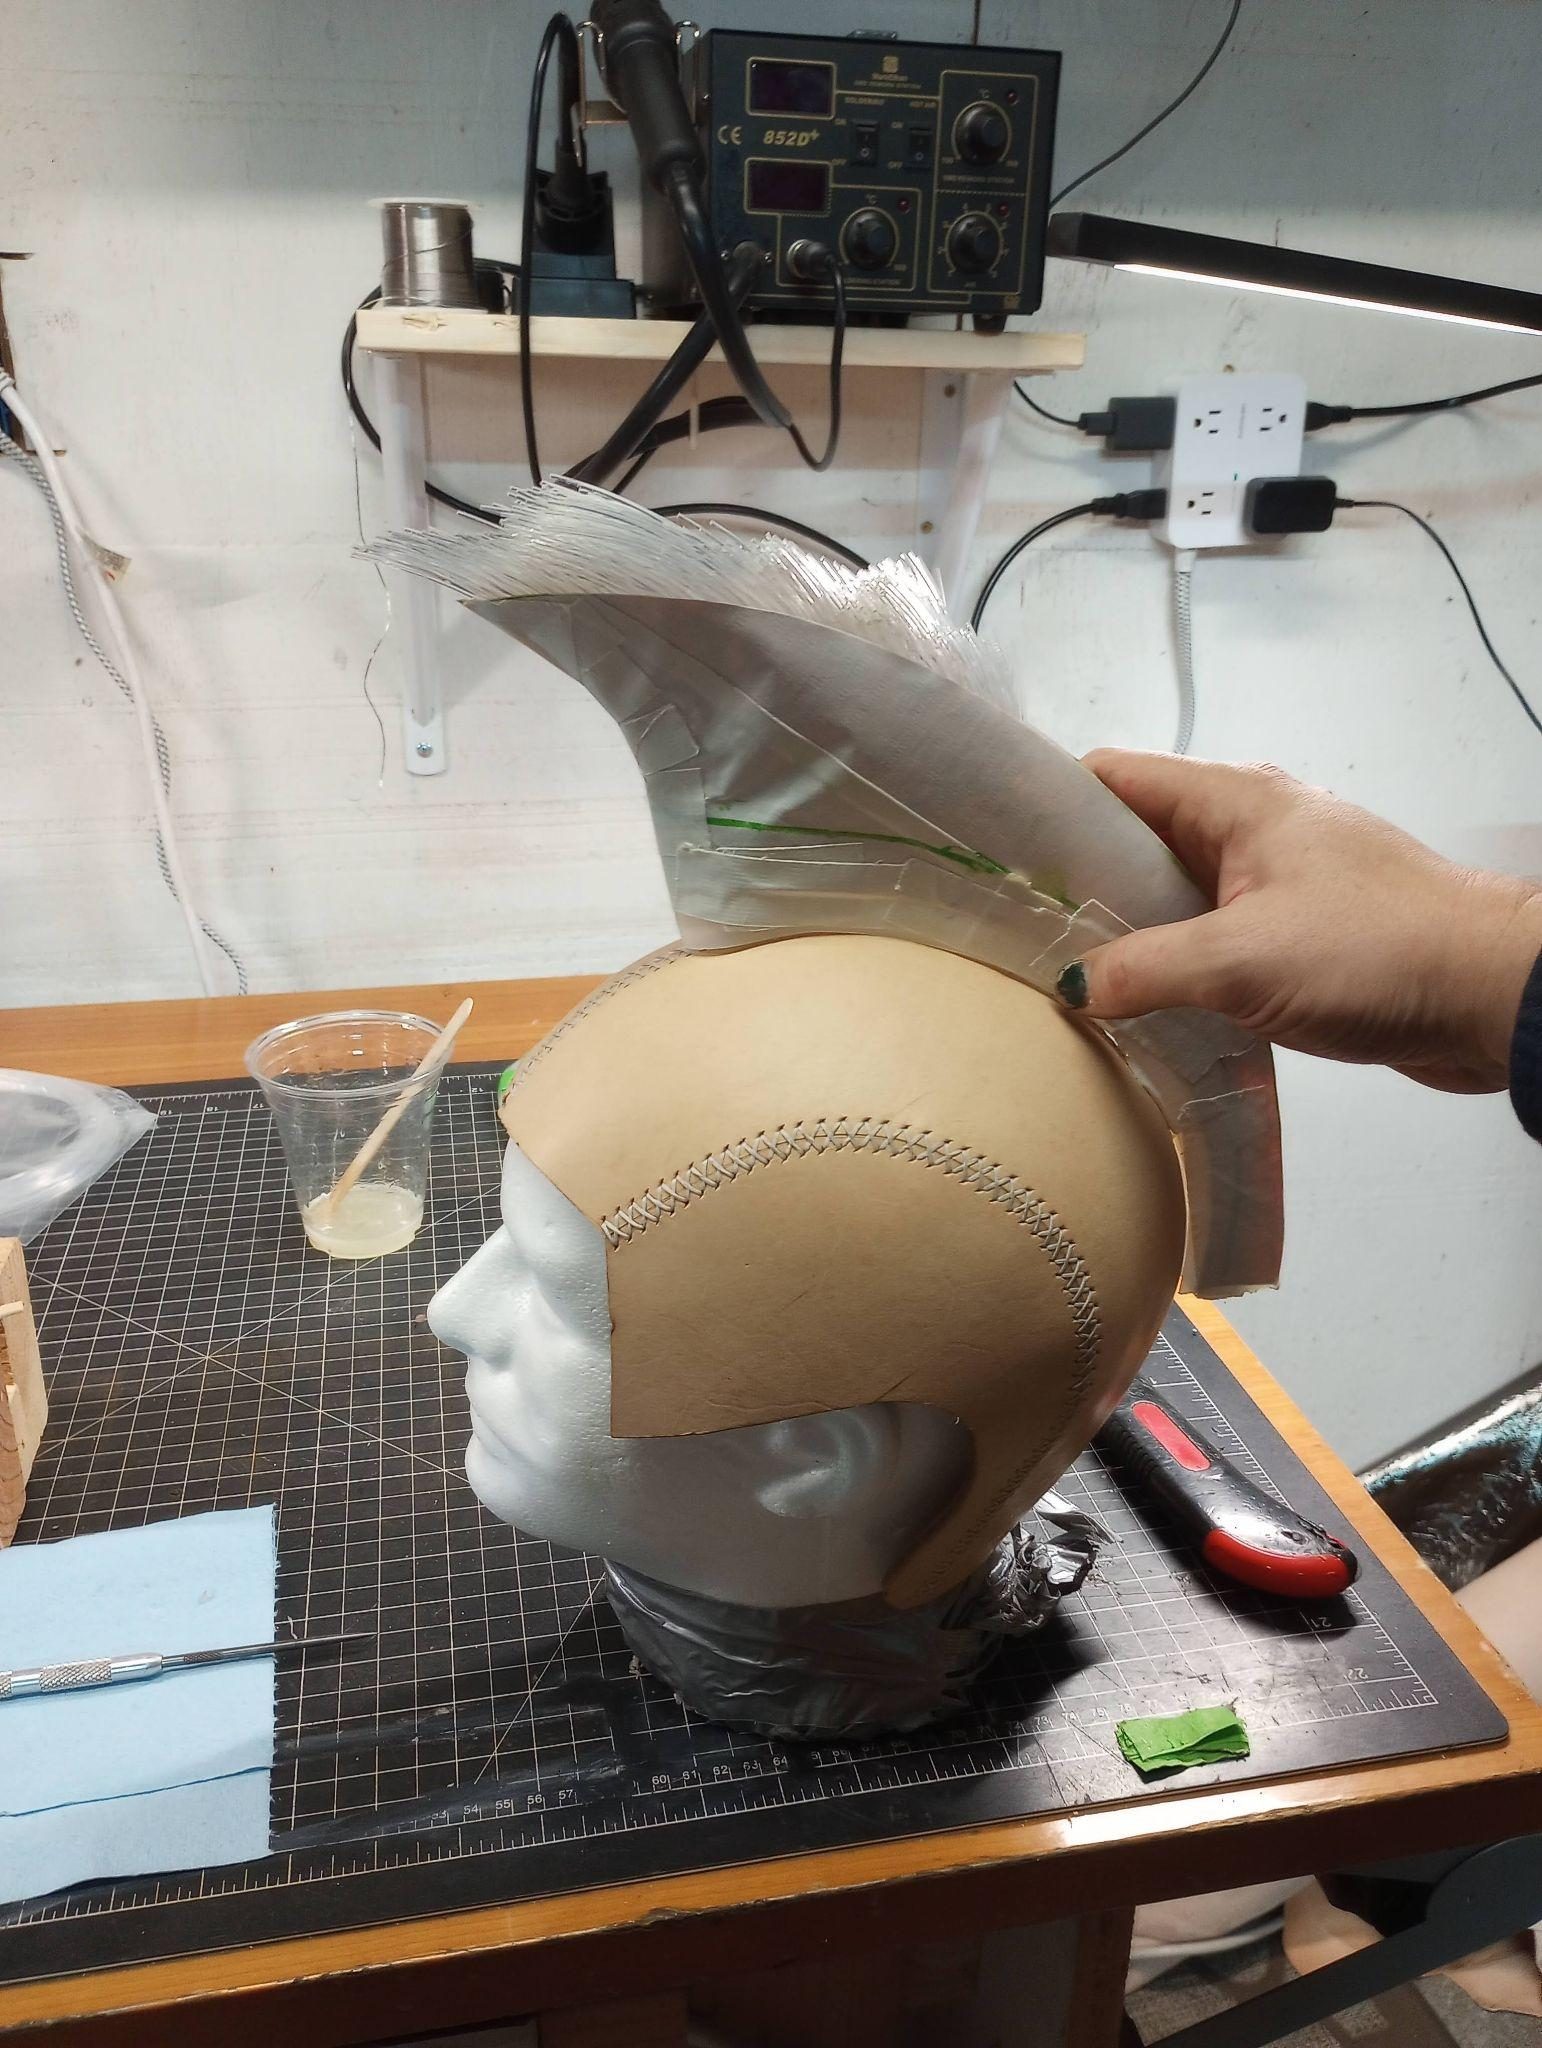
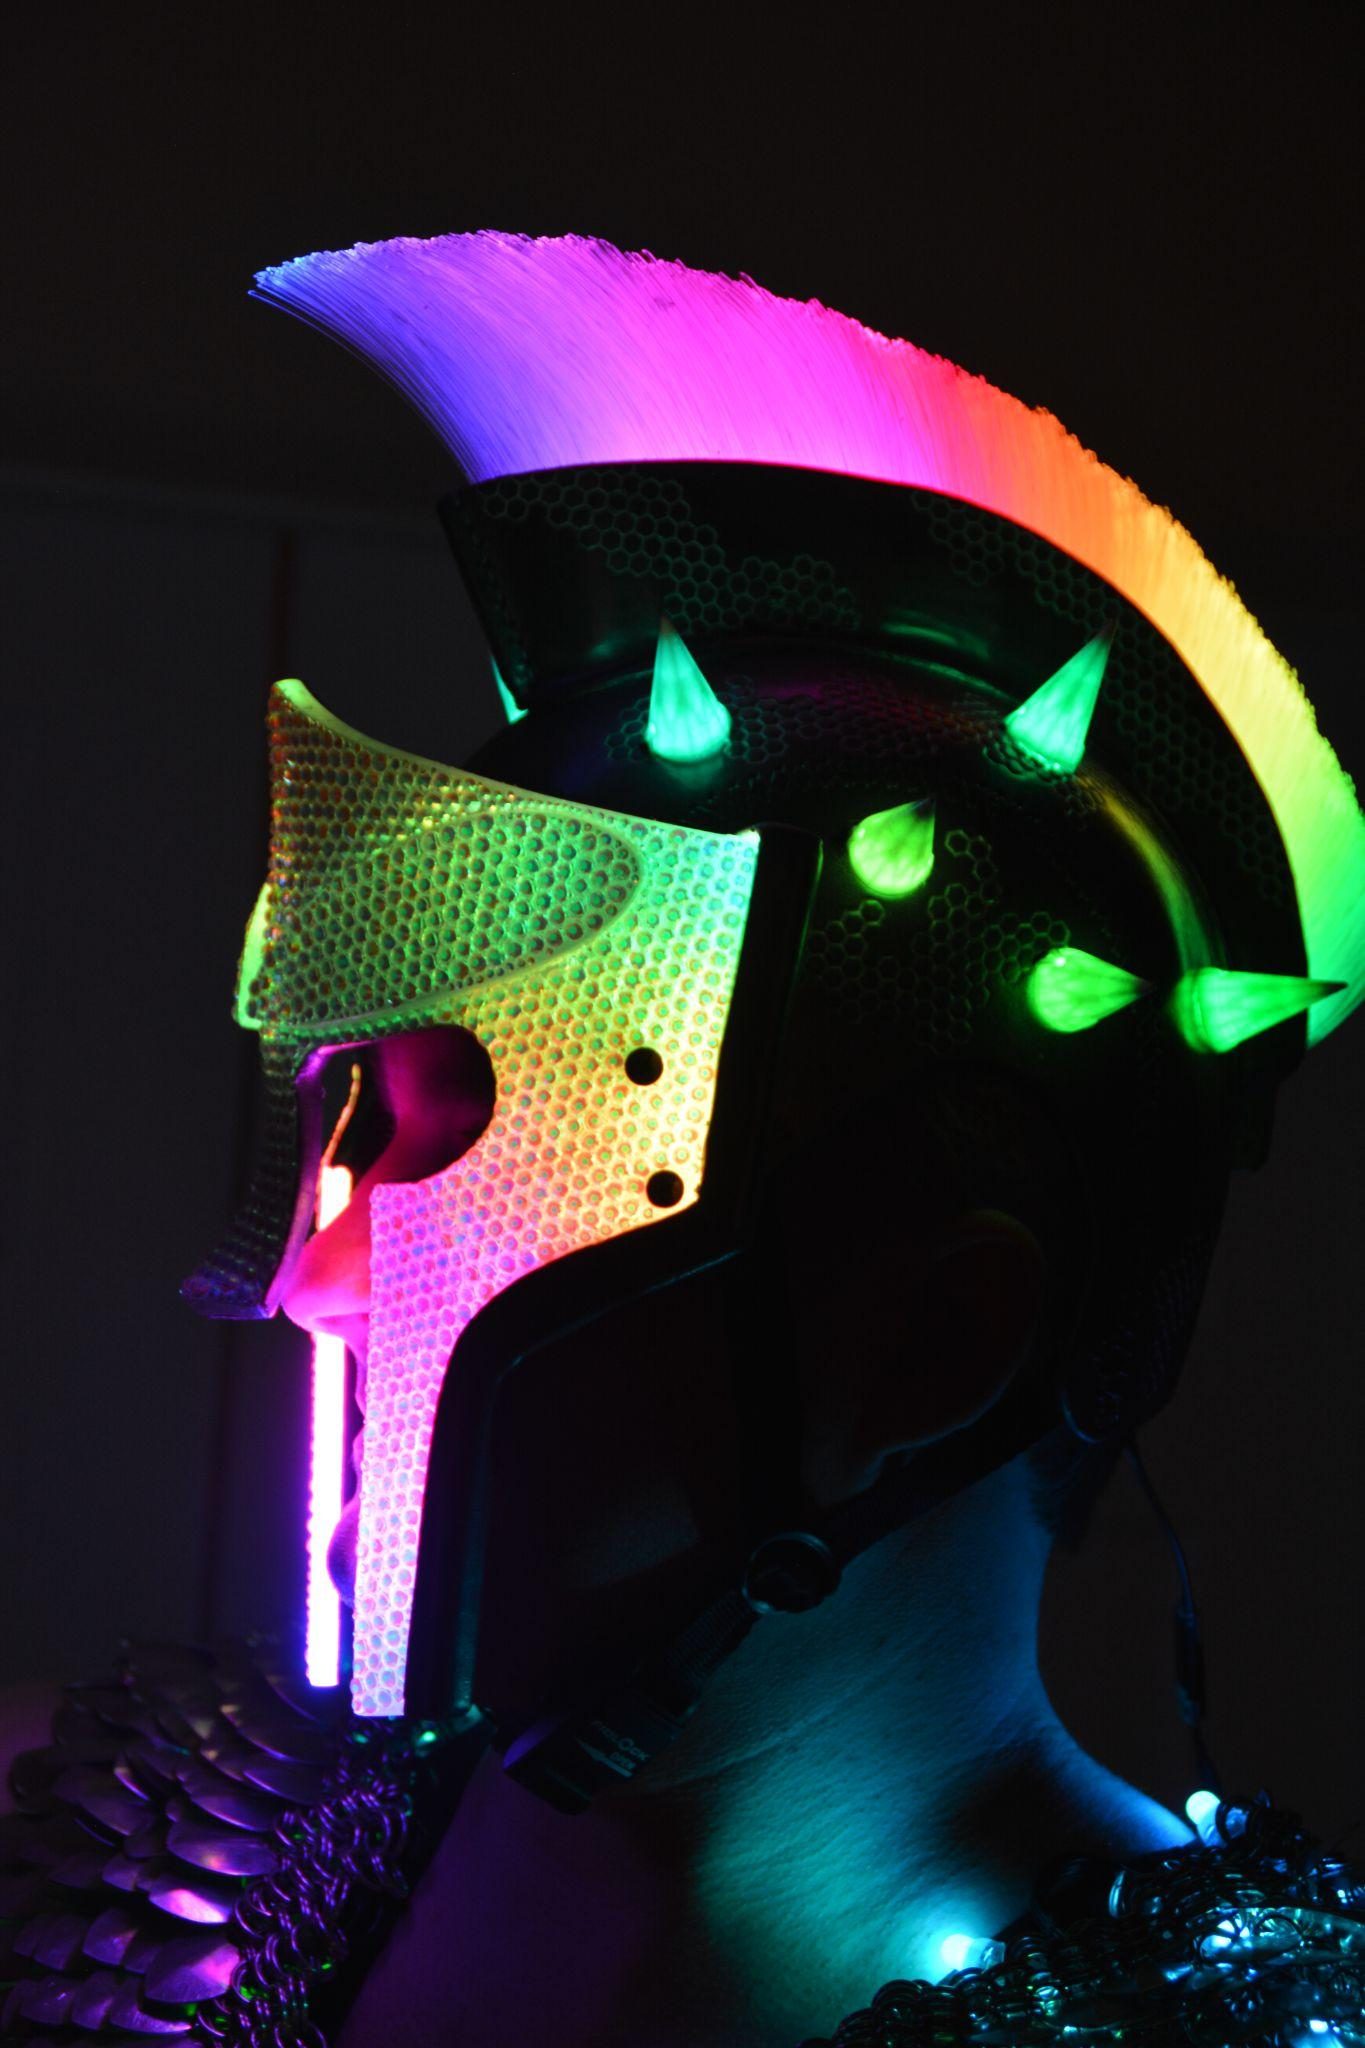
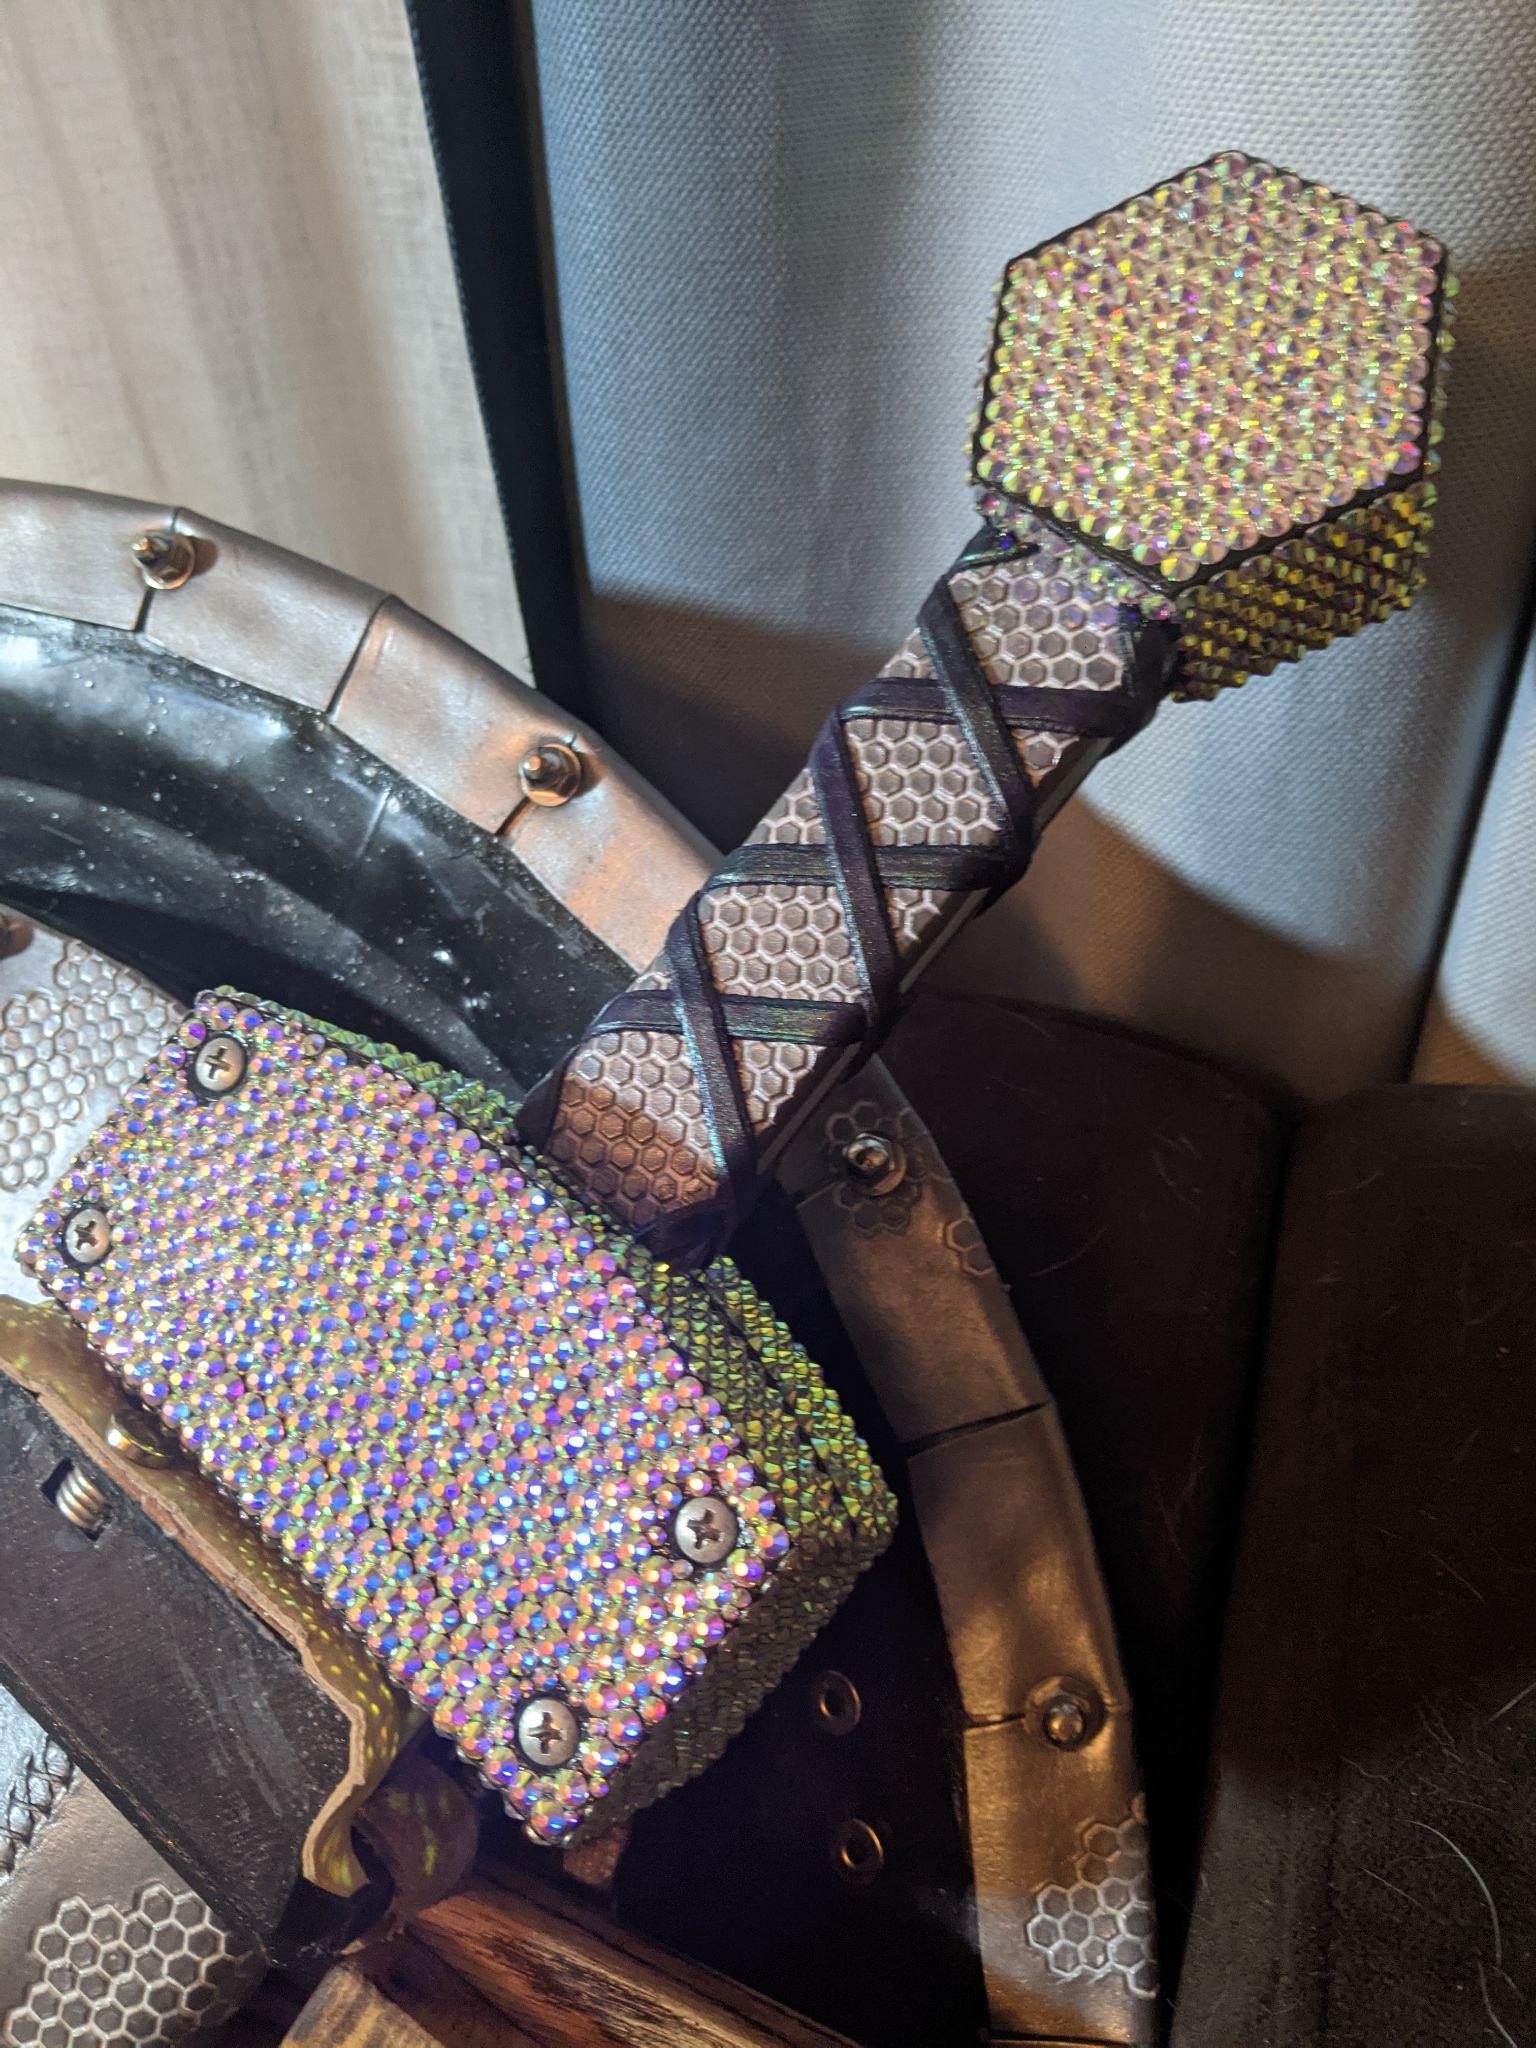
I started with a simple helmet pattern that I made out of paper and duct tape, and then transferred to veg tan leather and hand stitched together. The base was painted and hand stamped with a hexagon pattern that became a running theme throughout the entire costume.
I created a channel out of diffuser that fit the shape of the helmet and filled it with epoxy and fiber optic cables. The fiber optics were then hand cut to shape into a mohawk. I left a small channel underneath that allows me to slip LED strips underneath, and left access in the back to allow for replacements as needed. I added a loop of leather for anchoring the power cable in case it gets caught, to prevent ripping out the controller and soldering contacts.
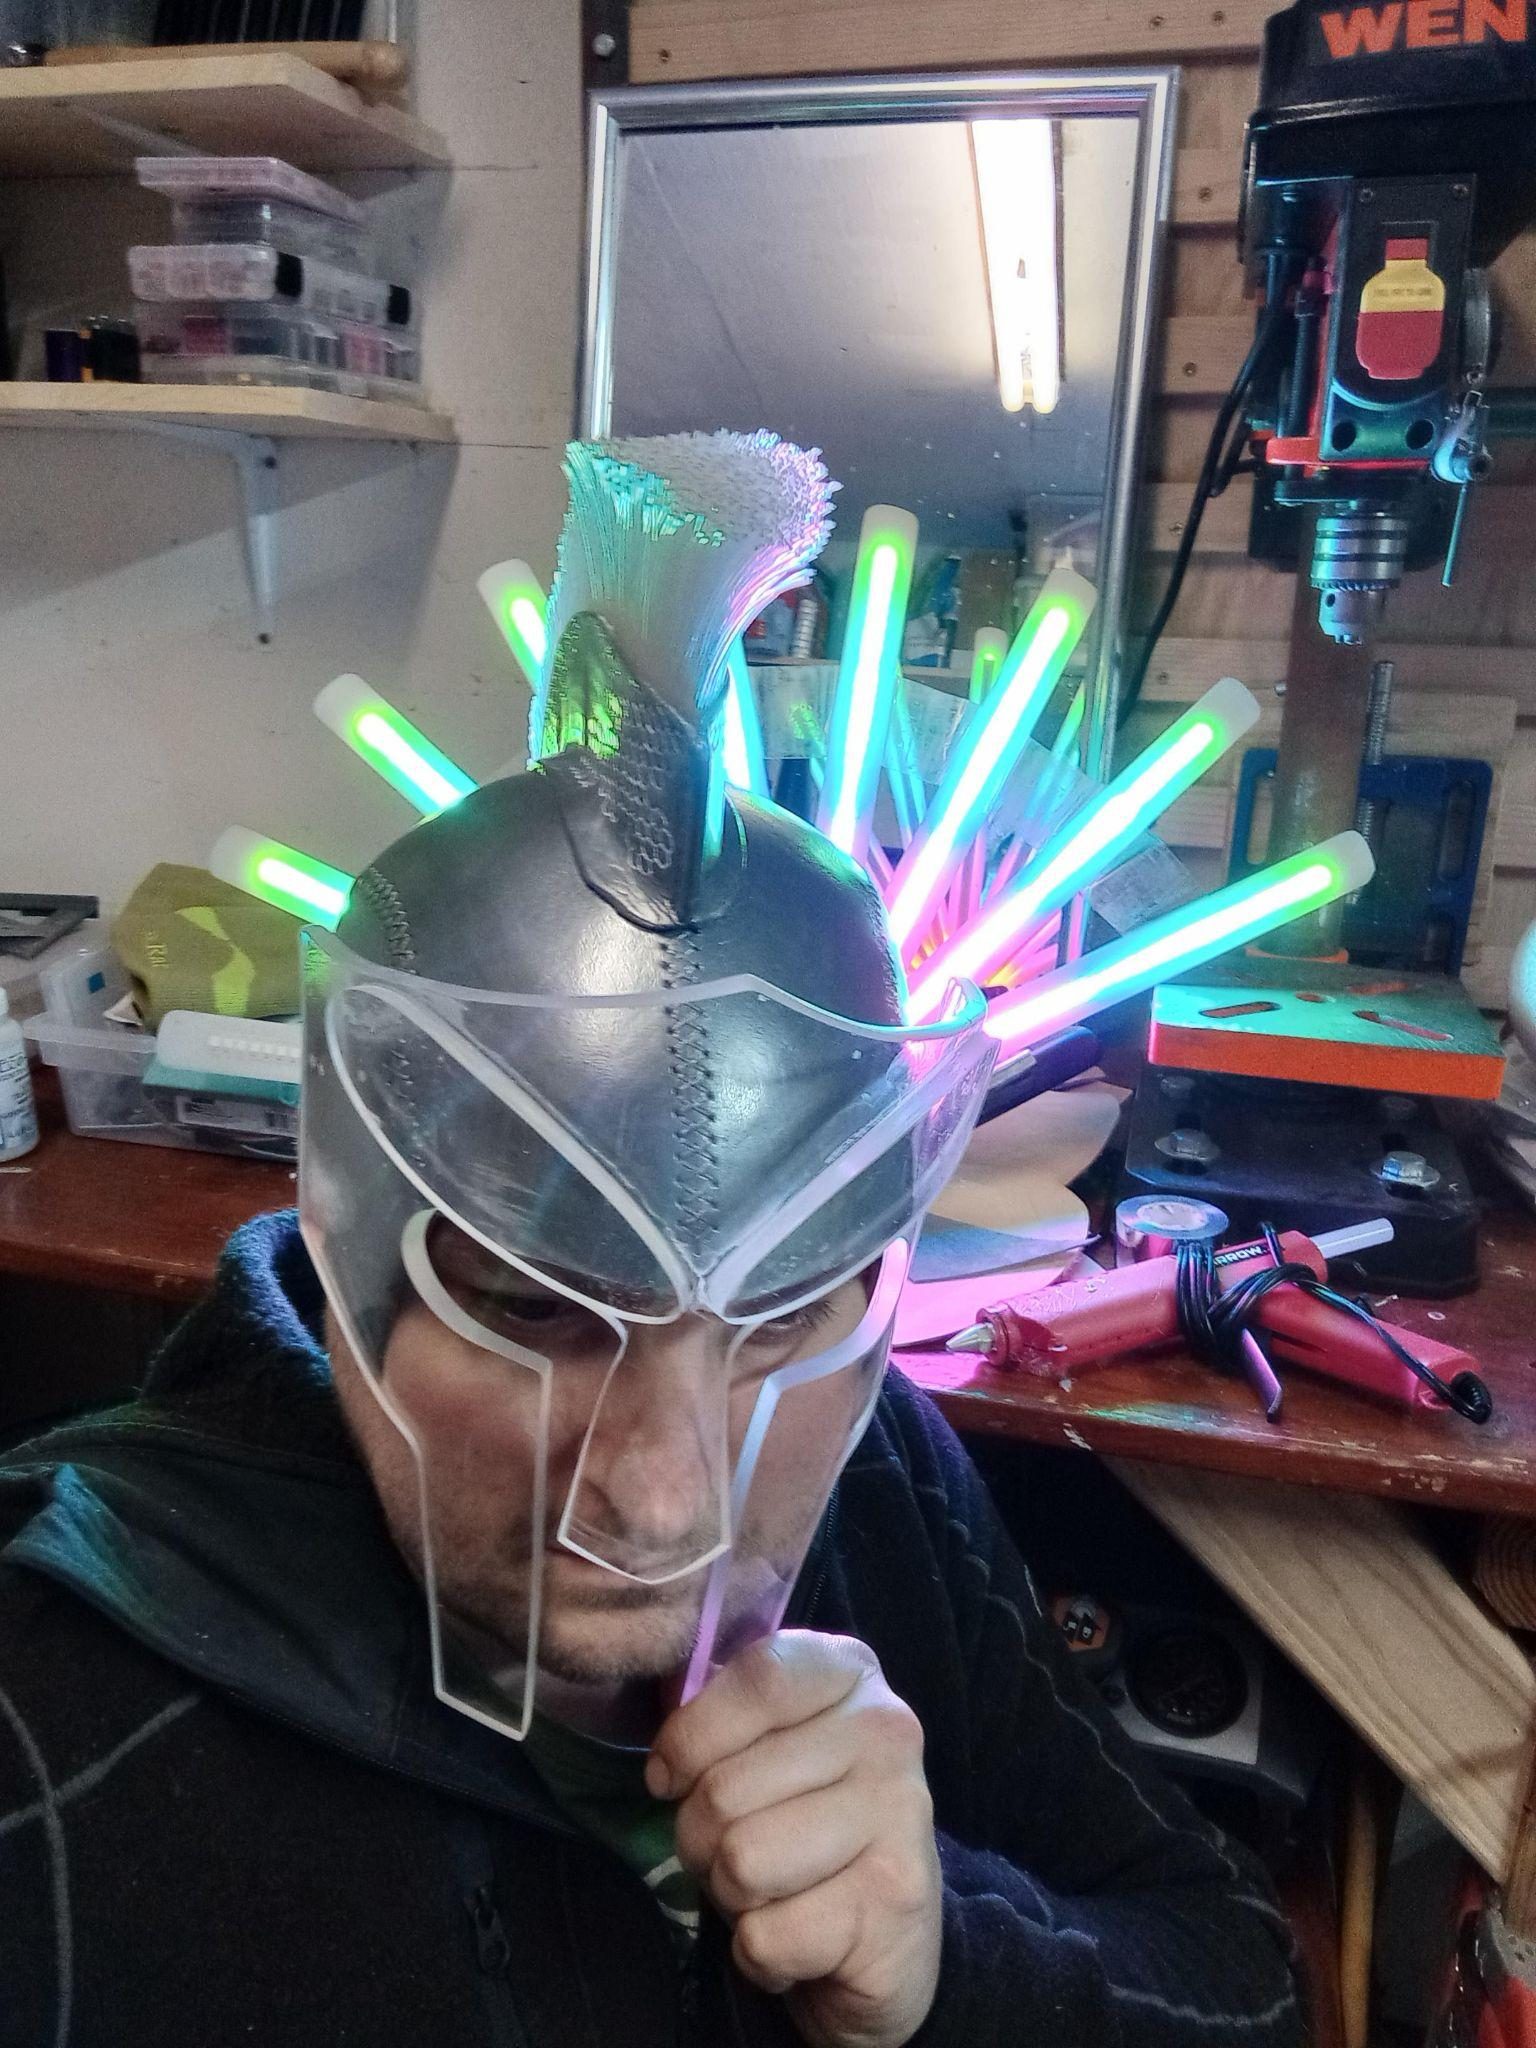
The face plate was cut using a jigsaw out of a flat piece of acrylic then heat shaped to fit the profile. I lined the sides with LEDs so the light would bounce through the acrylic and give the entire face a rainbow glow. Aurora Borealis rhinestones with clear backs were added to give it that extra shine. There are approximately 10,000 hand placed rhinestones in the entire costume, with 1,500 of them in the face alone.
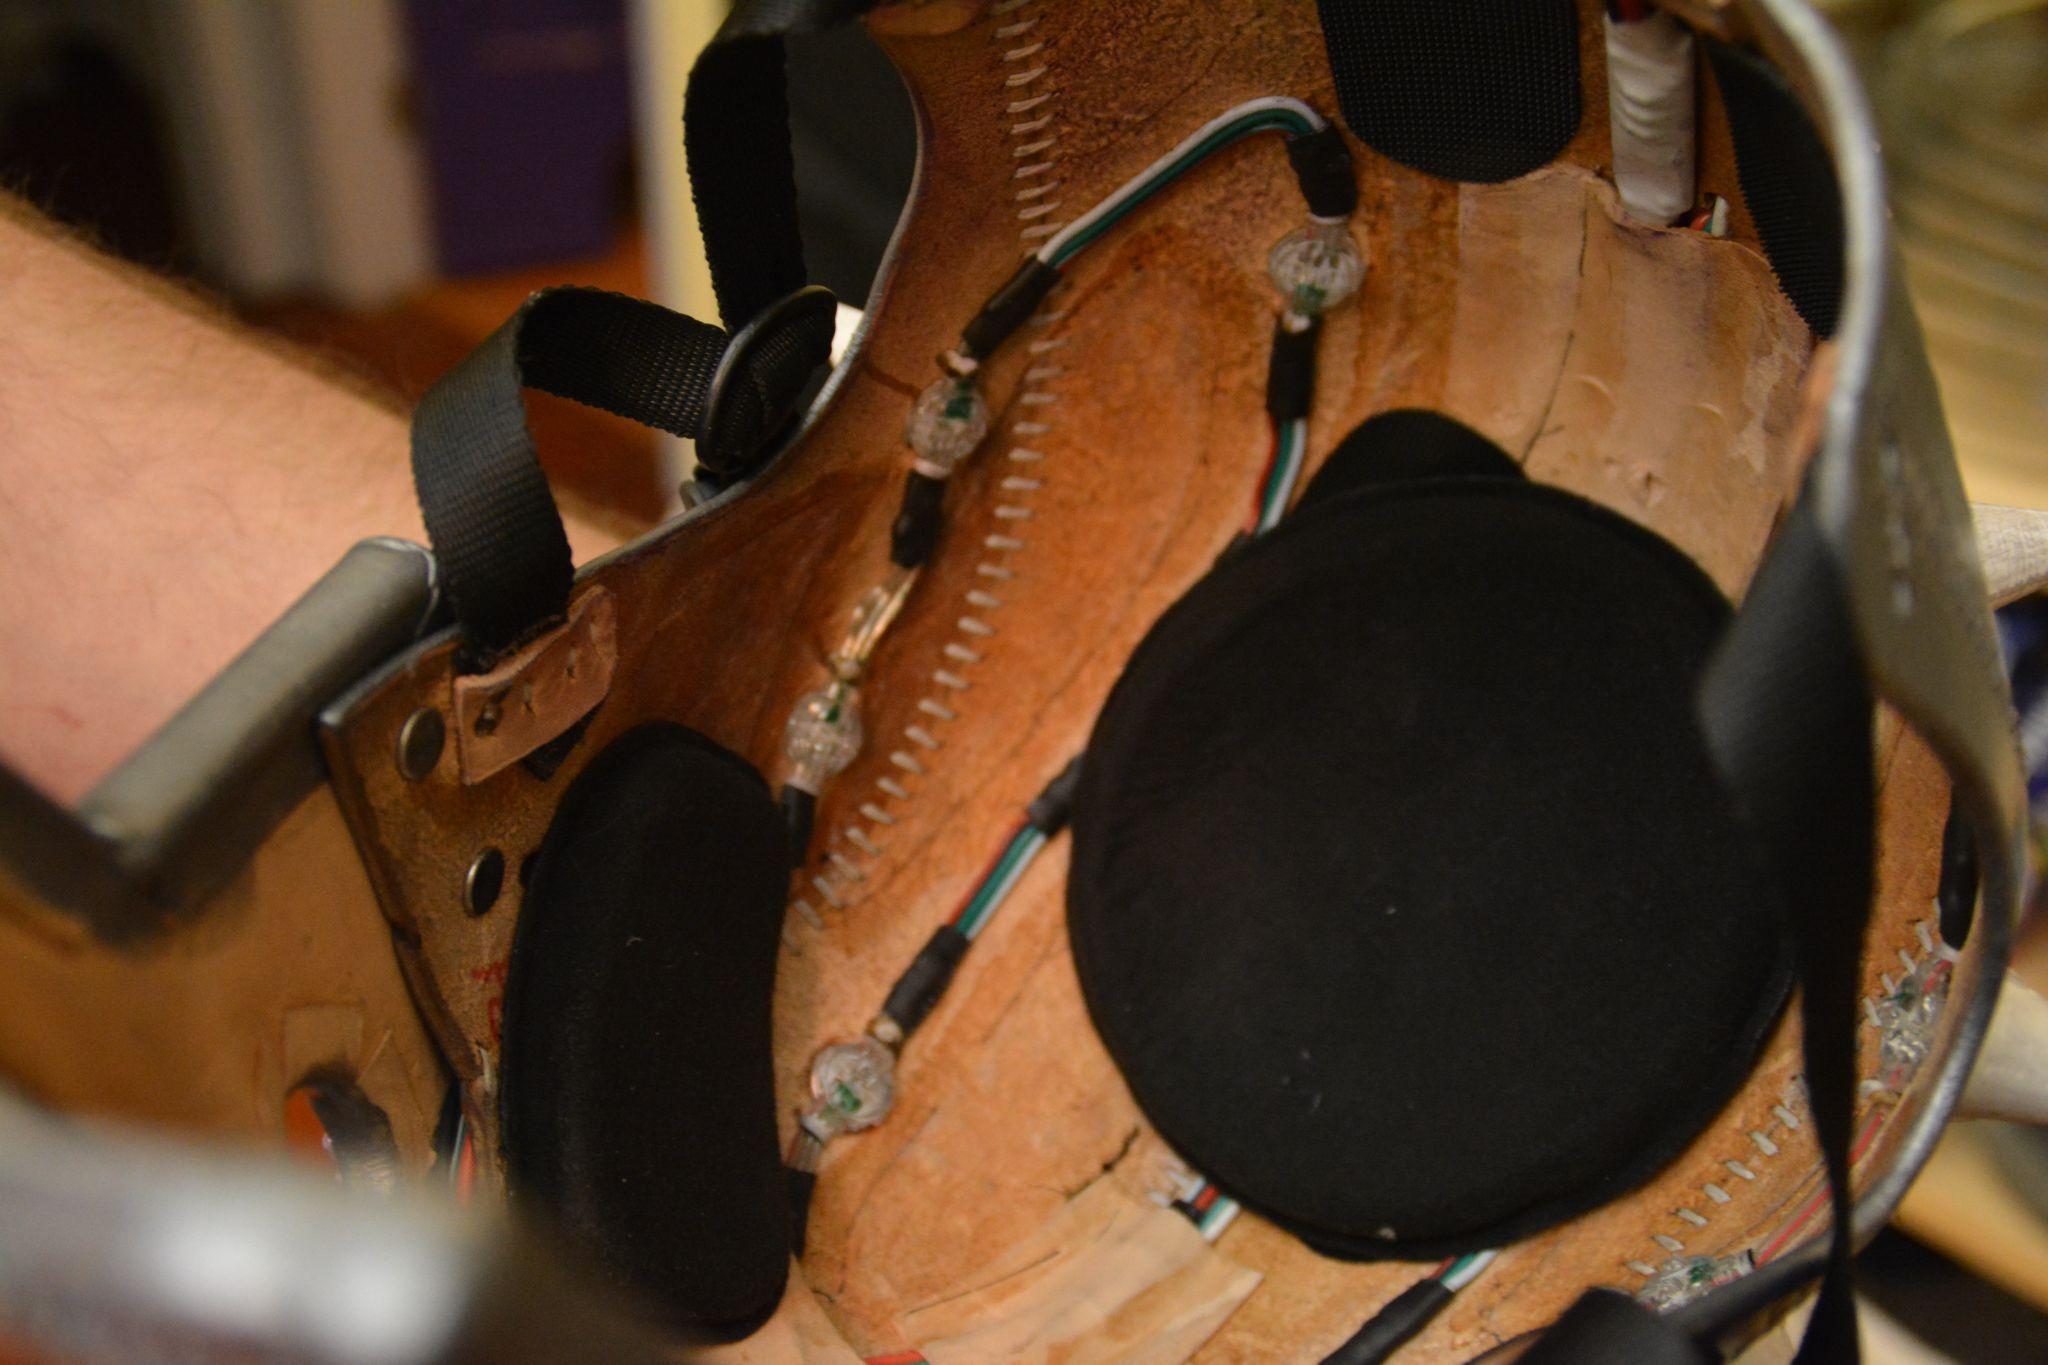
All the wiring is contained inside the helmet with leather covers to protect the more sensitive components. There are 10 individual lights placed under the horns. Each horn was 3D printed and stitched onto the top.
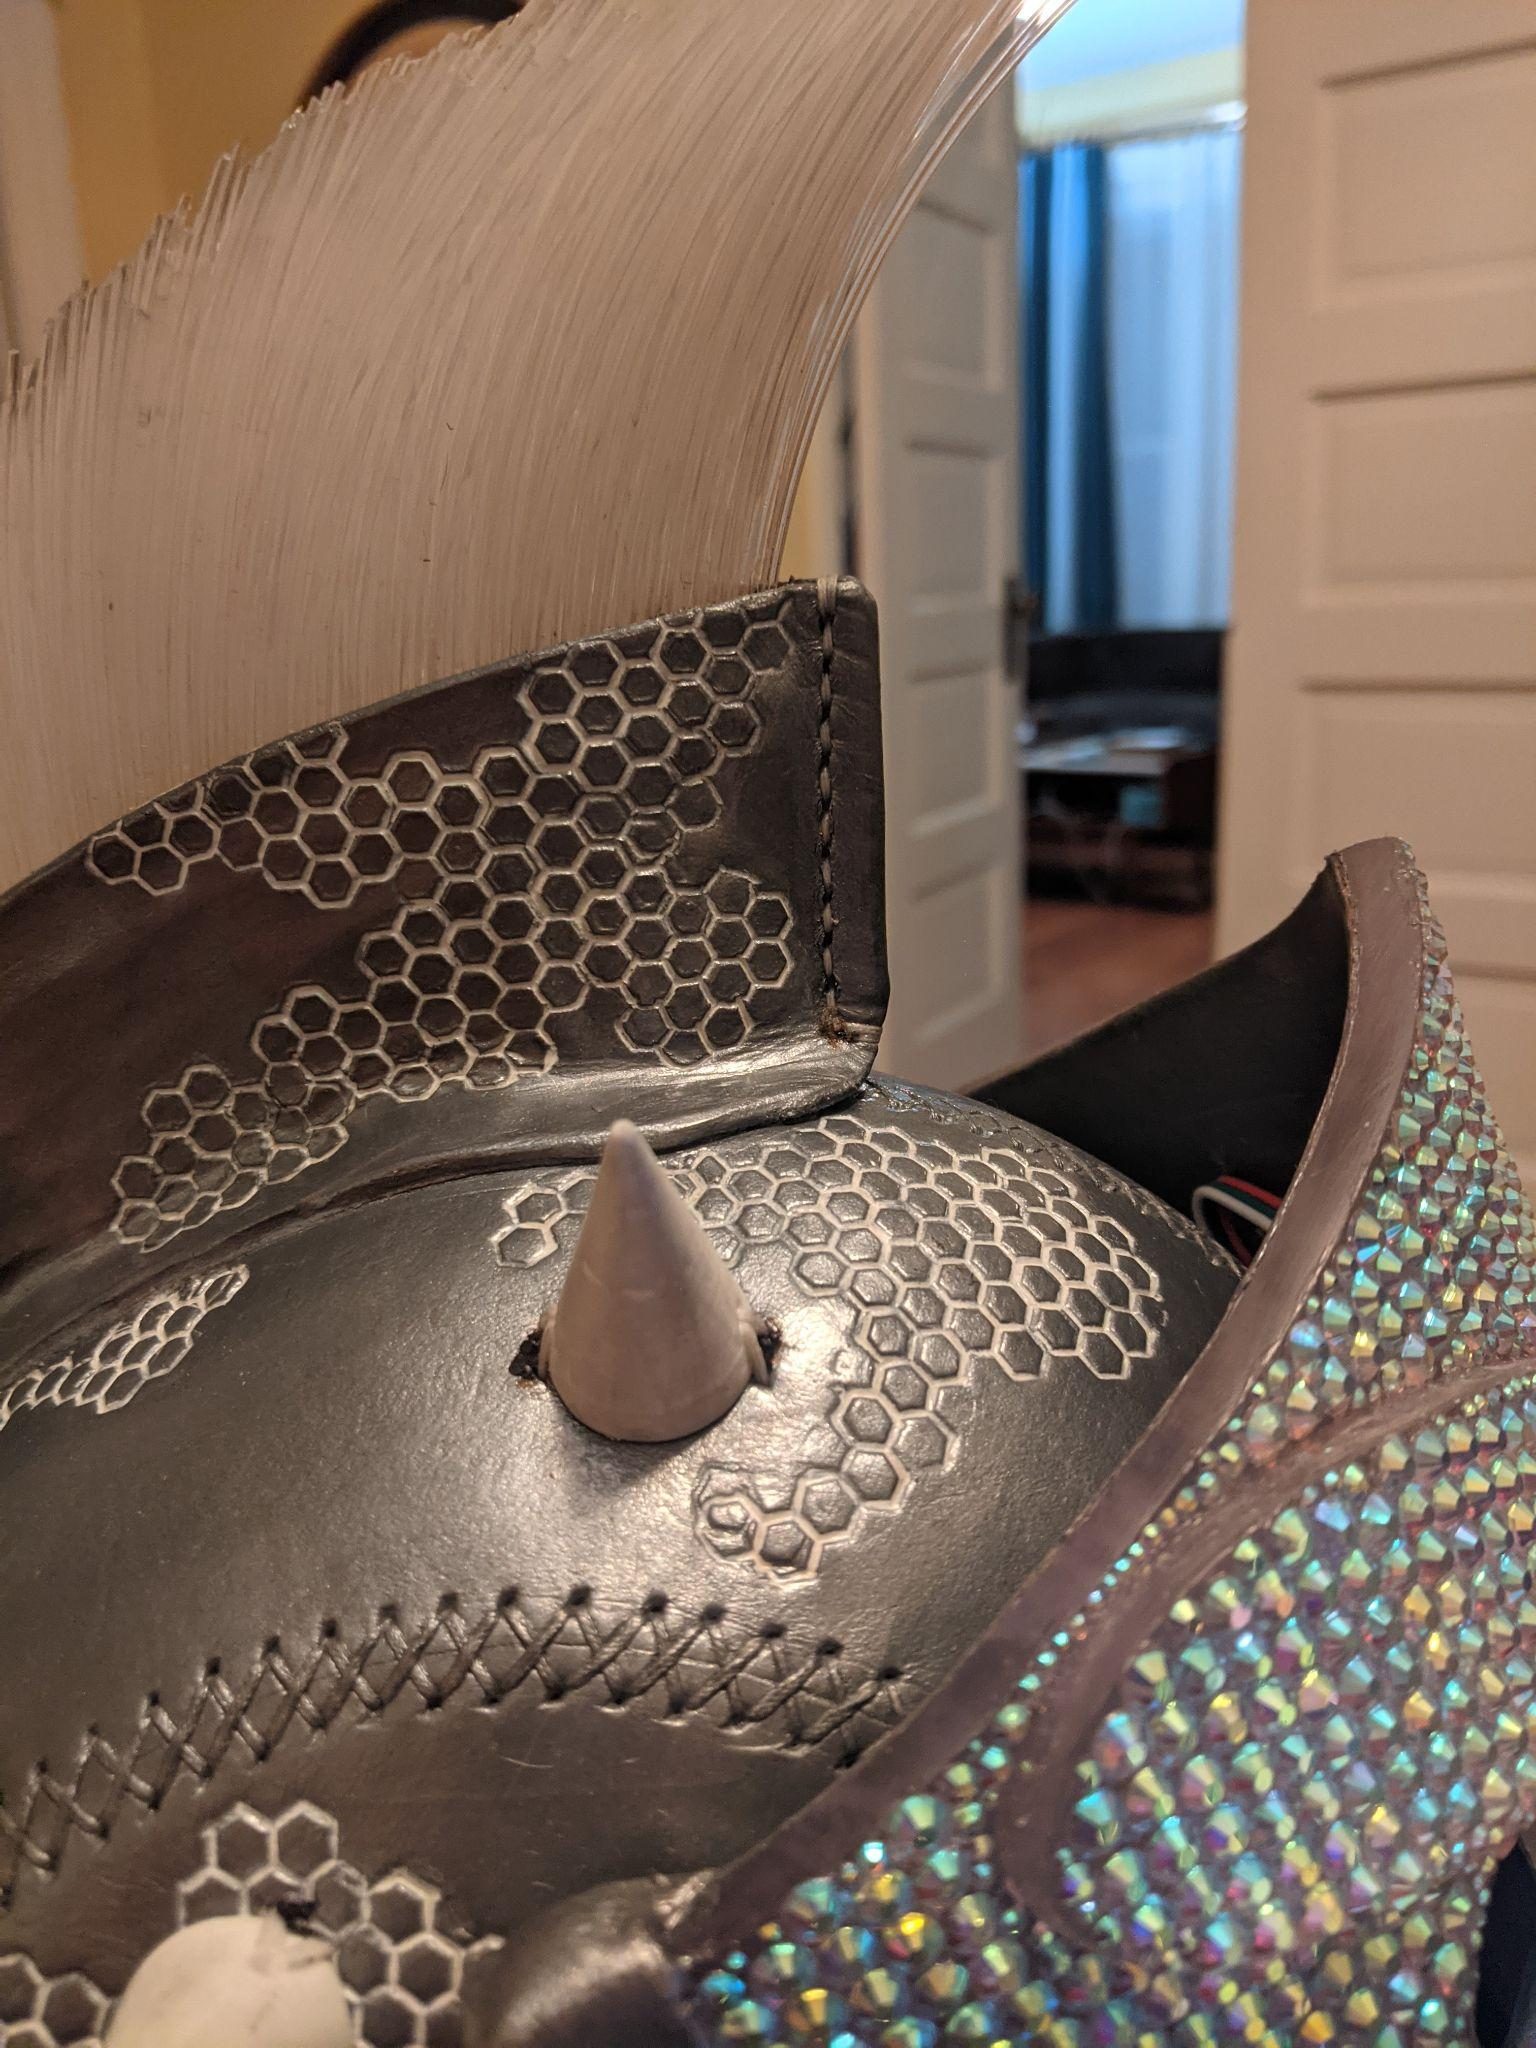
I didn't have much of a plan for the entire costume from the start. It was organic decisions like the UV reactive hexagons and the rhinestones, discovered during my initial helmet build, that propagated through the rest of my build.
03 Build book
LED and Scalemaille Vests
Four mirrored light panels underneath, 2,200 scales on top.
- Lights in the undervest
- 400+, hand stitched
- Metal scales
- ~2,200
- Rings
- ~8,000, one at a time
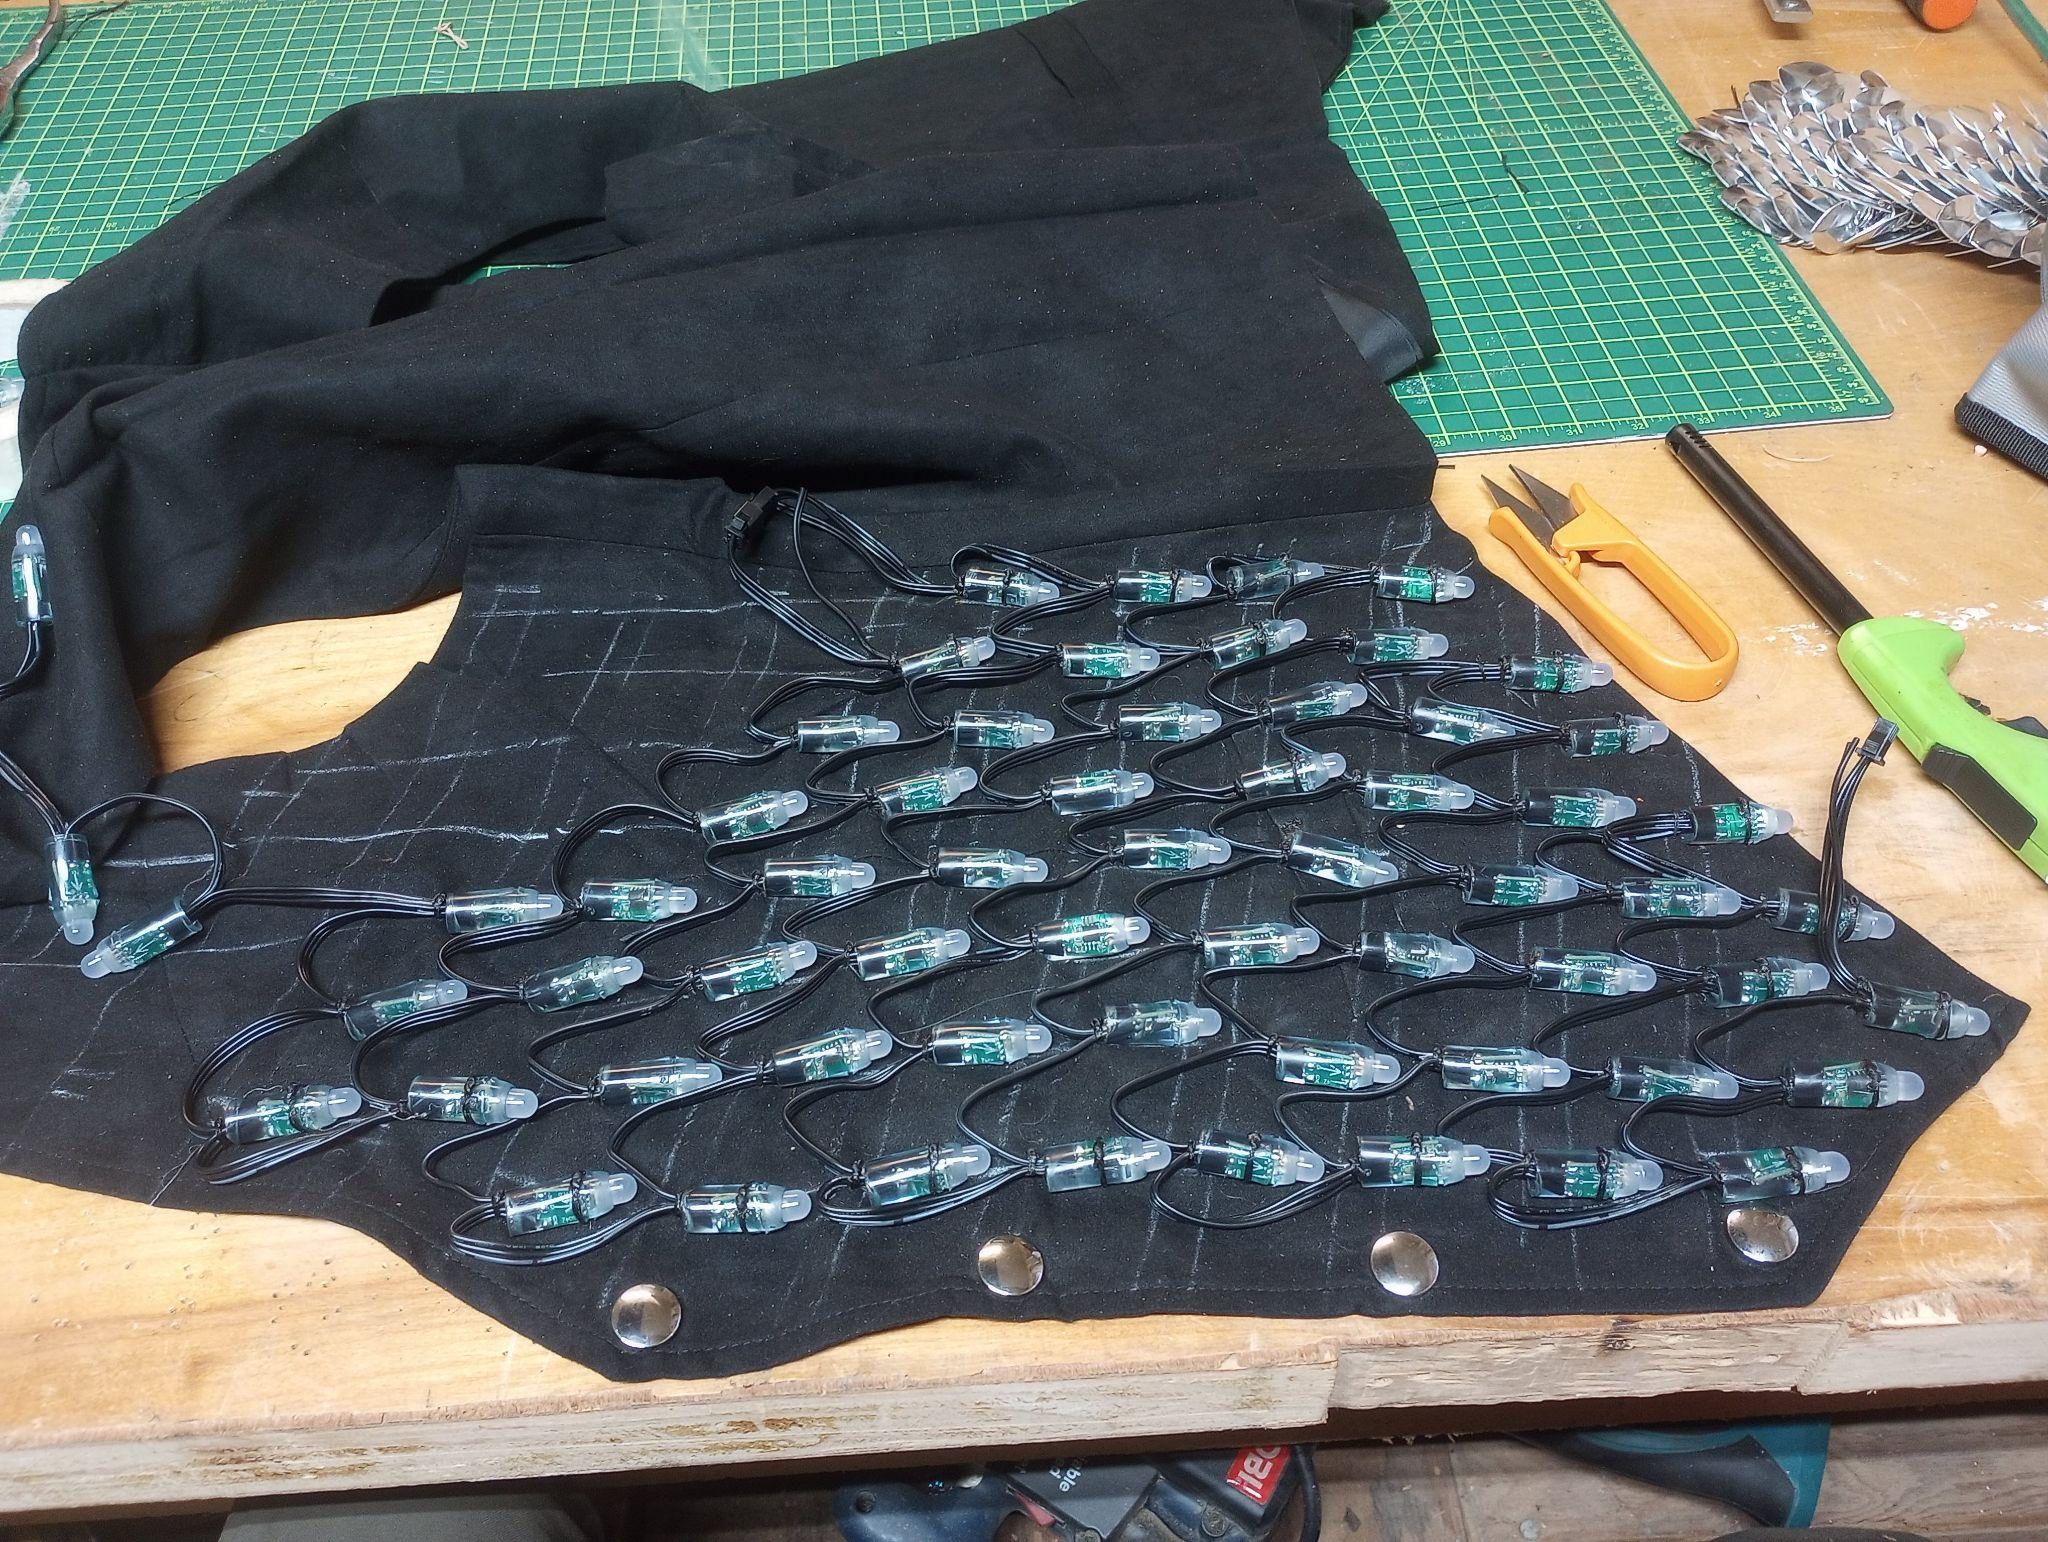
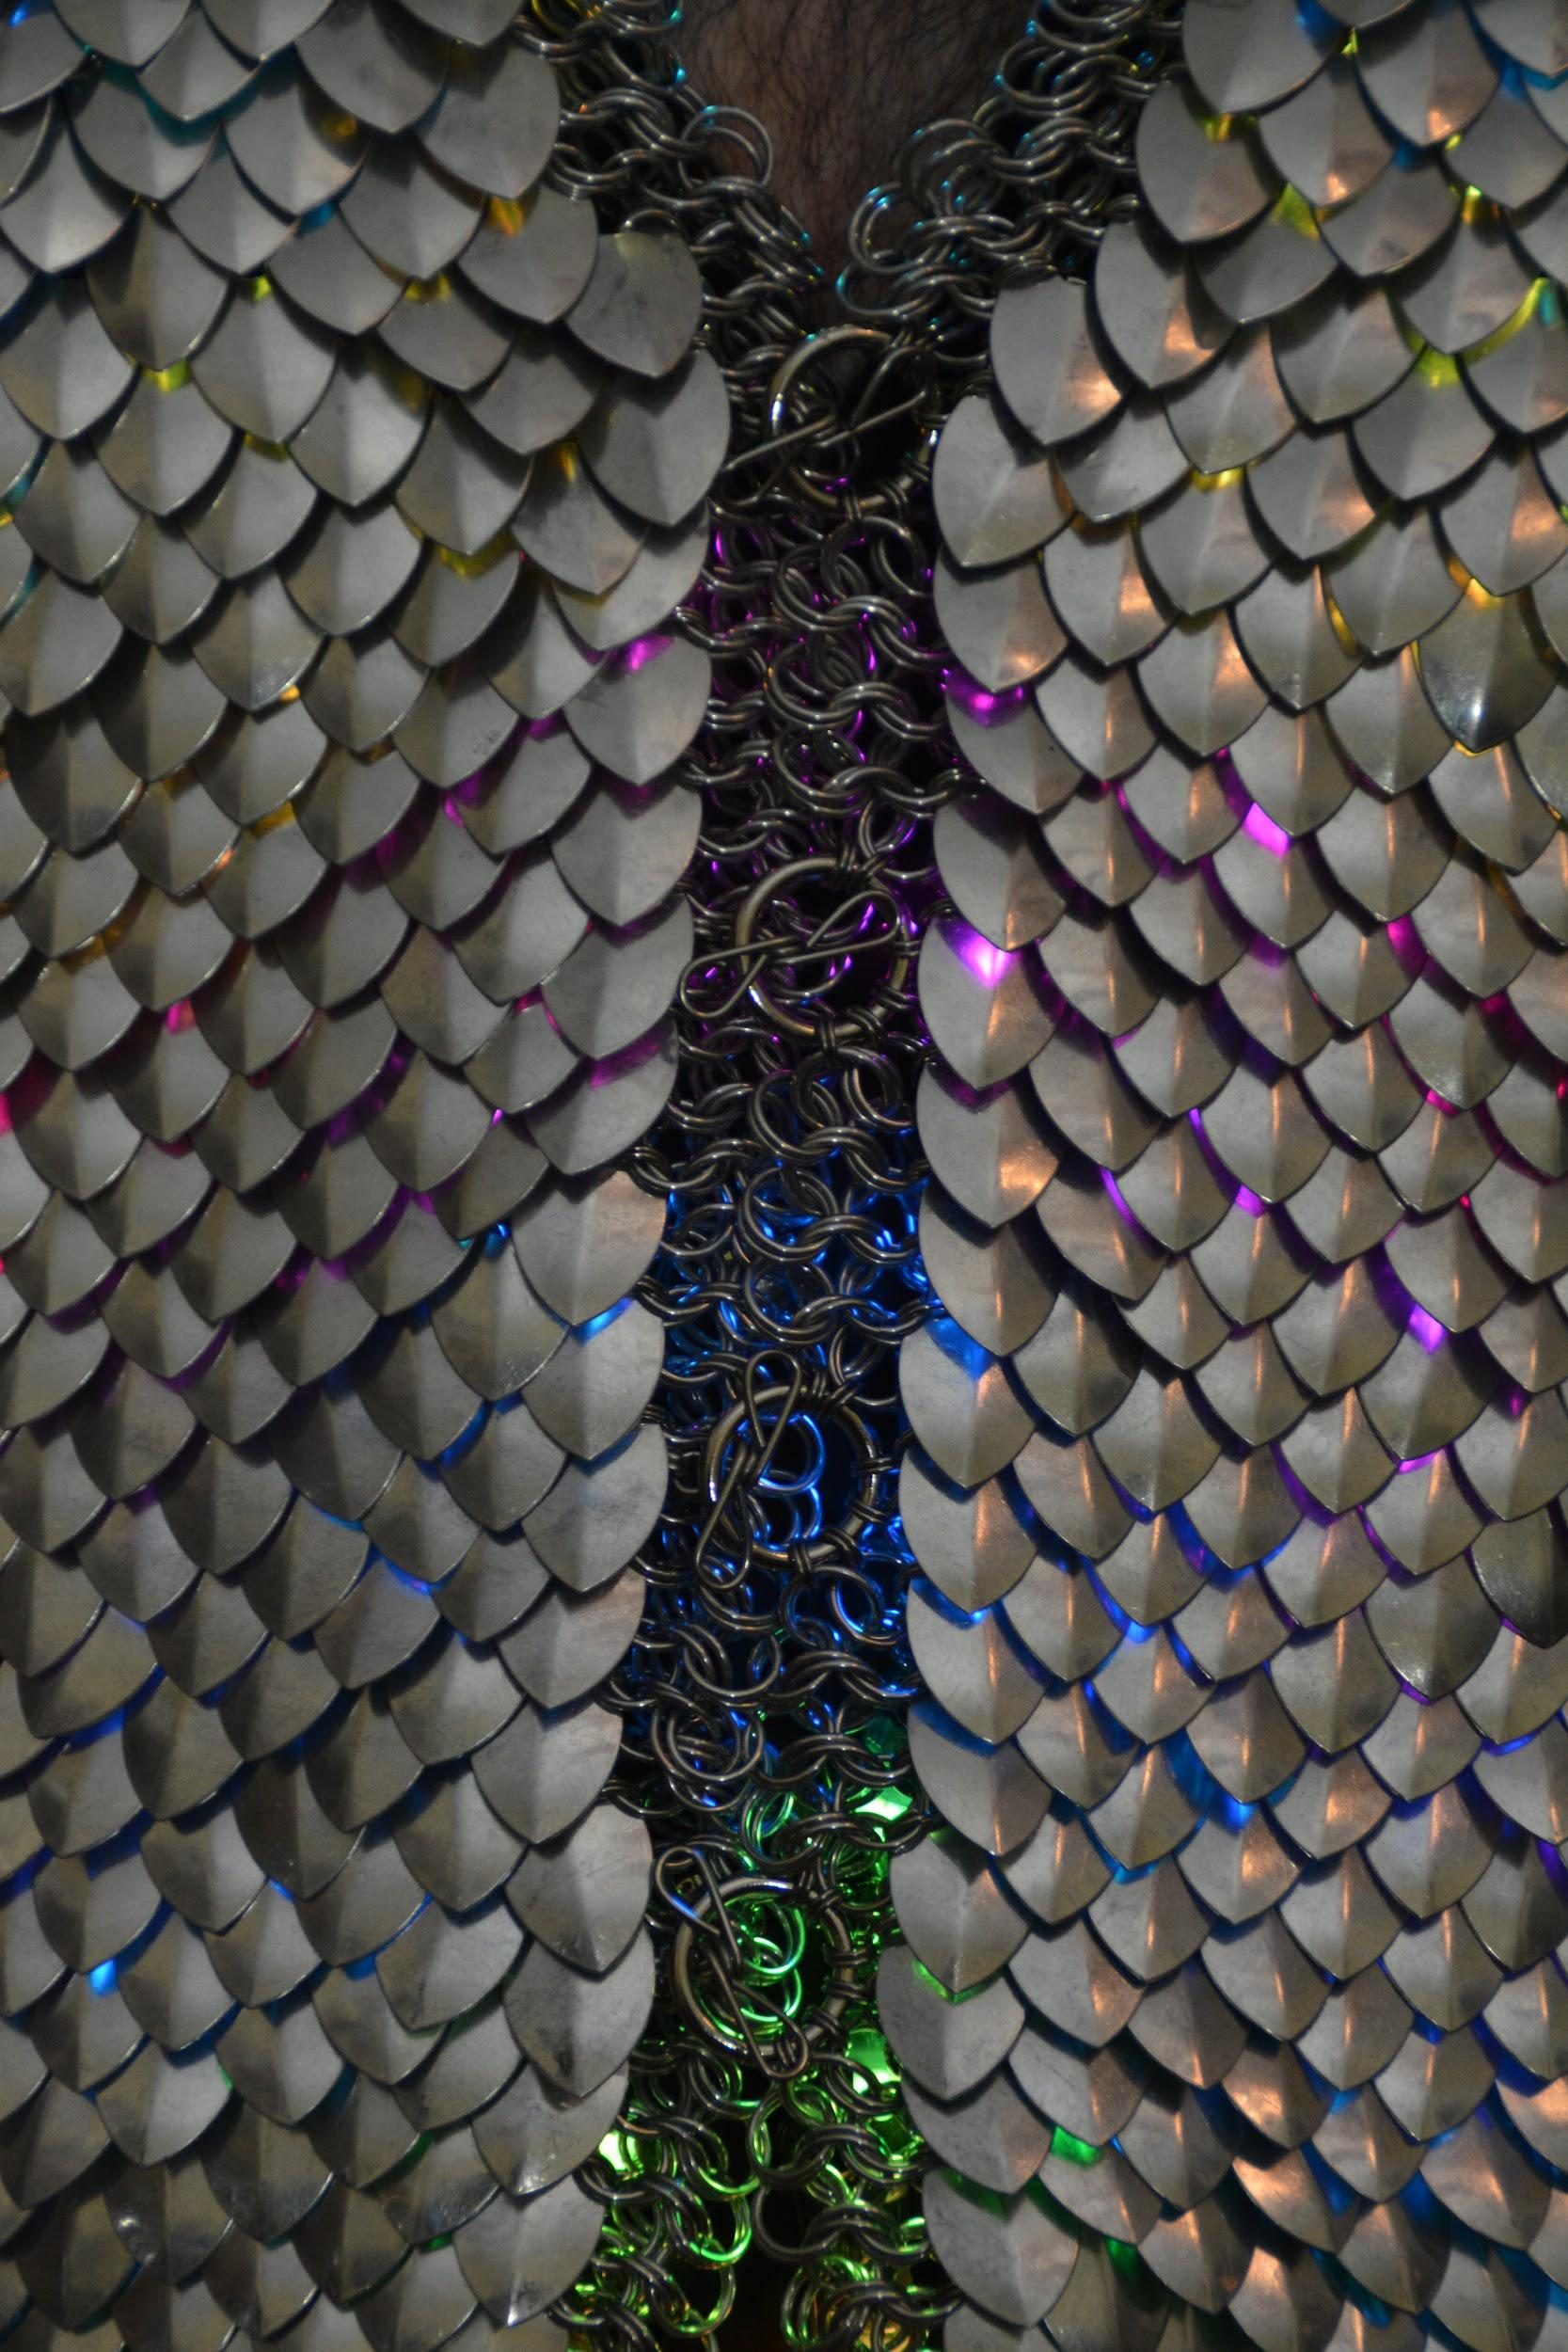
The LED undervest has over 400 lights that were hand stitched into four panels, two on the front and two on the back. Mirroring the layouts this way made it easier to program interesting patterns into the lights. For this competition I used off the shelf controllers for ease and interchangeability, but I am experimenting with programming my own for coordinating my costume with songs for my band.
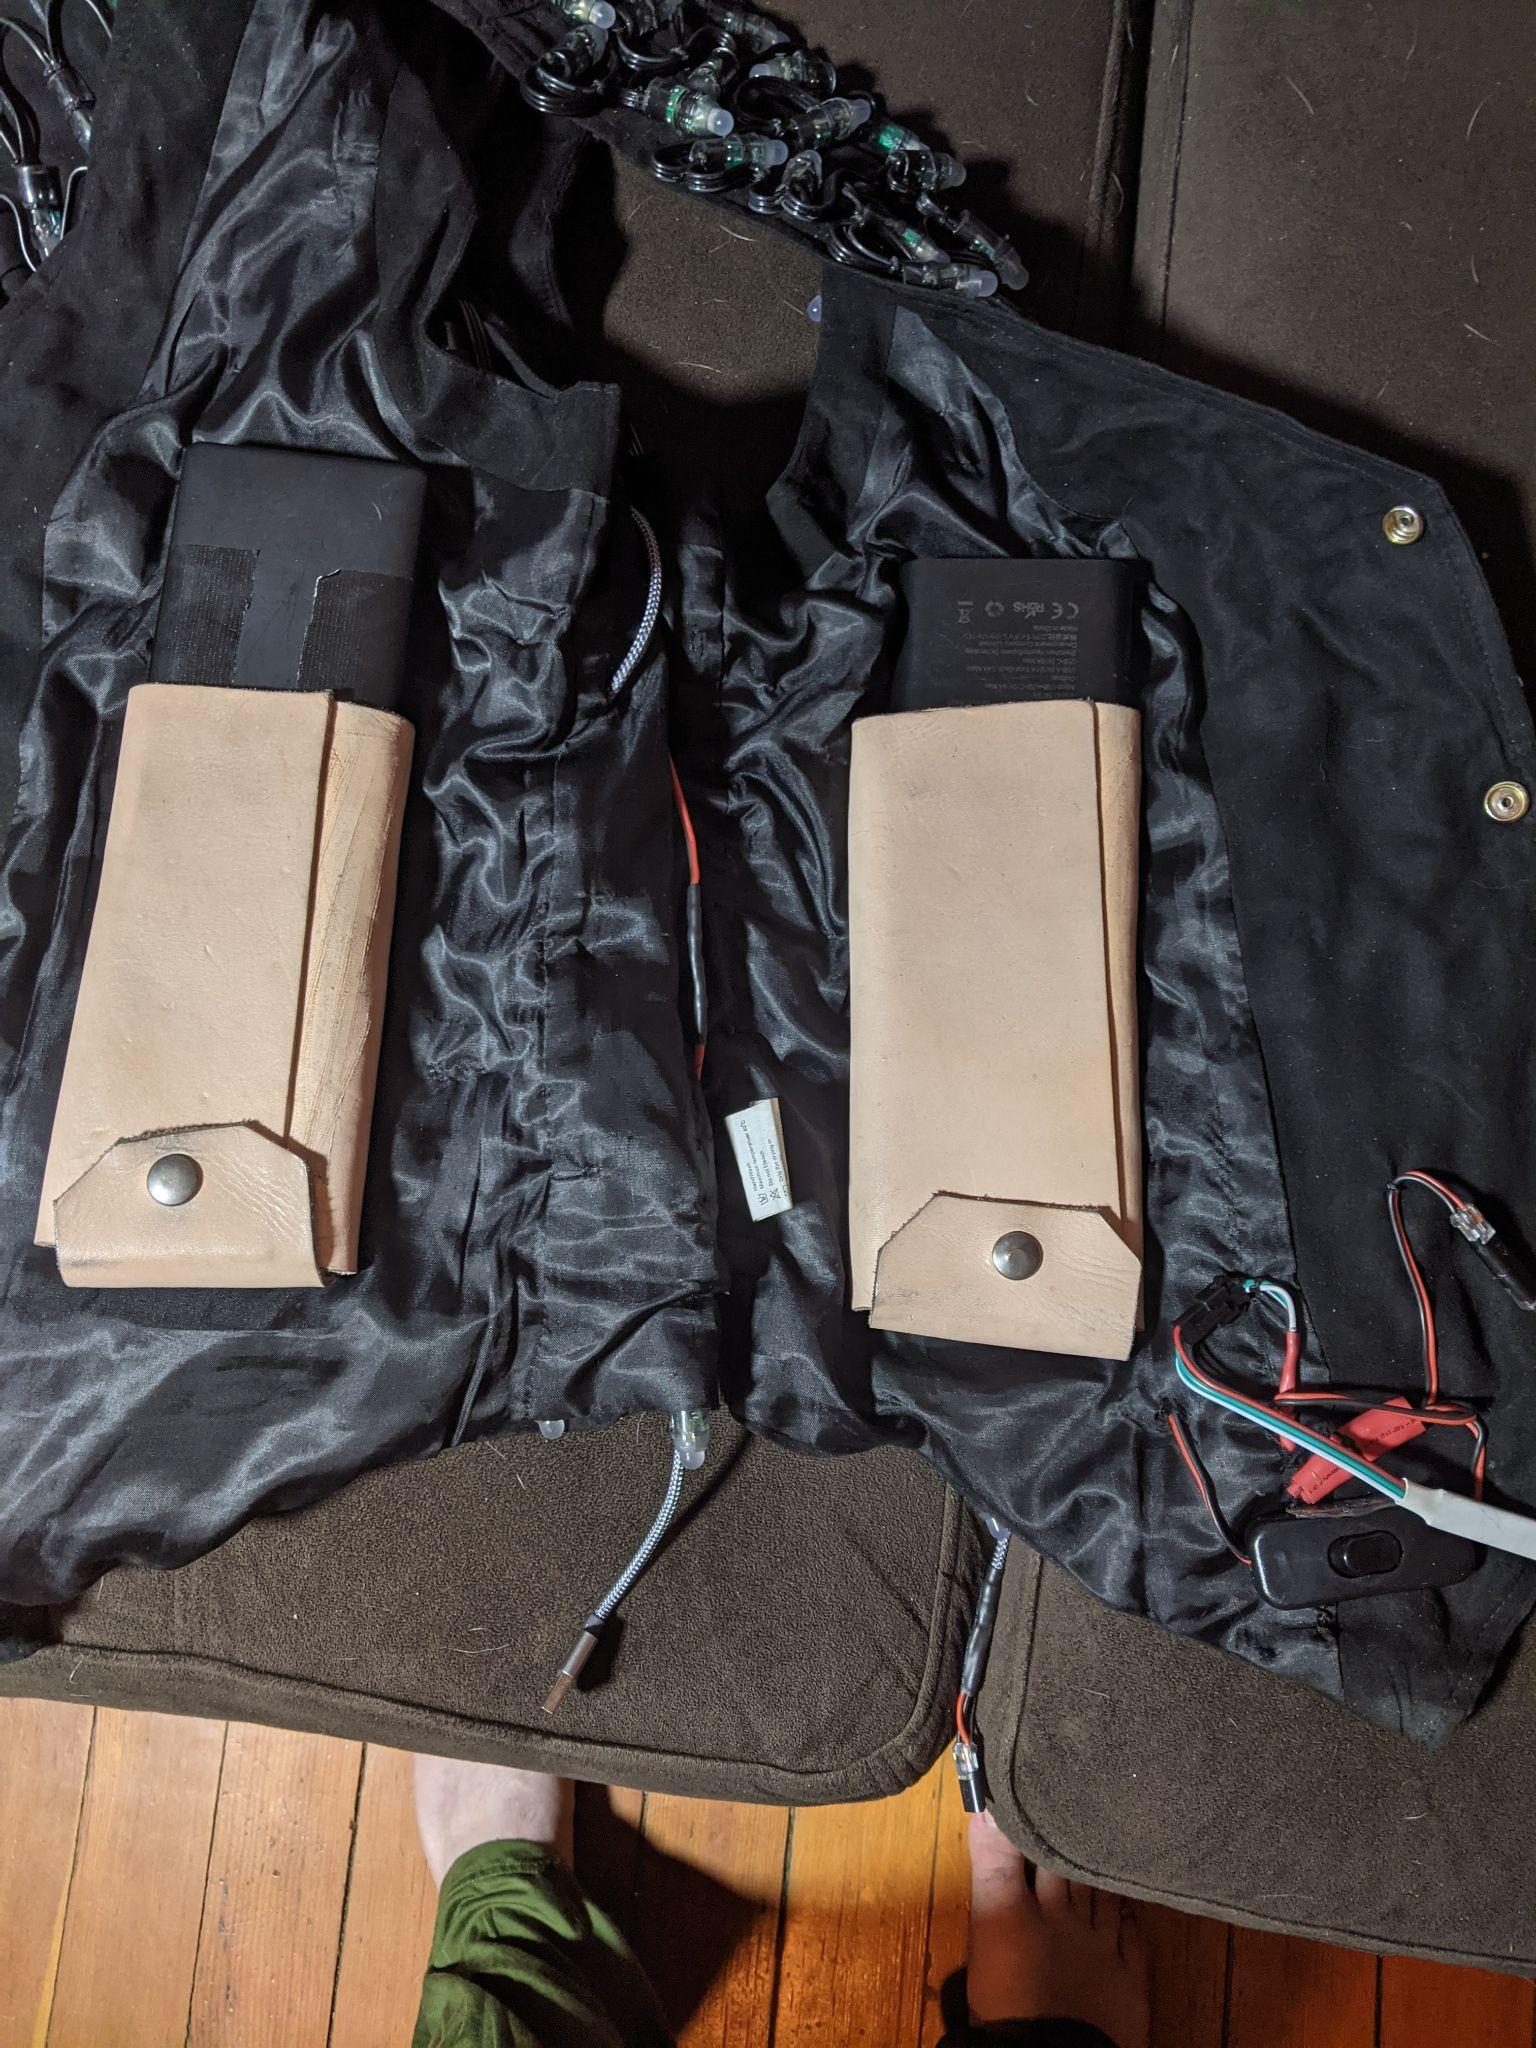
The vest has two large leather pouches for holding the power banks. One drives the vest and the other drives the helmet and kilt. When the vest is on it is hard to reach the batteries, so I included a switch for disabling the lights to give the batteries a break. I am using these batteries for far more than they are intended. In the event of a catastrophic failure — read fire (has not happened yet, but I was a boy scout) — I would not be able to reach the batteries quickly, so I added flaps with snaps on the bottom to dump out the batteries.
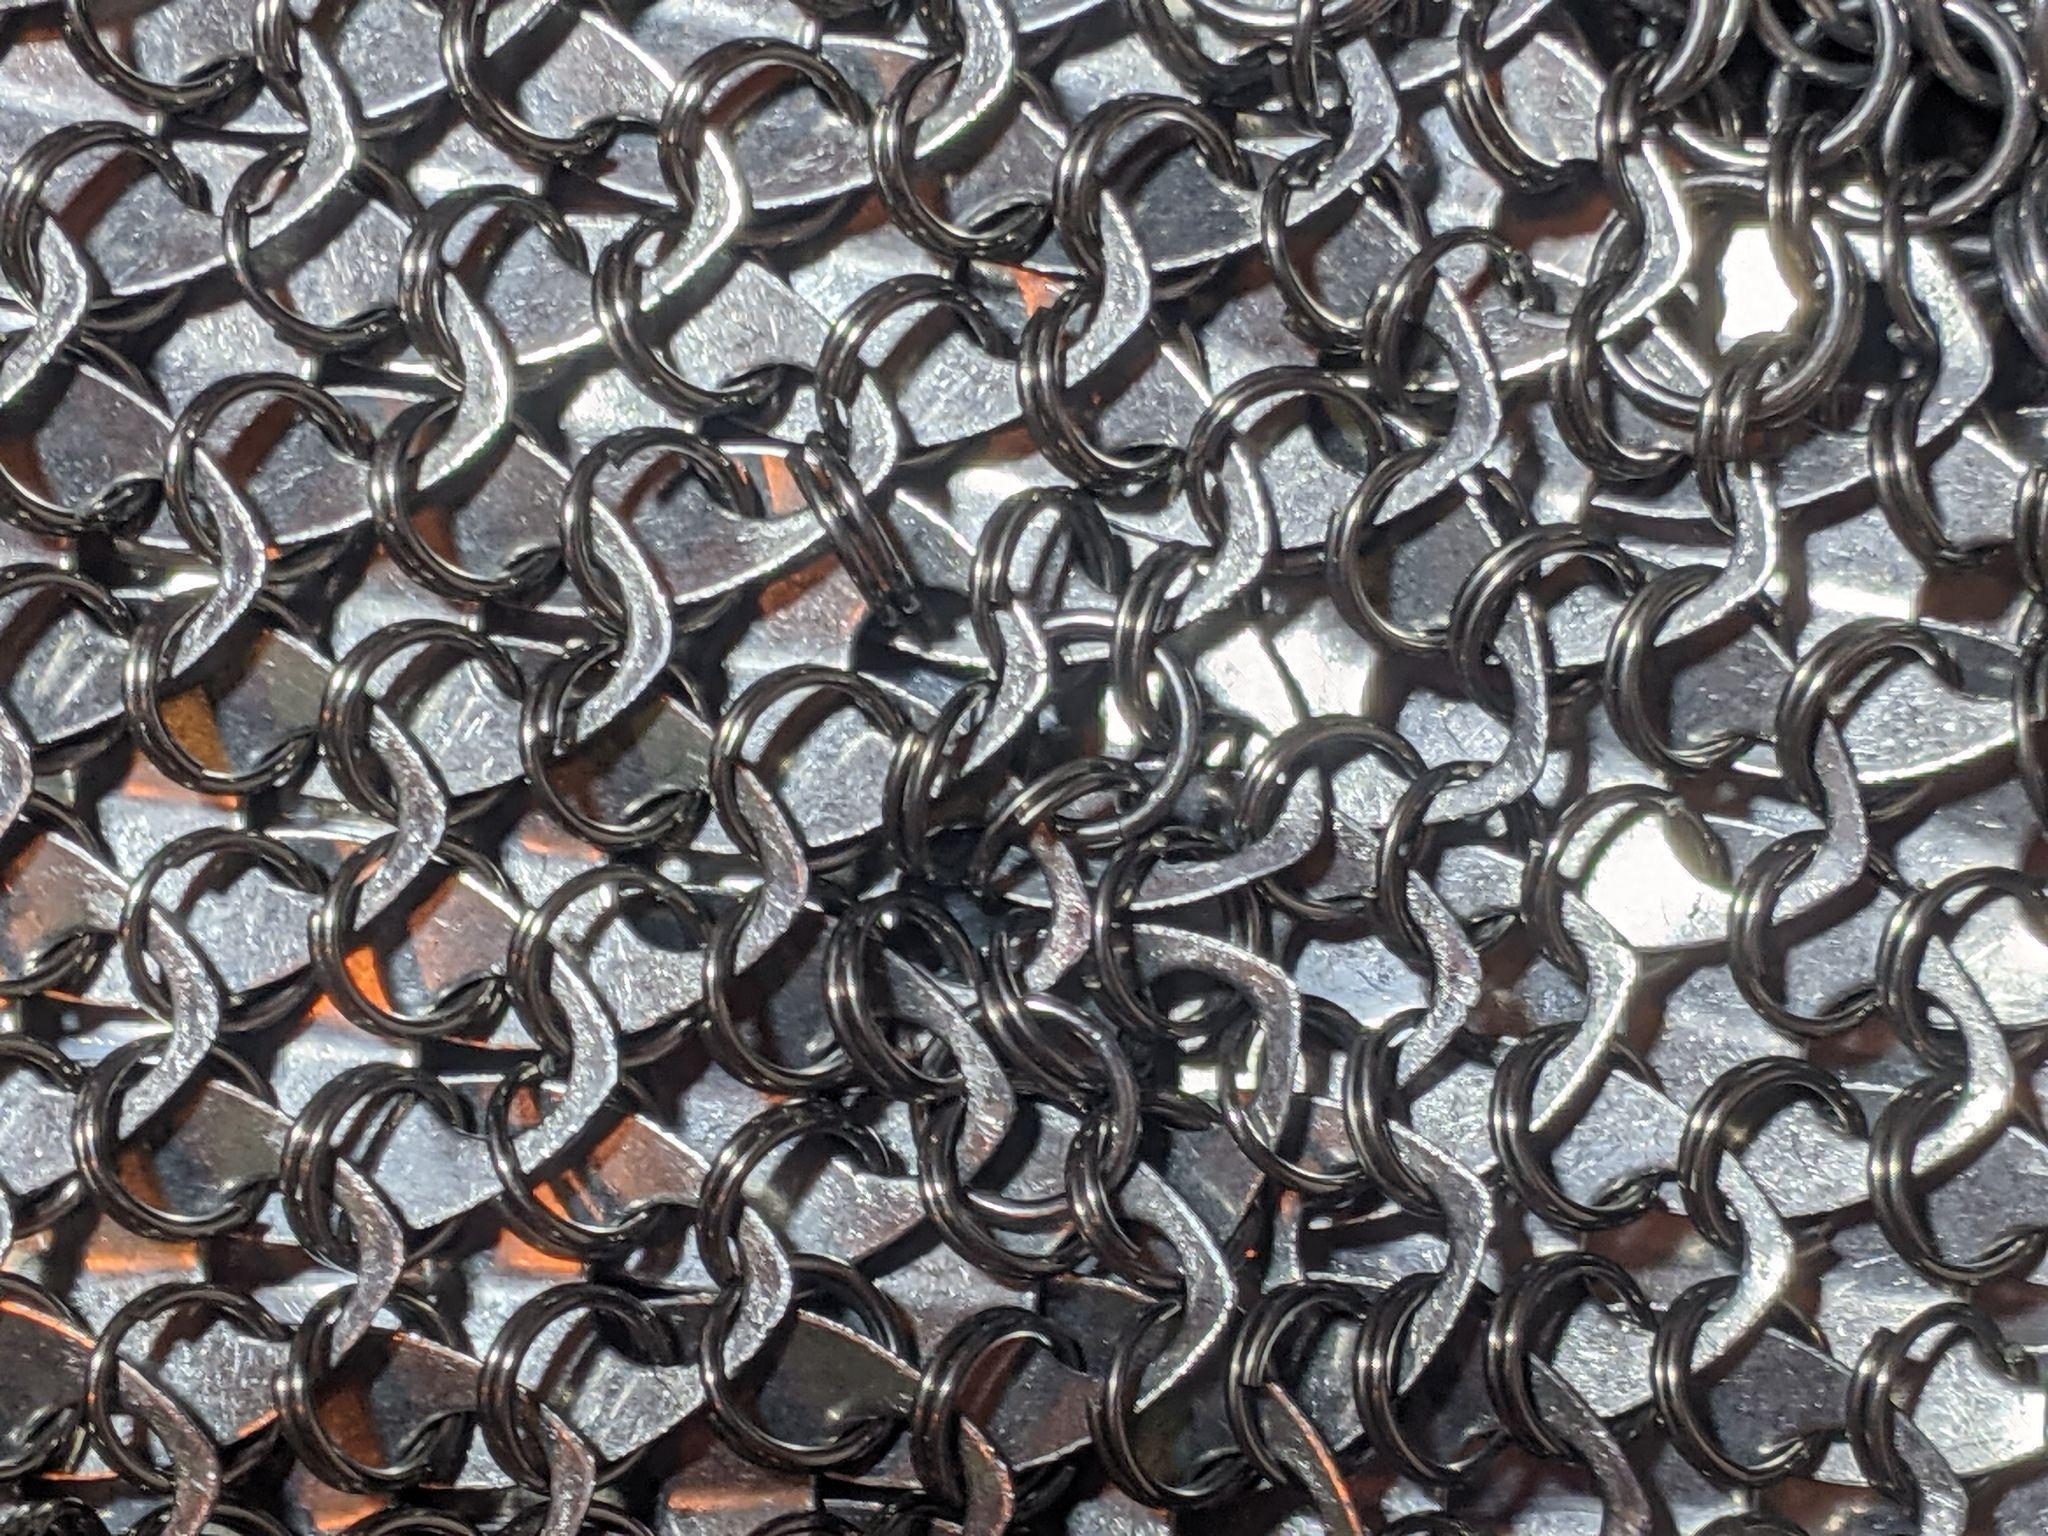
The top of the vest consists of around 2200 metal scales and 8000 rings that were each added one at a time with pliers. I trimmed the scales with kingsmaille and handmade toggles using custom jigs that I create out of wood blocks and steel rods. It was important to tailor fit the shoulders, otherwise the weight of the vest would be unbearable after a short period of time. I had to invent my own expansion pattern to allow for shaping the scales around my shoulders without splitting for seams or introducing a different pattern.
04 Build book
Shield
A donated spartan shield, stripped to steel and rebuilt around an infinity mirror.
- Donor
- A friend's spartan shield, stripped to mild steel
- Mirror mount
- 6 interlocking printed sections
- Sword switching
- Magnetic reed, cuts both pieces
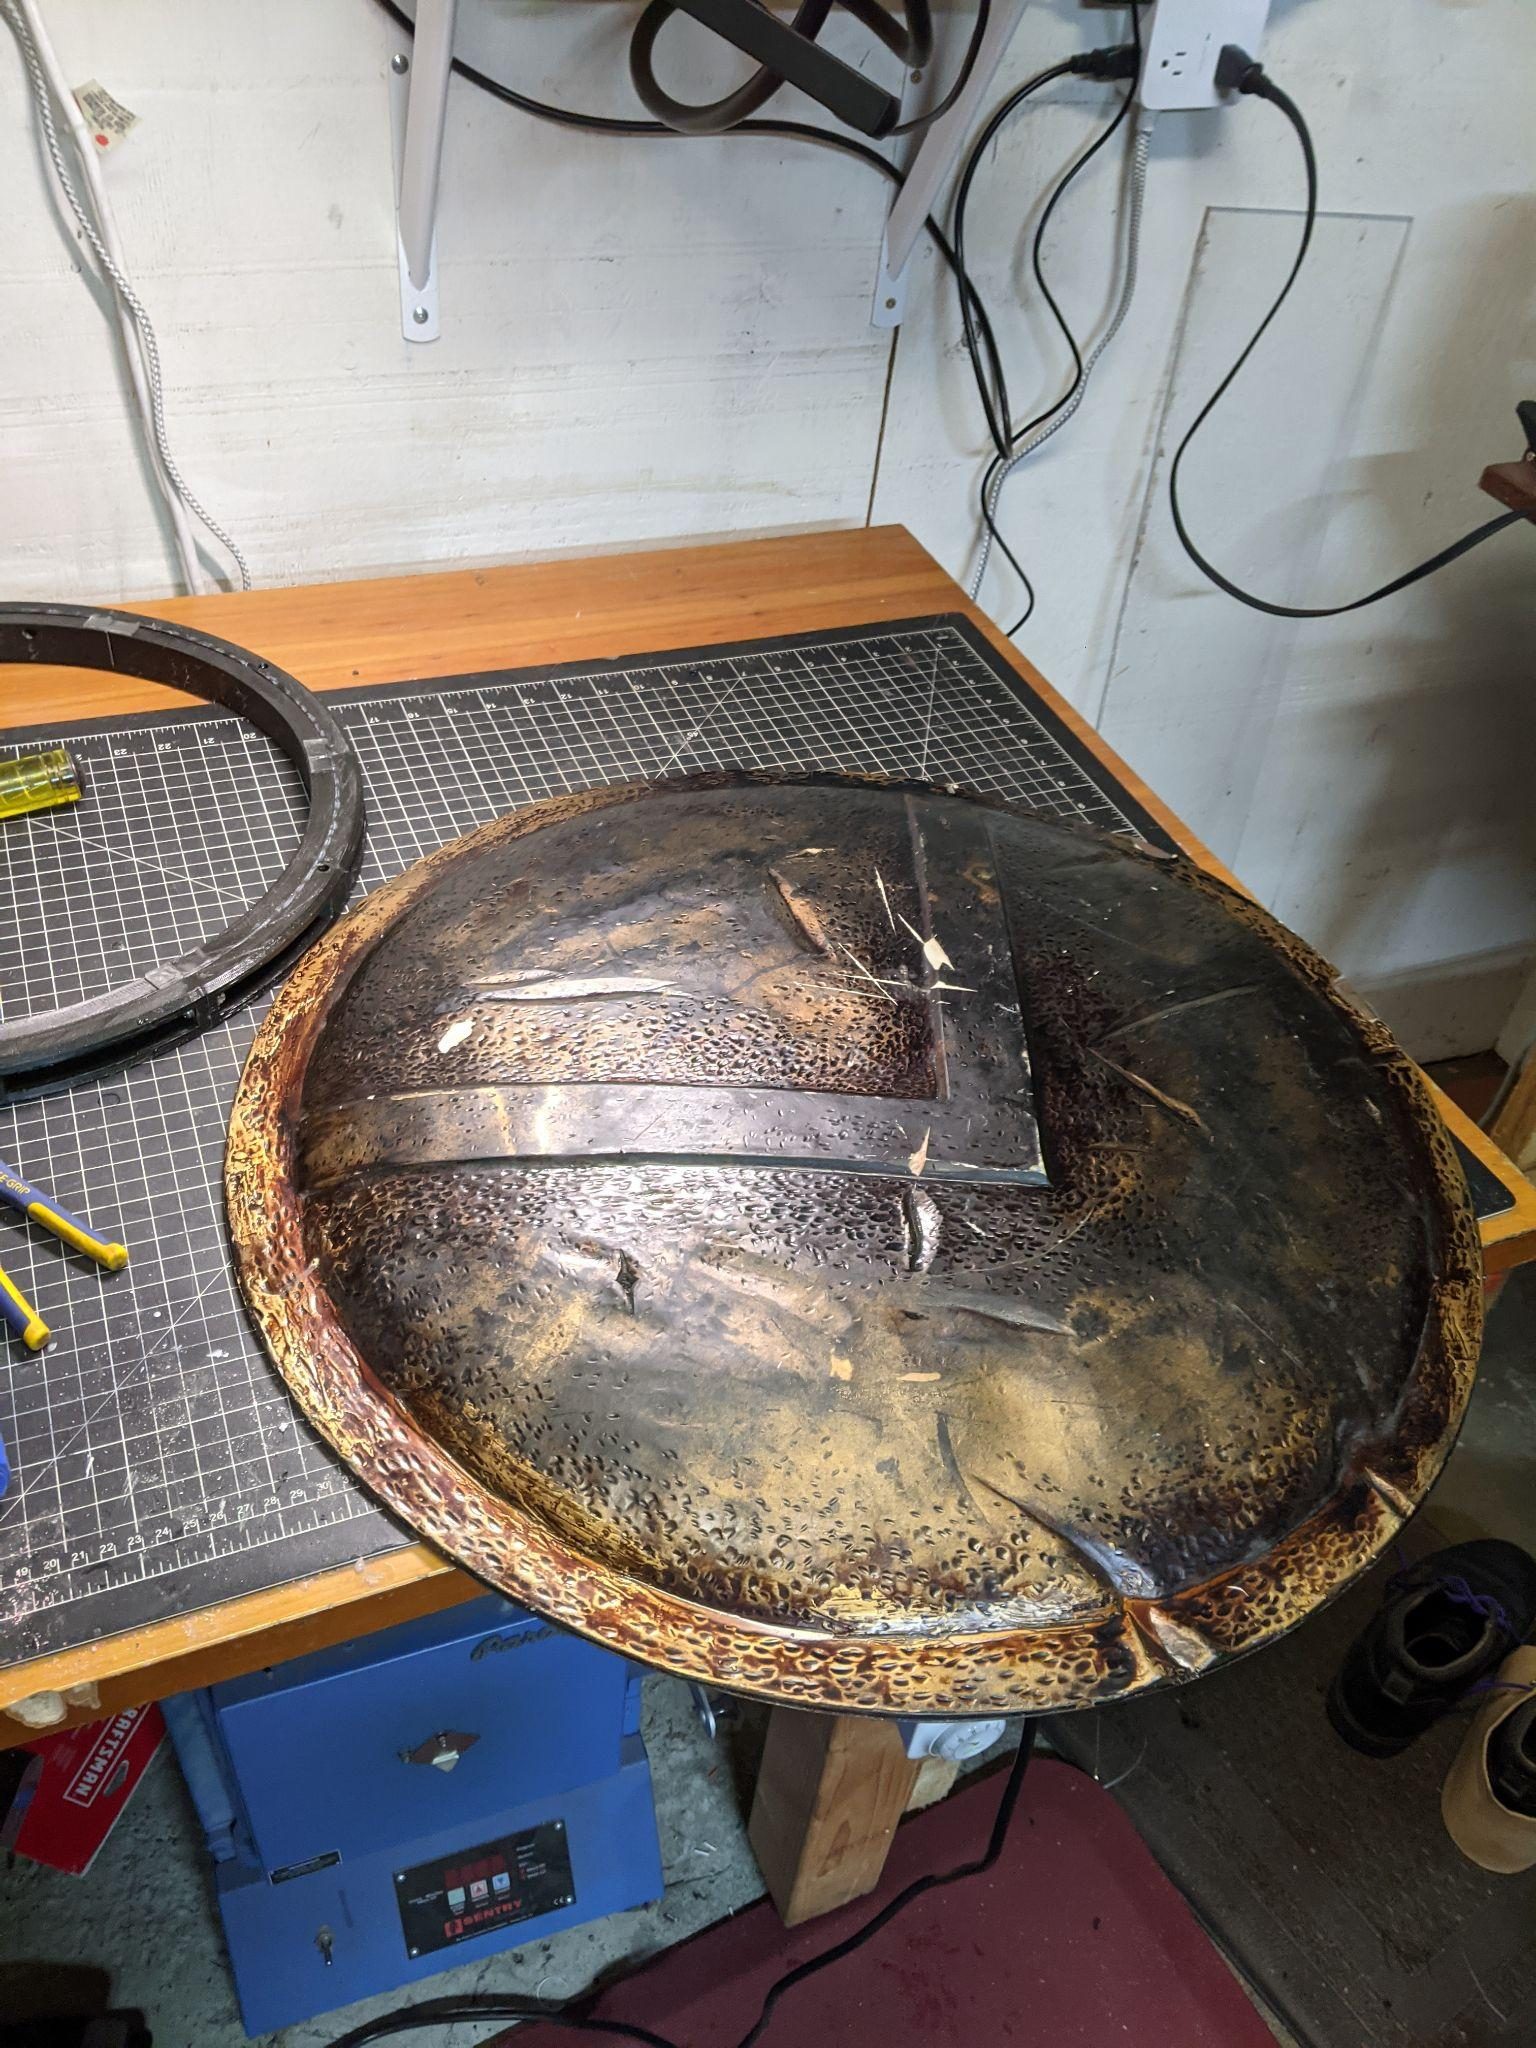
I started with an old spartan shield that a friend donated. I cut a hole for the mirrors and stripped several pounds of plastic off the metal, leaving behind a circular sheet of mild steel.
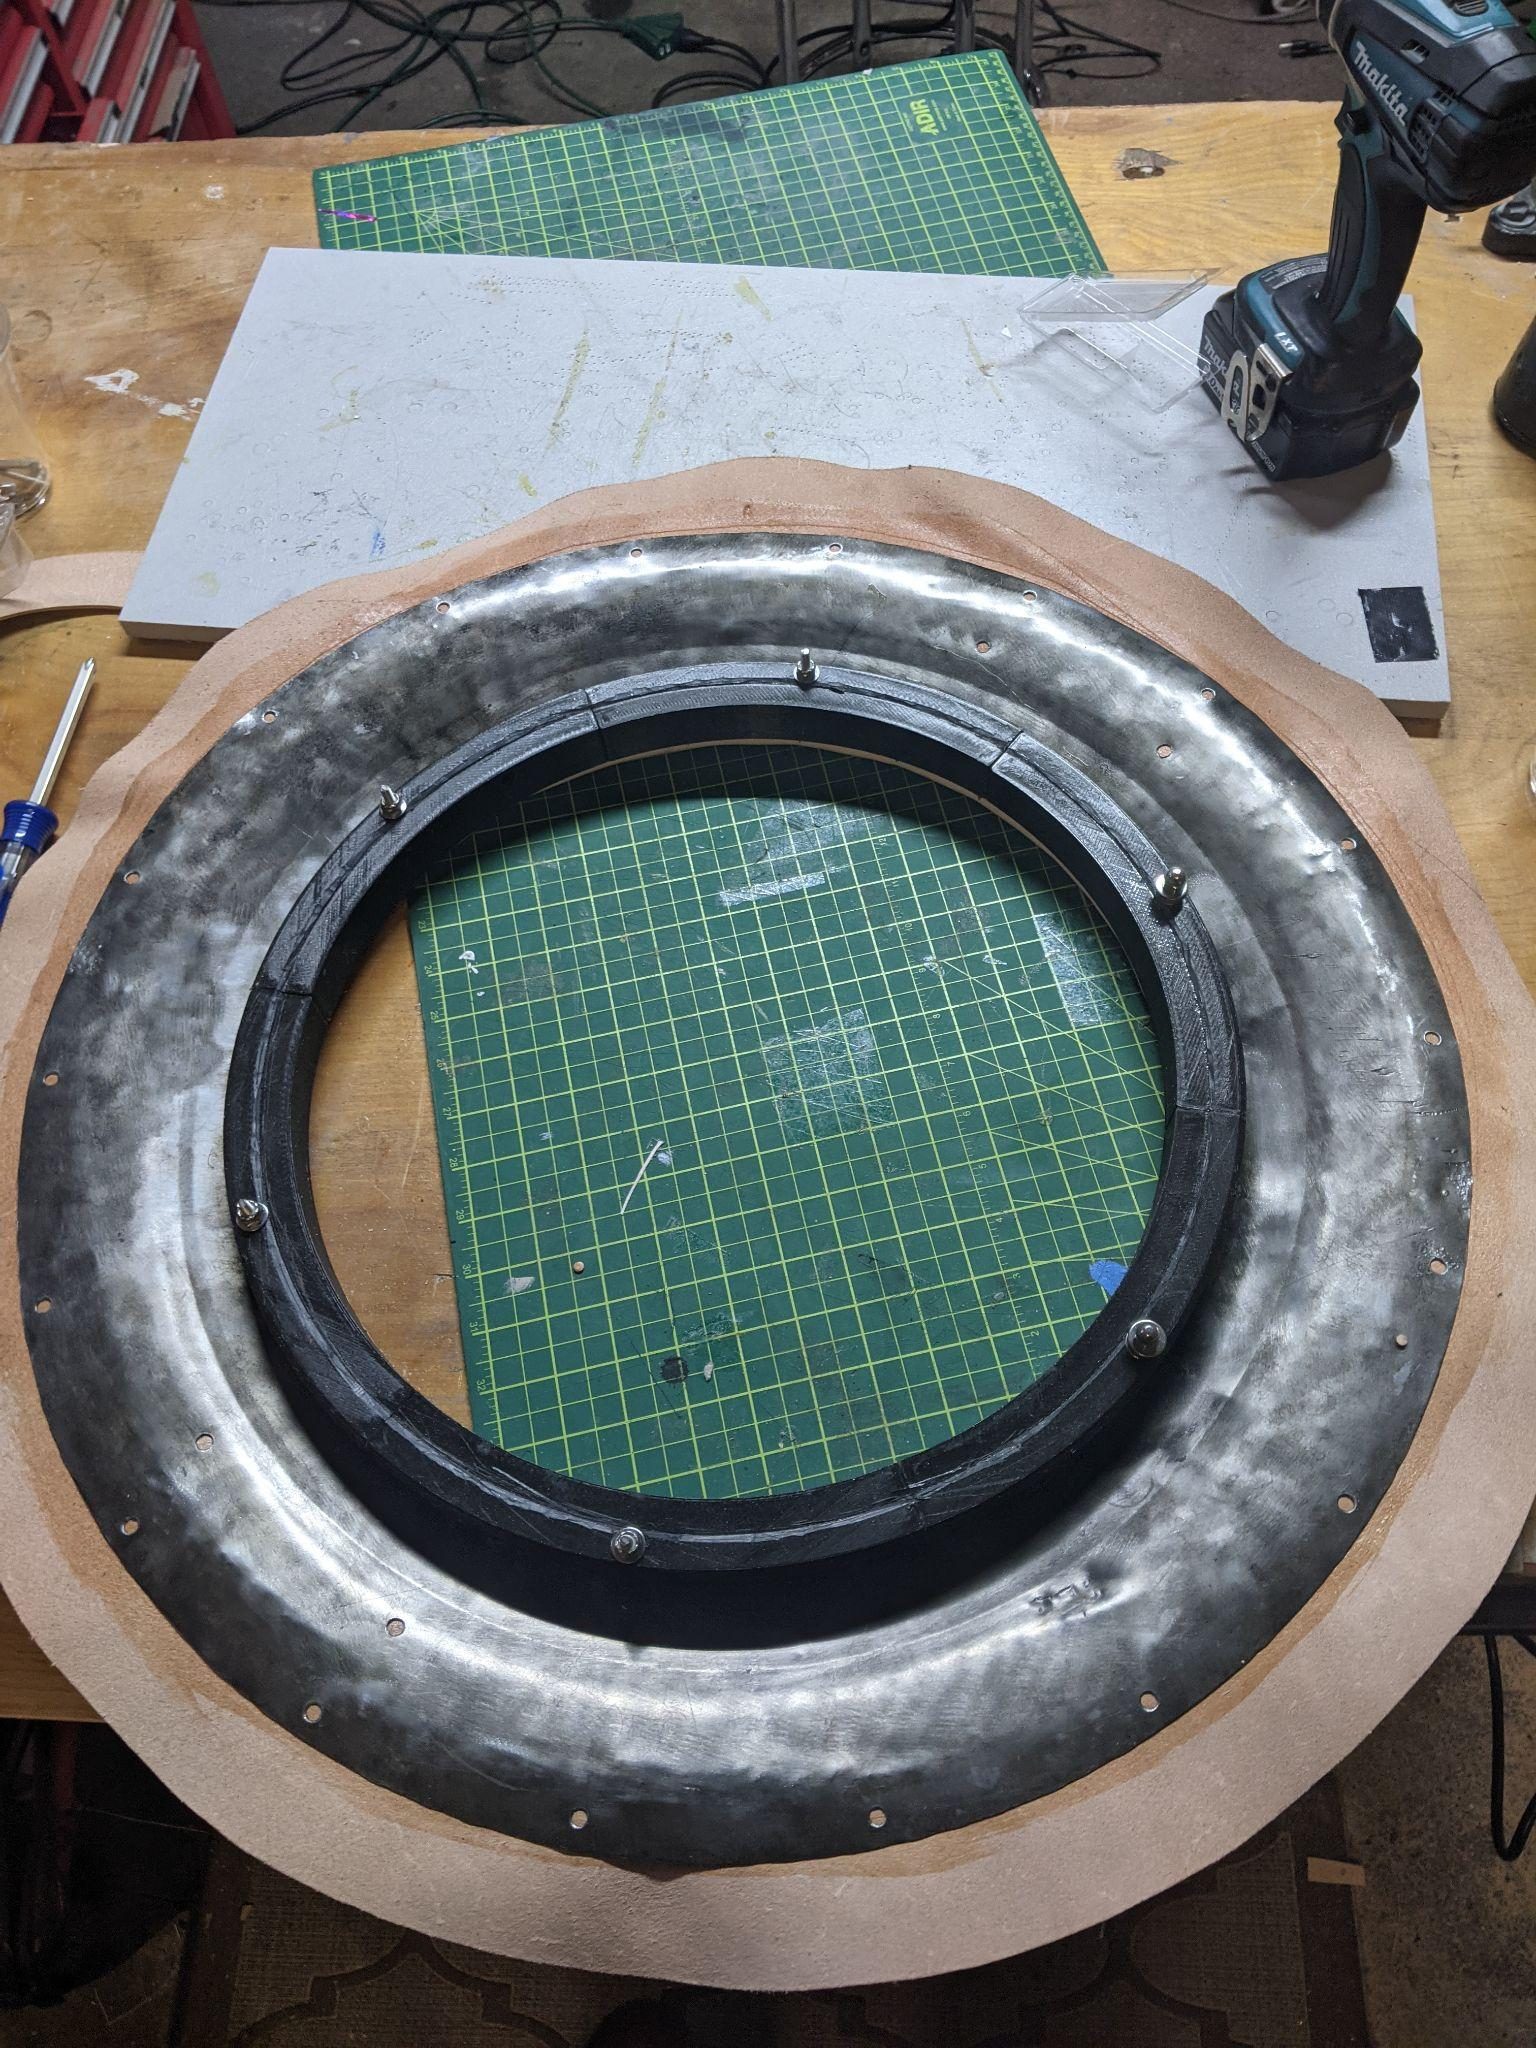
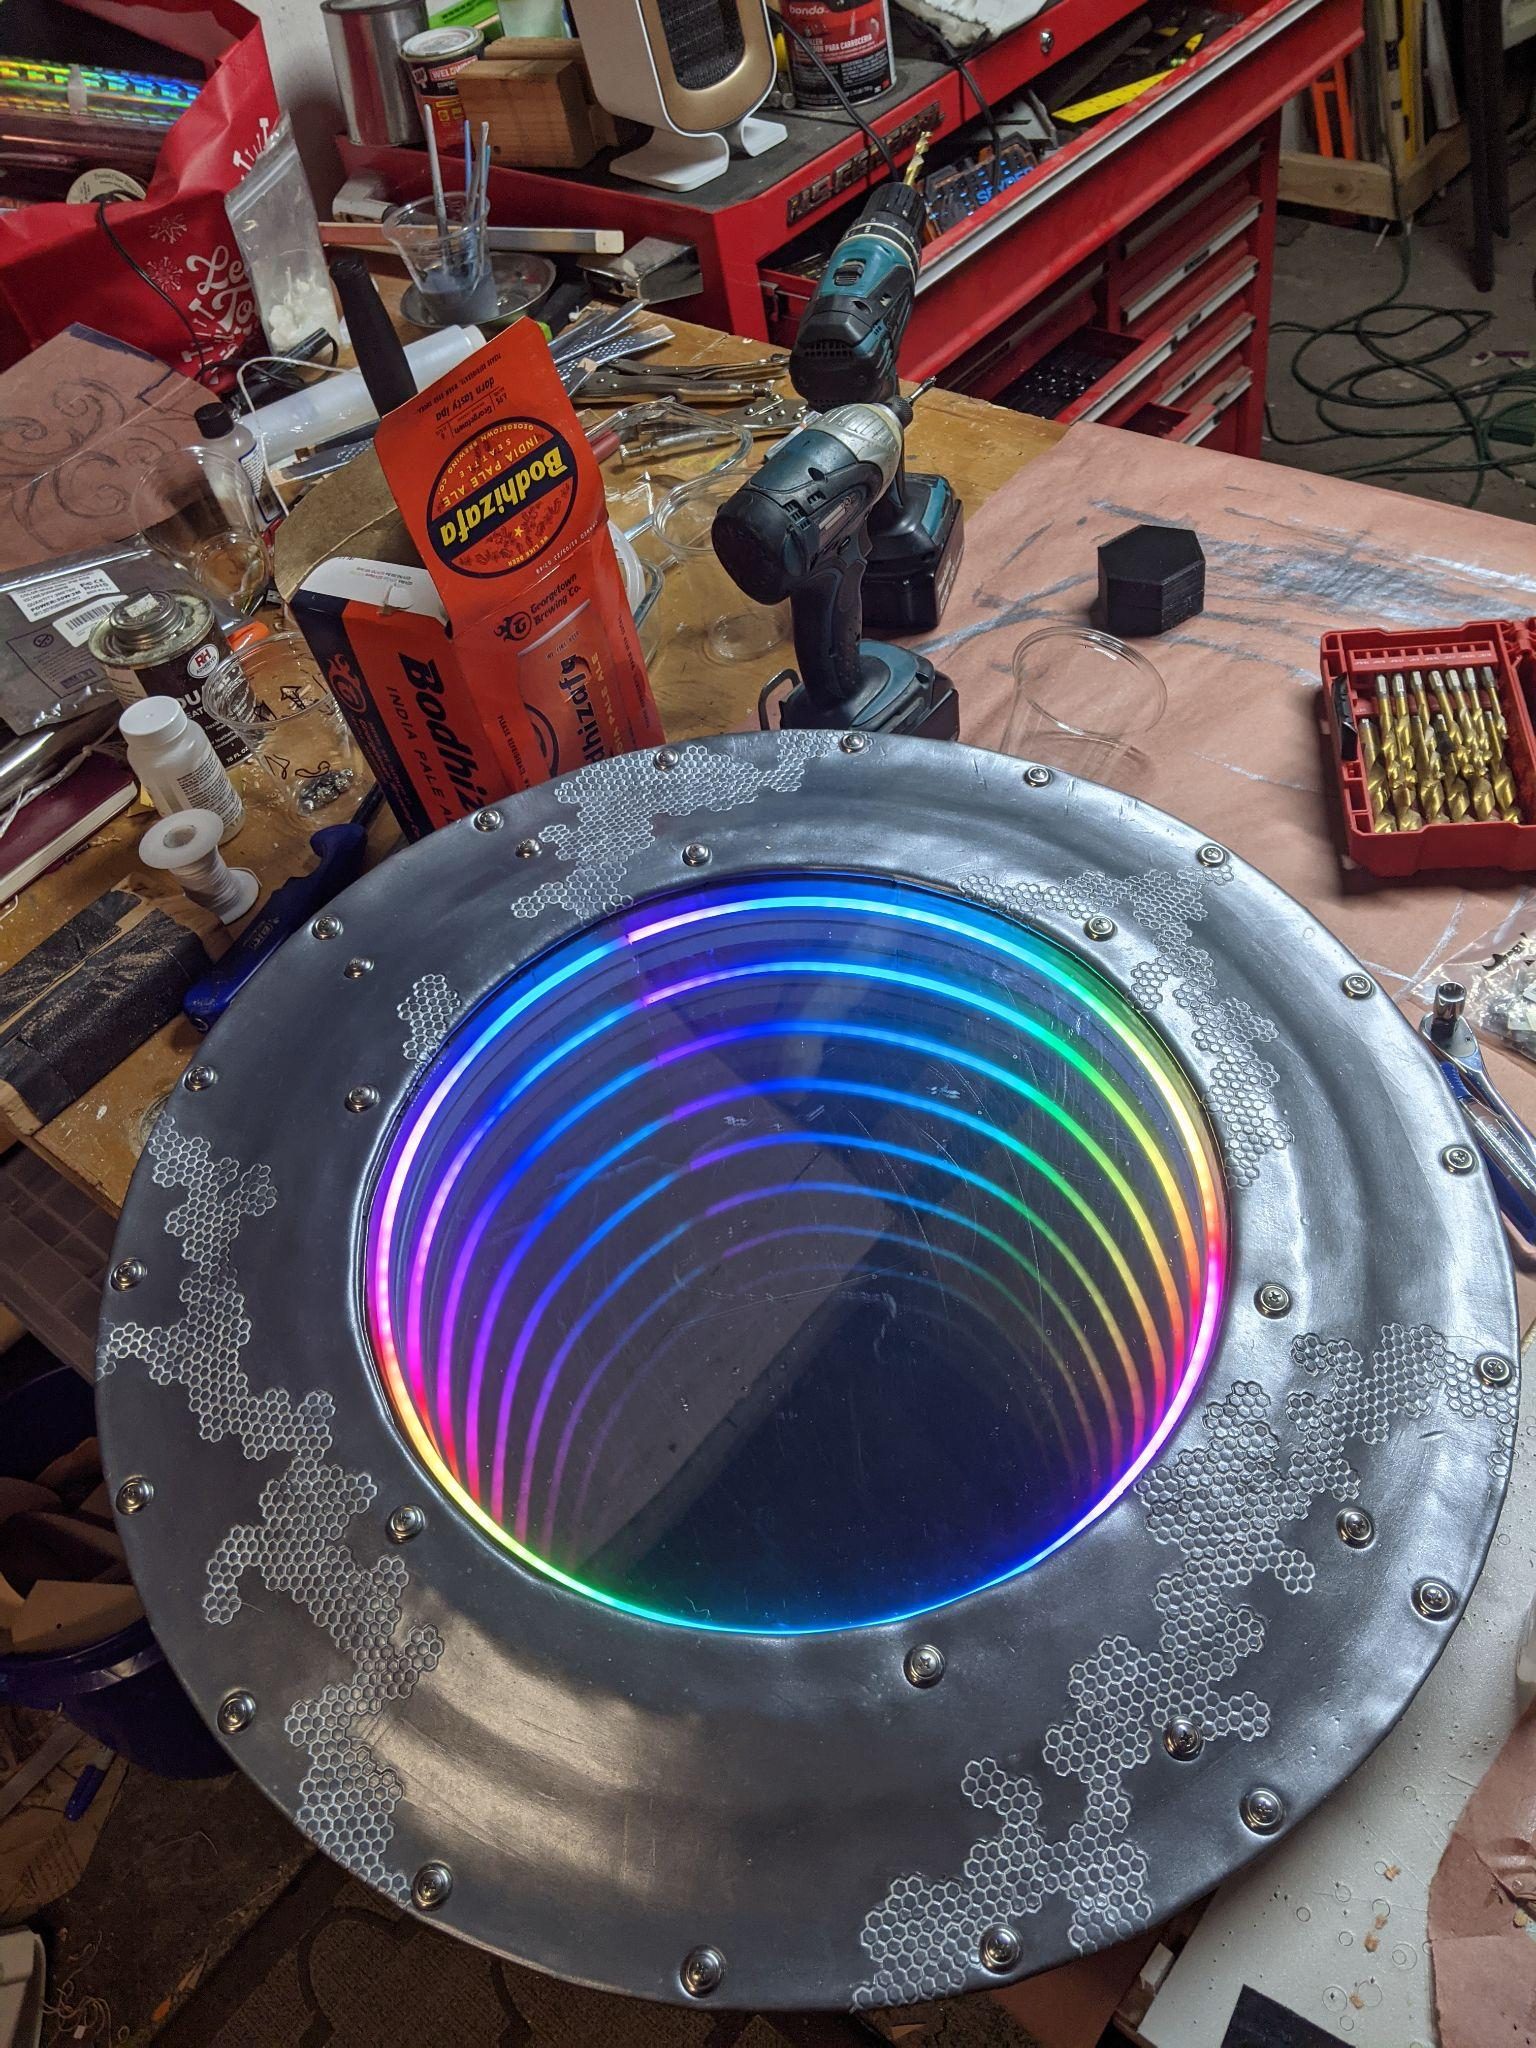
I designed and 3D printed six interlocking sections that bolt together to hold the mirrors and lights to the shield without introducing extra stress to the acrylic. I then hexagon stamped the leather and contact cemented it onto the front of the shield. The infinity mirror is created by separating the back full mirror from the front partial mirror and lining the inside with LEDs. The light bounces between the mirrors giving the tunnel effect. It's important to have lights between the two mirrors, otherwise the outer mirror will mostly reflect the observer instead of the internal space.
I cut a piece of oak and shaped some angled offsets to mount the arm bracket across the shield. It was important to stand this off the mirror assembly so it would not warp or damage the mirrors. The wood was burned and oiled.
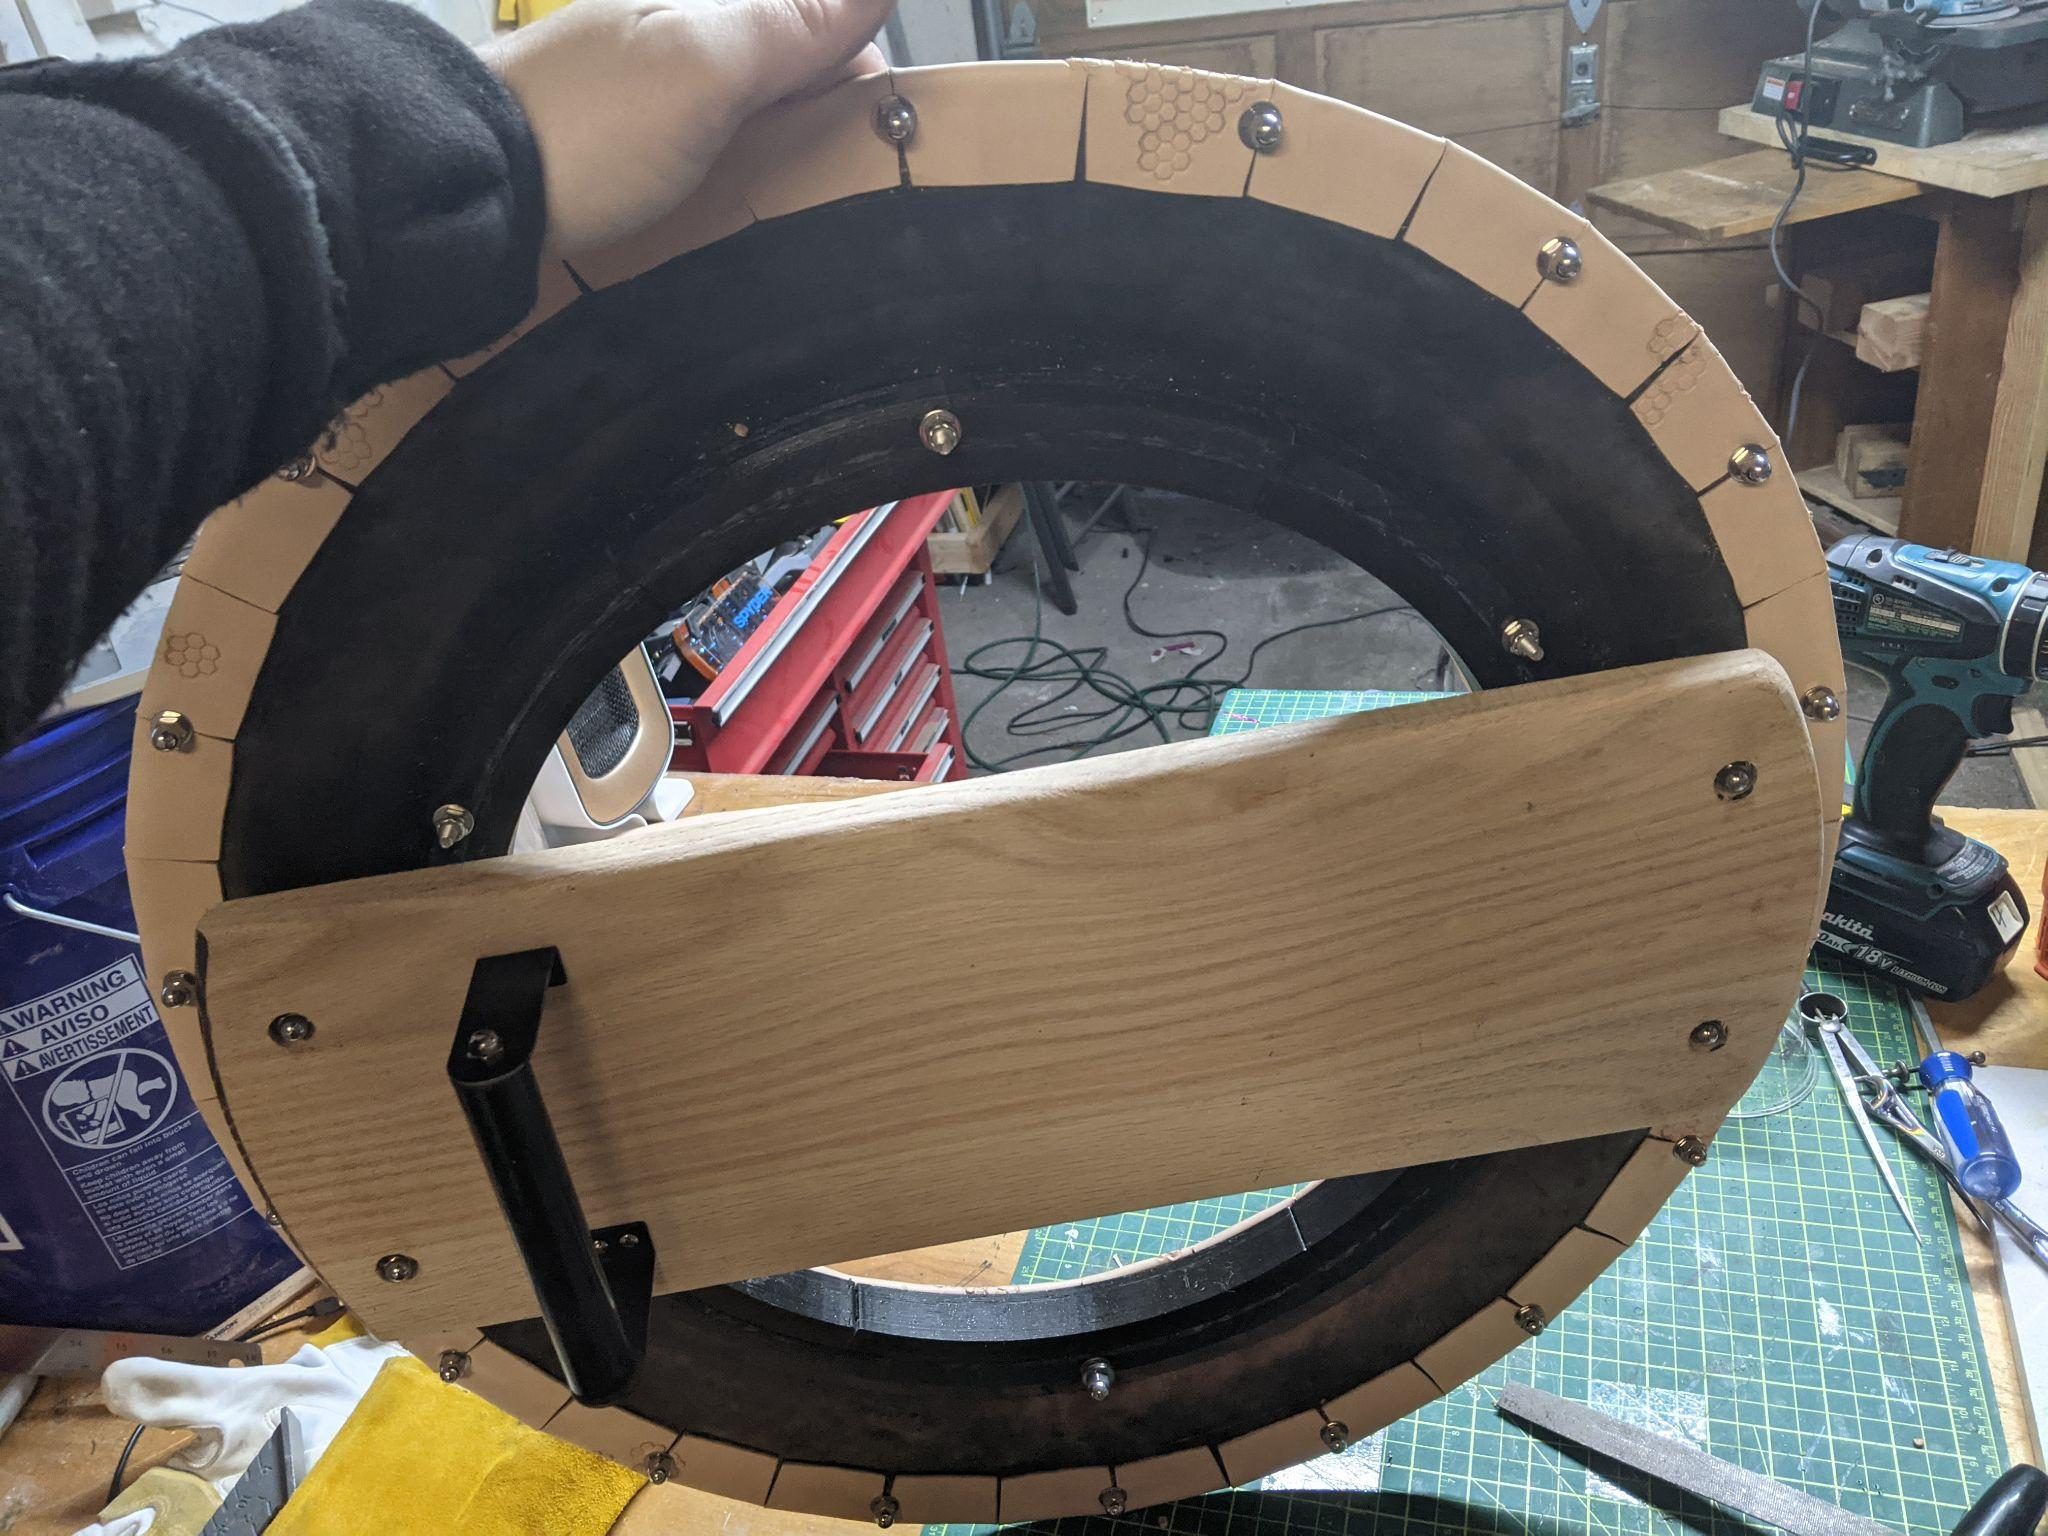
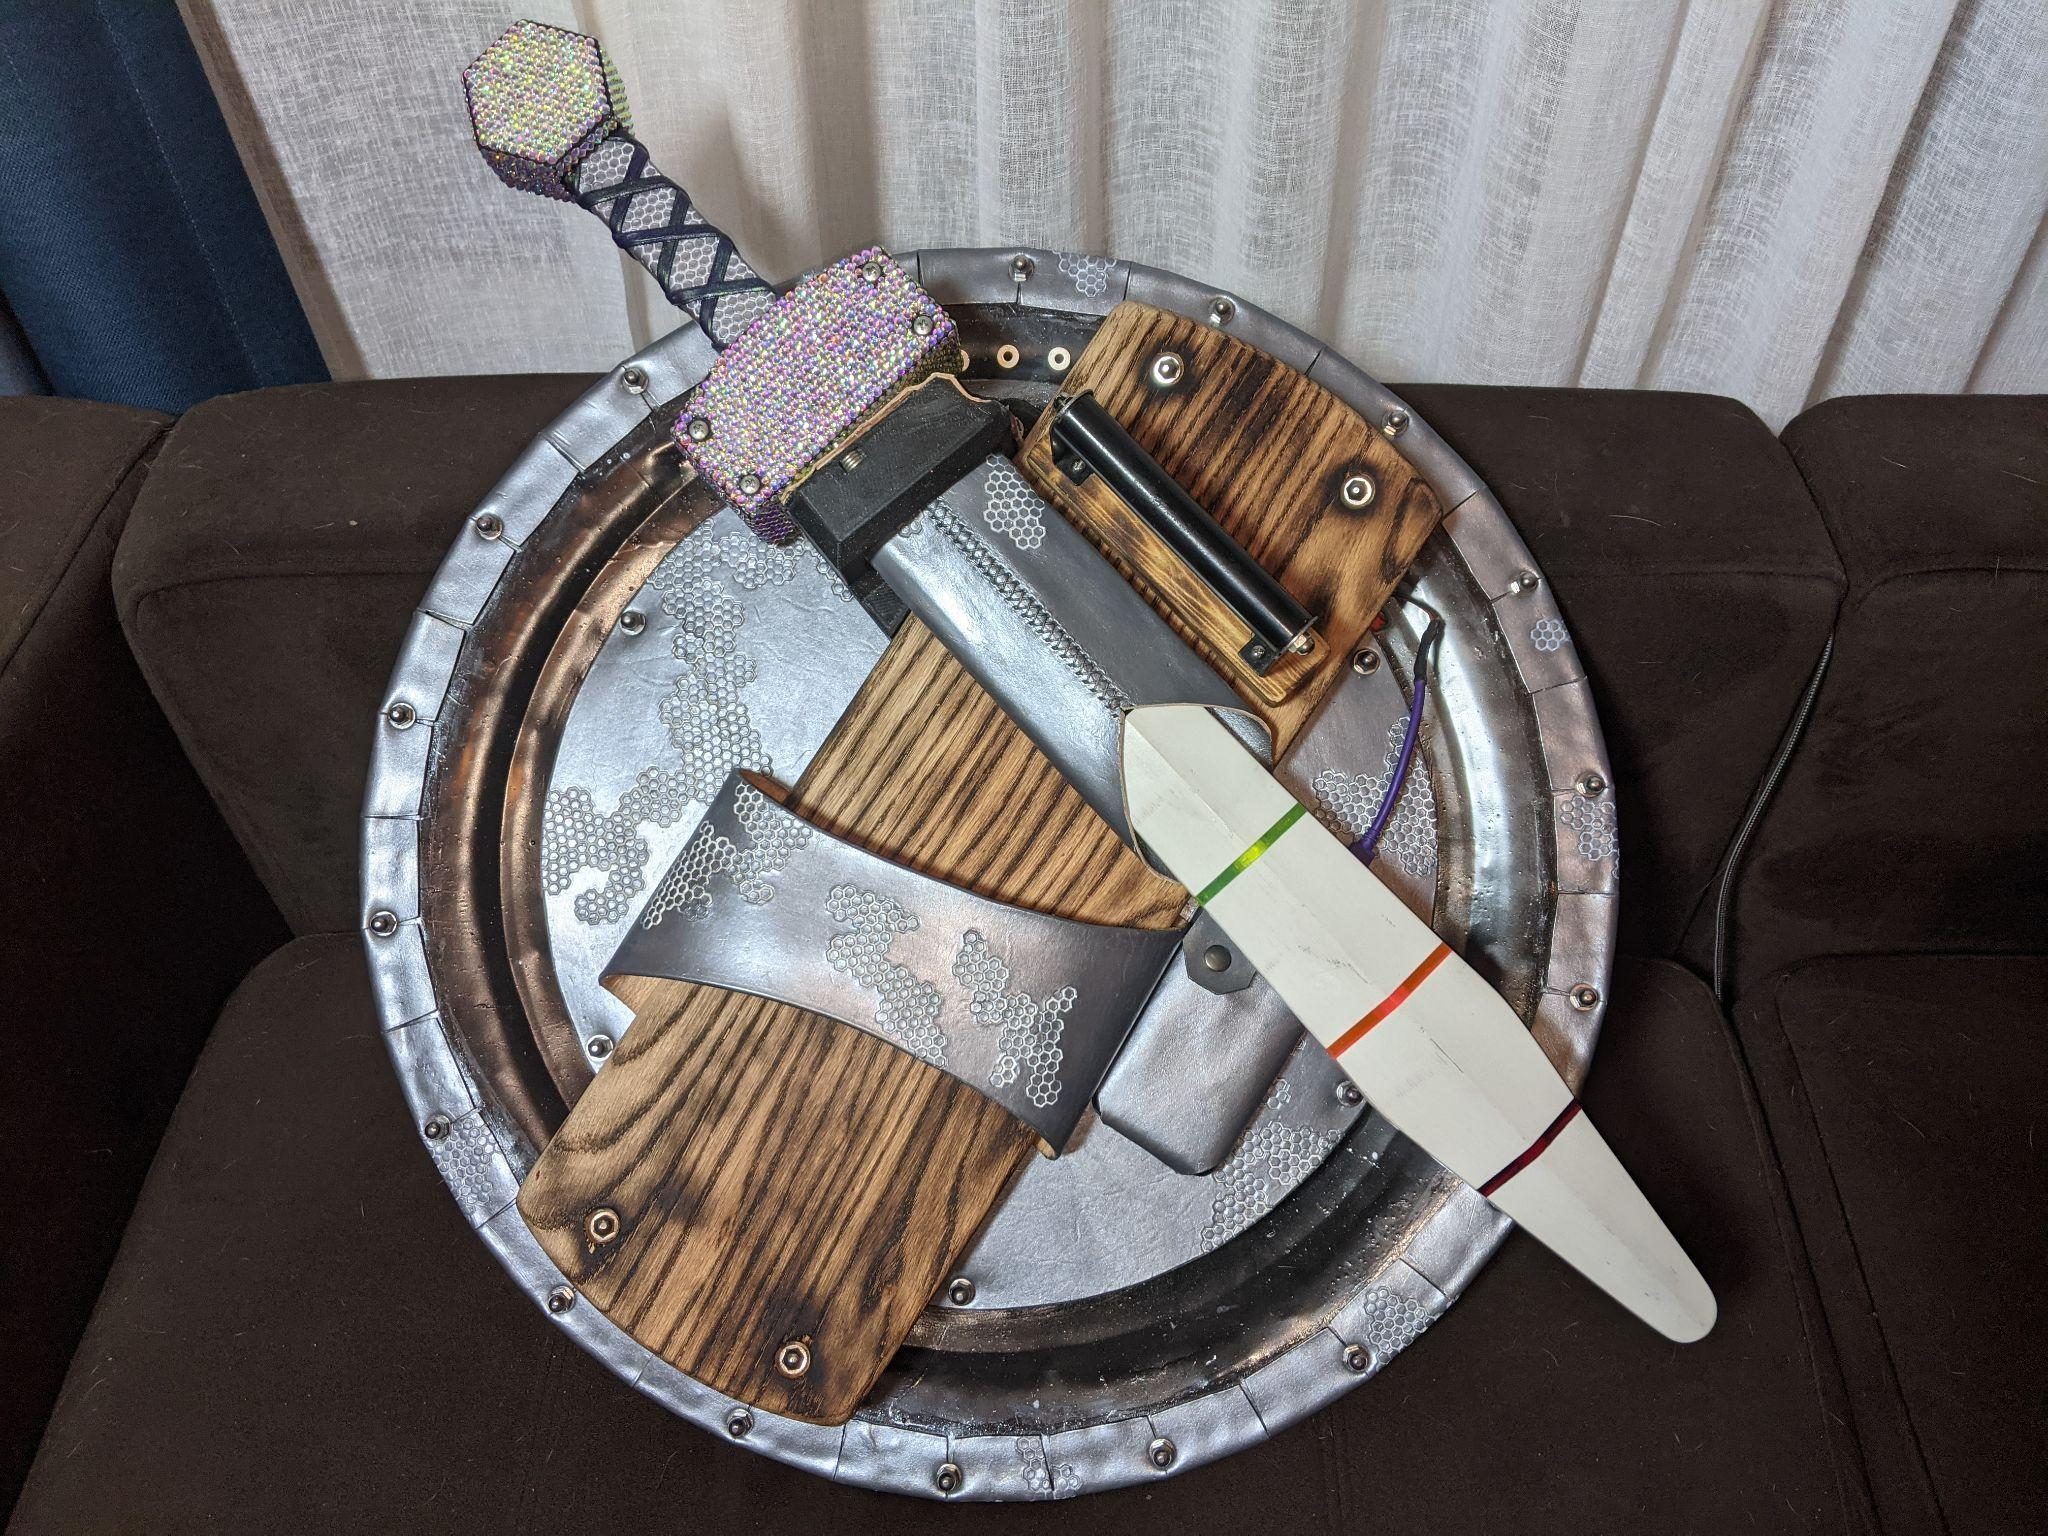
I added a leather back plate to the mirror assembly as well as an arm strap, scabbard, and battery pack holder. The top portion of the scabbard was modeled and 3D printed. I embedded magnets and magnetic reed switches in both the sword and shield. These disengage the electronics when the sword is sheathed, disabling the lights in both pieces.
05 Build book
Sword
An acrylic core, laminated printed panels, and a pound of lead.
- Core
- Acrylic, with printed PLA diffusion panels
- Hilt ballast
- 1 lb of lead
- Hilt also holds
- Battery, controller, reed switch
The sword has an acrylic core with 3D printed white PLA panels to allow for light diffusion. All the pieces were laminated together leaving a channel on either side to allow LEDs to slip down the blade.
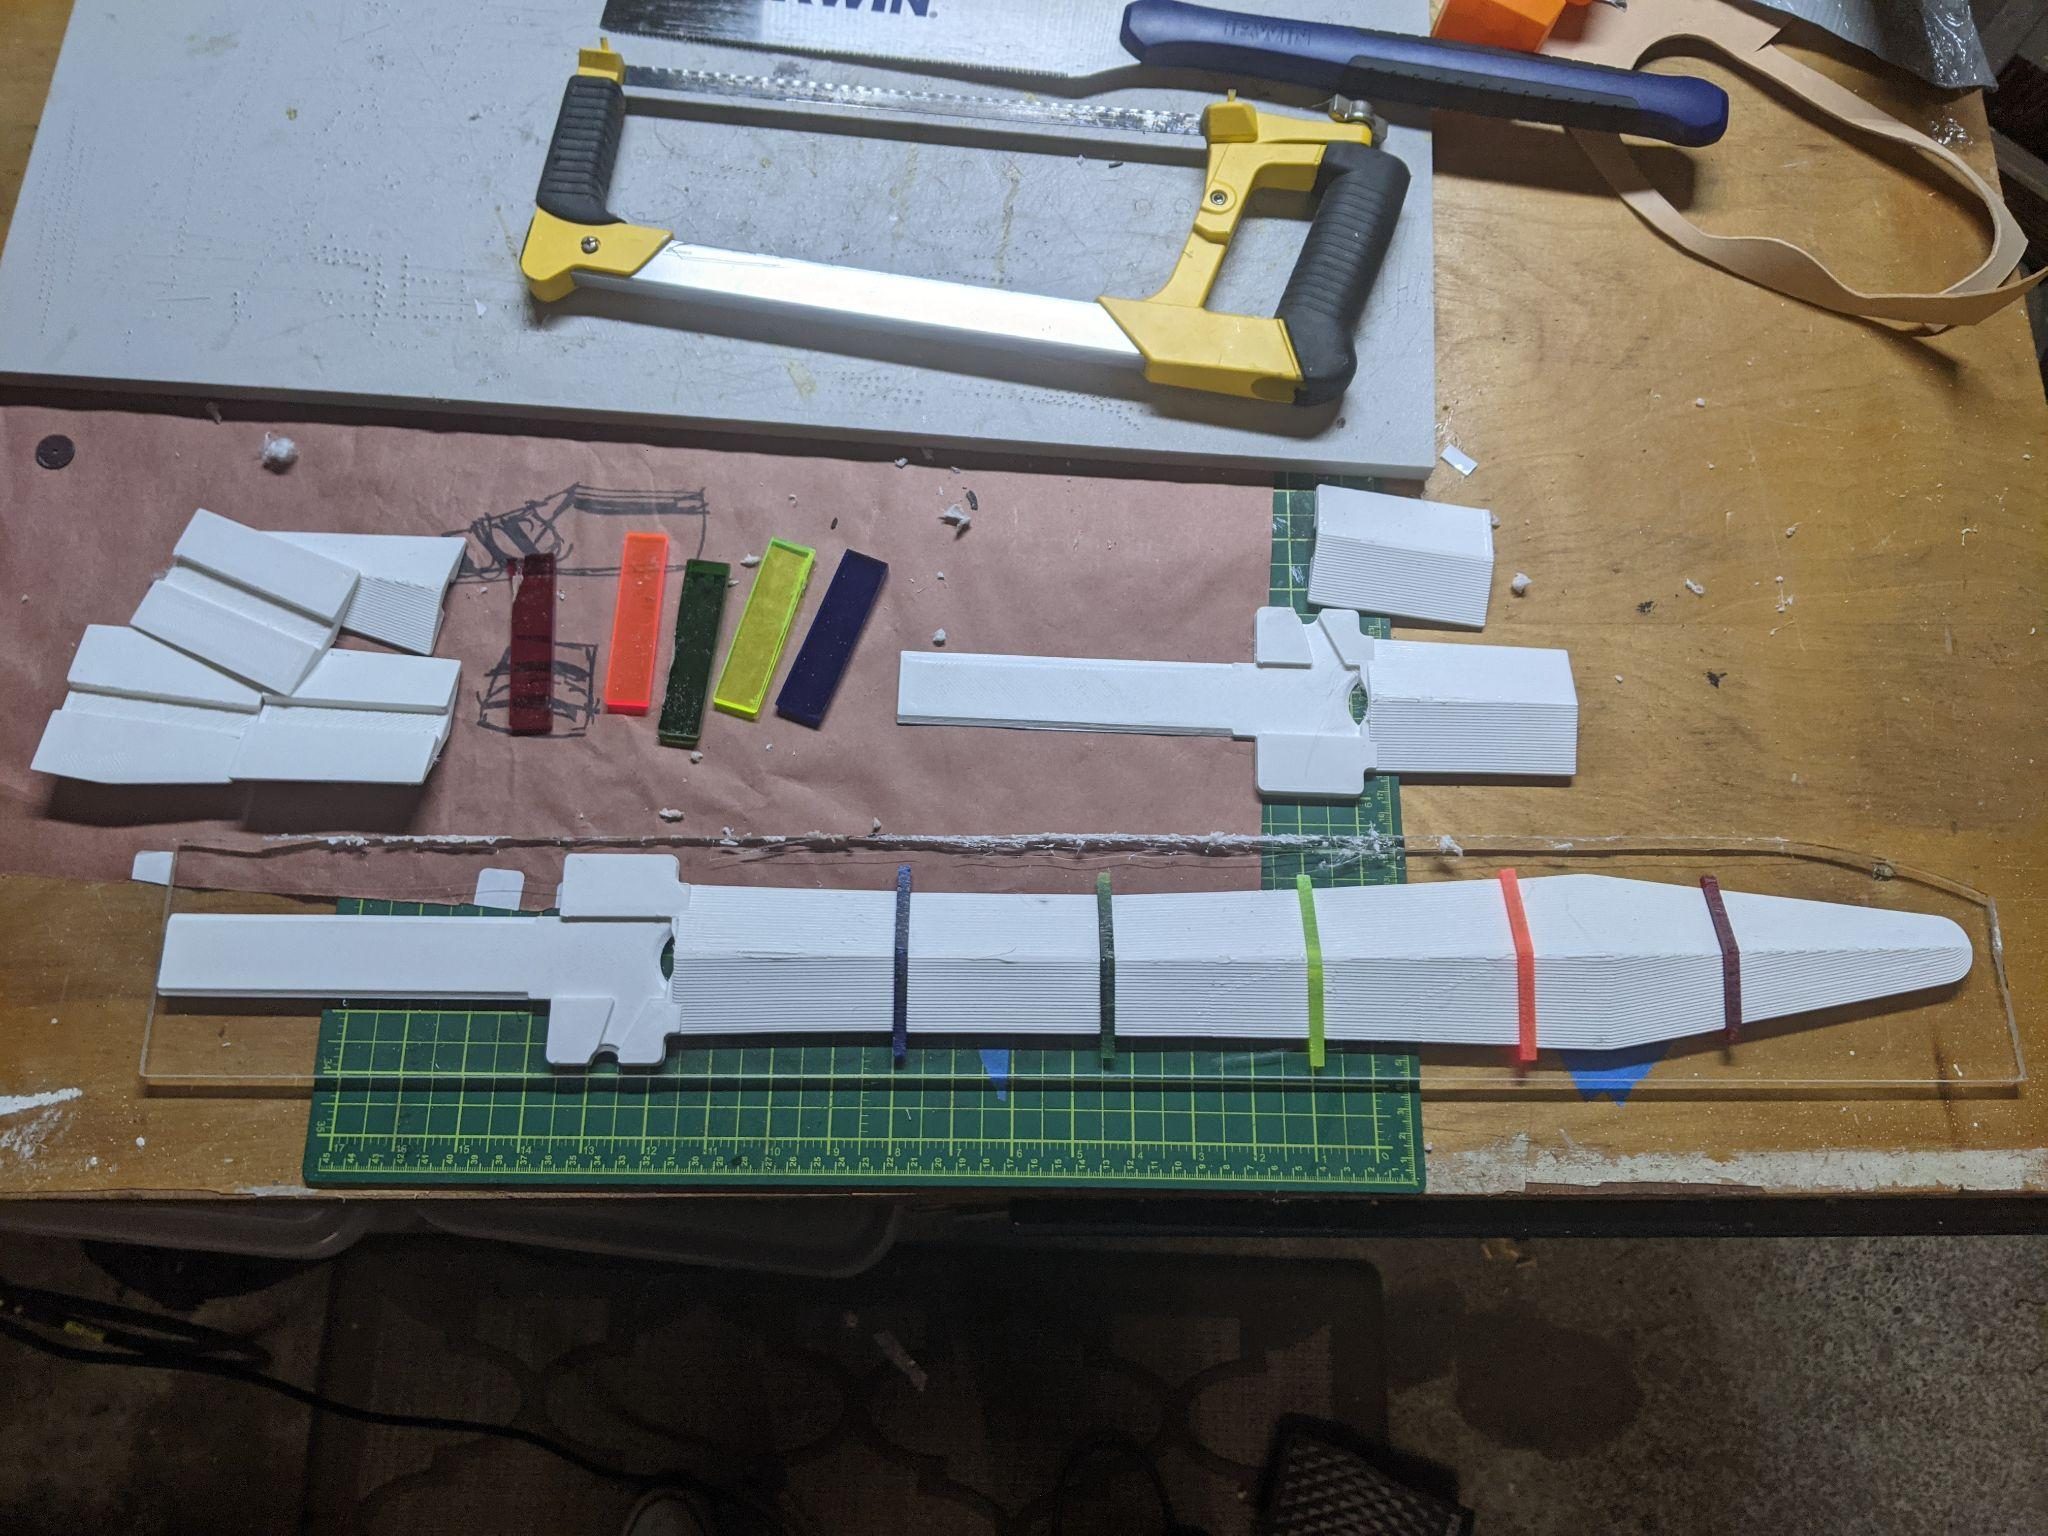
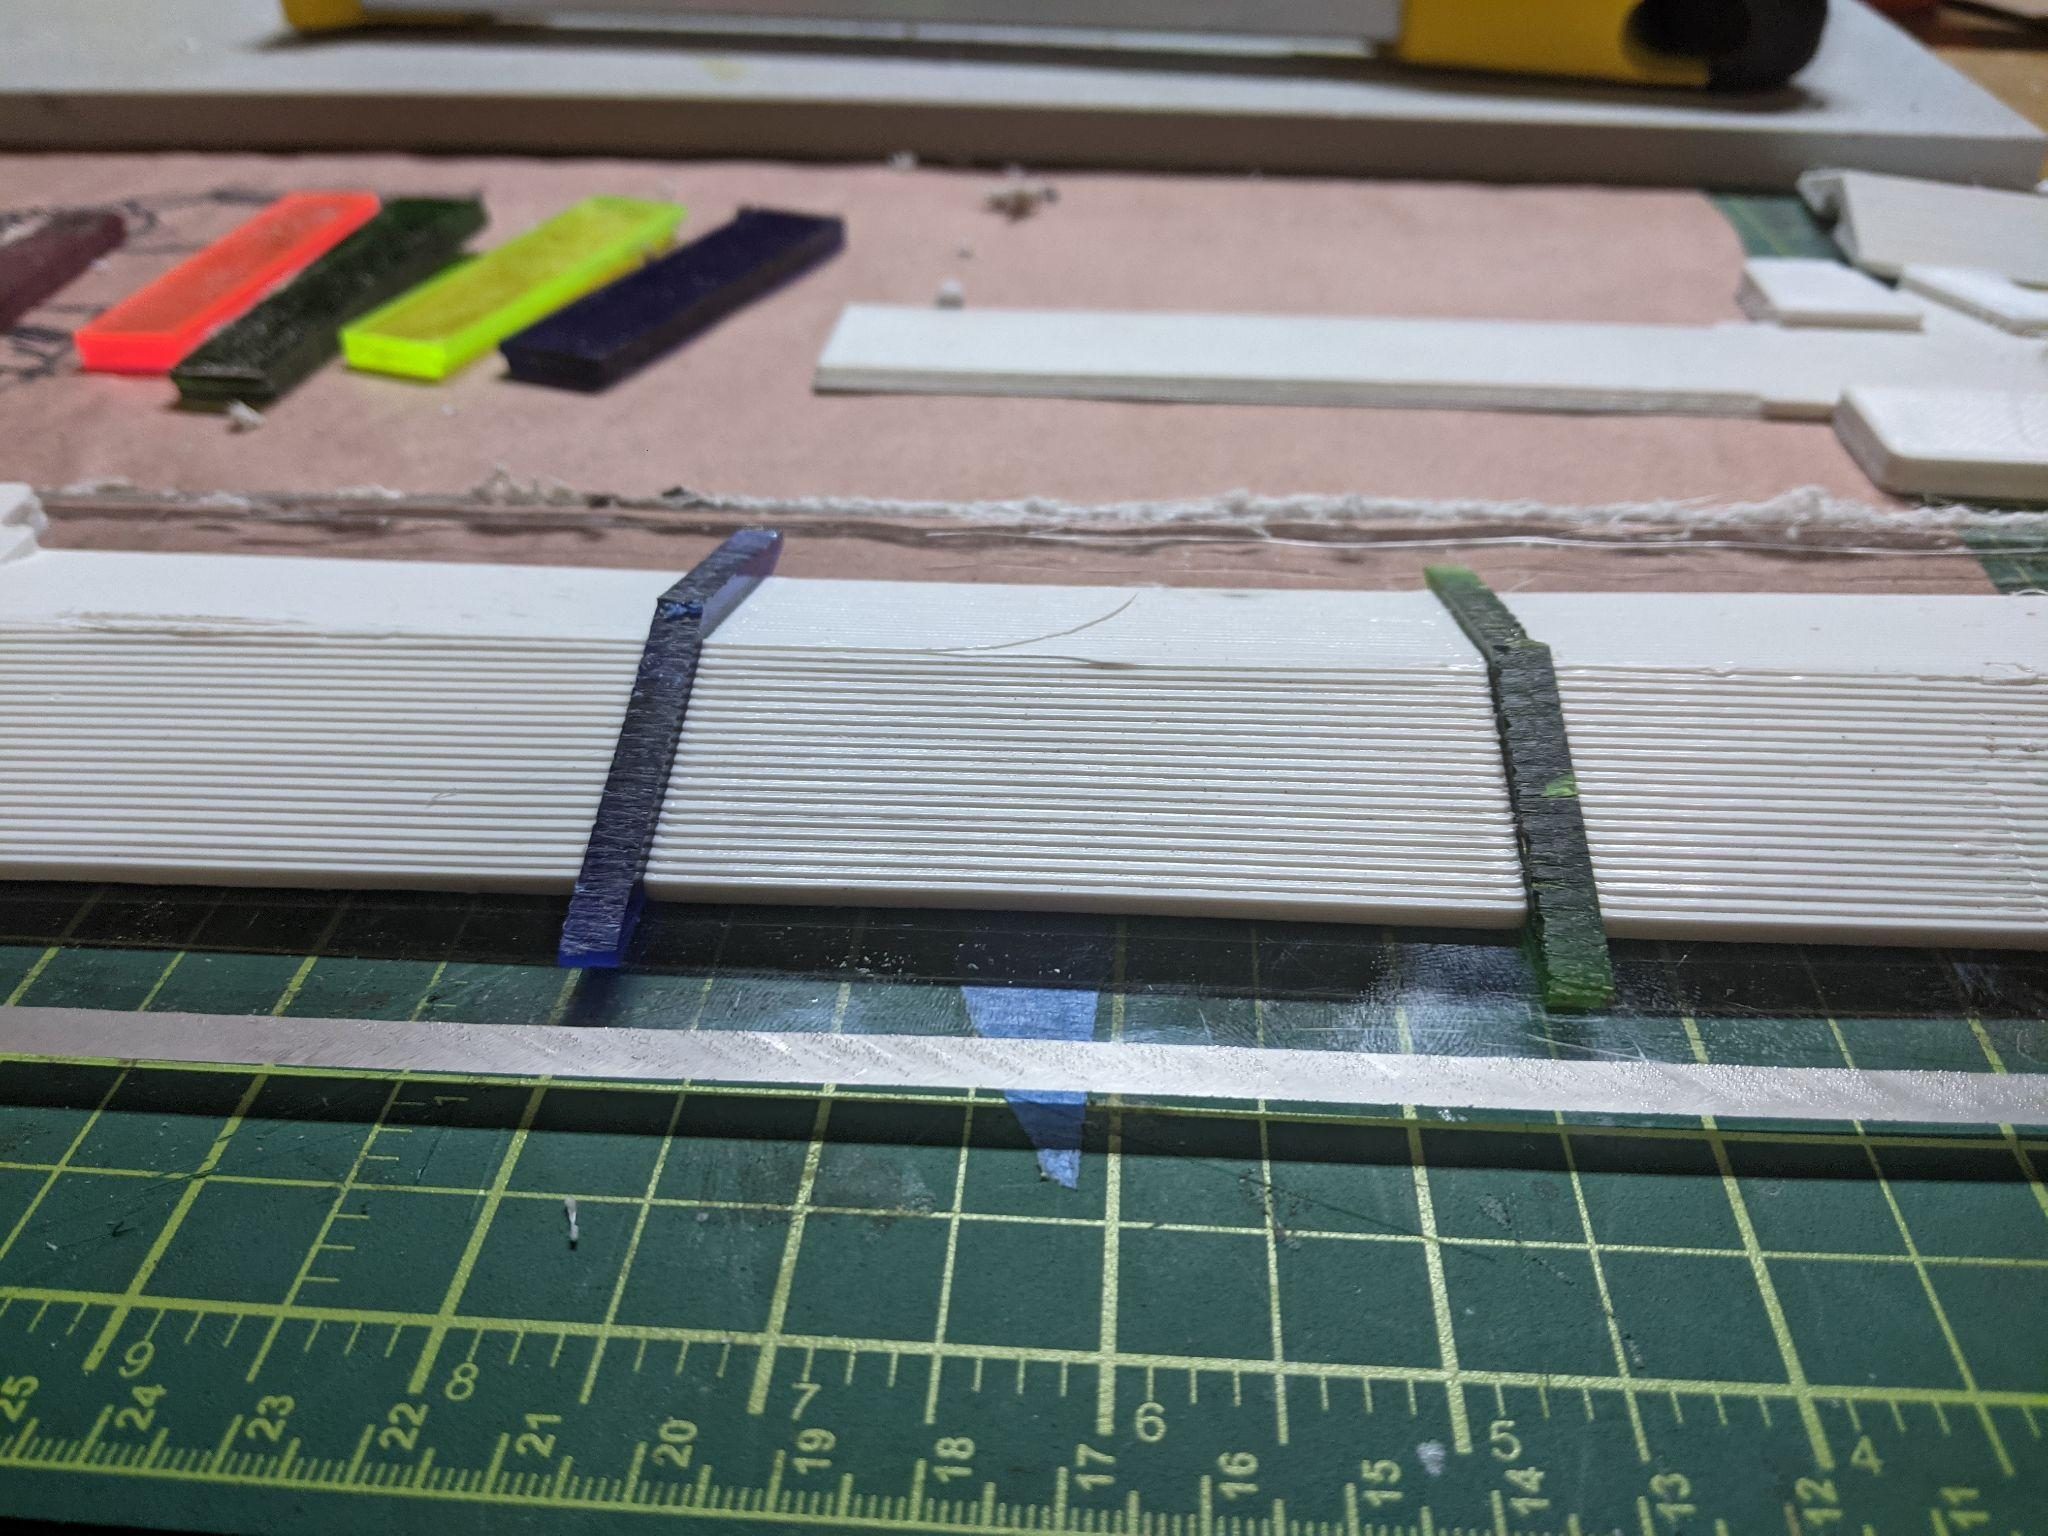
The blade was sanded down to remove print lines and clear coated.
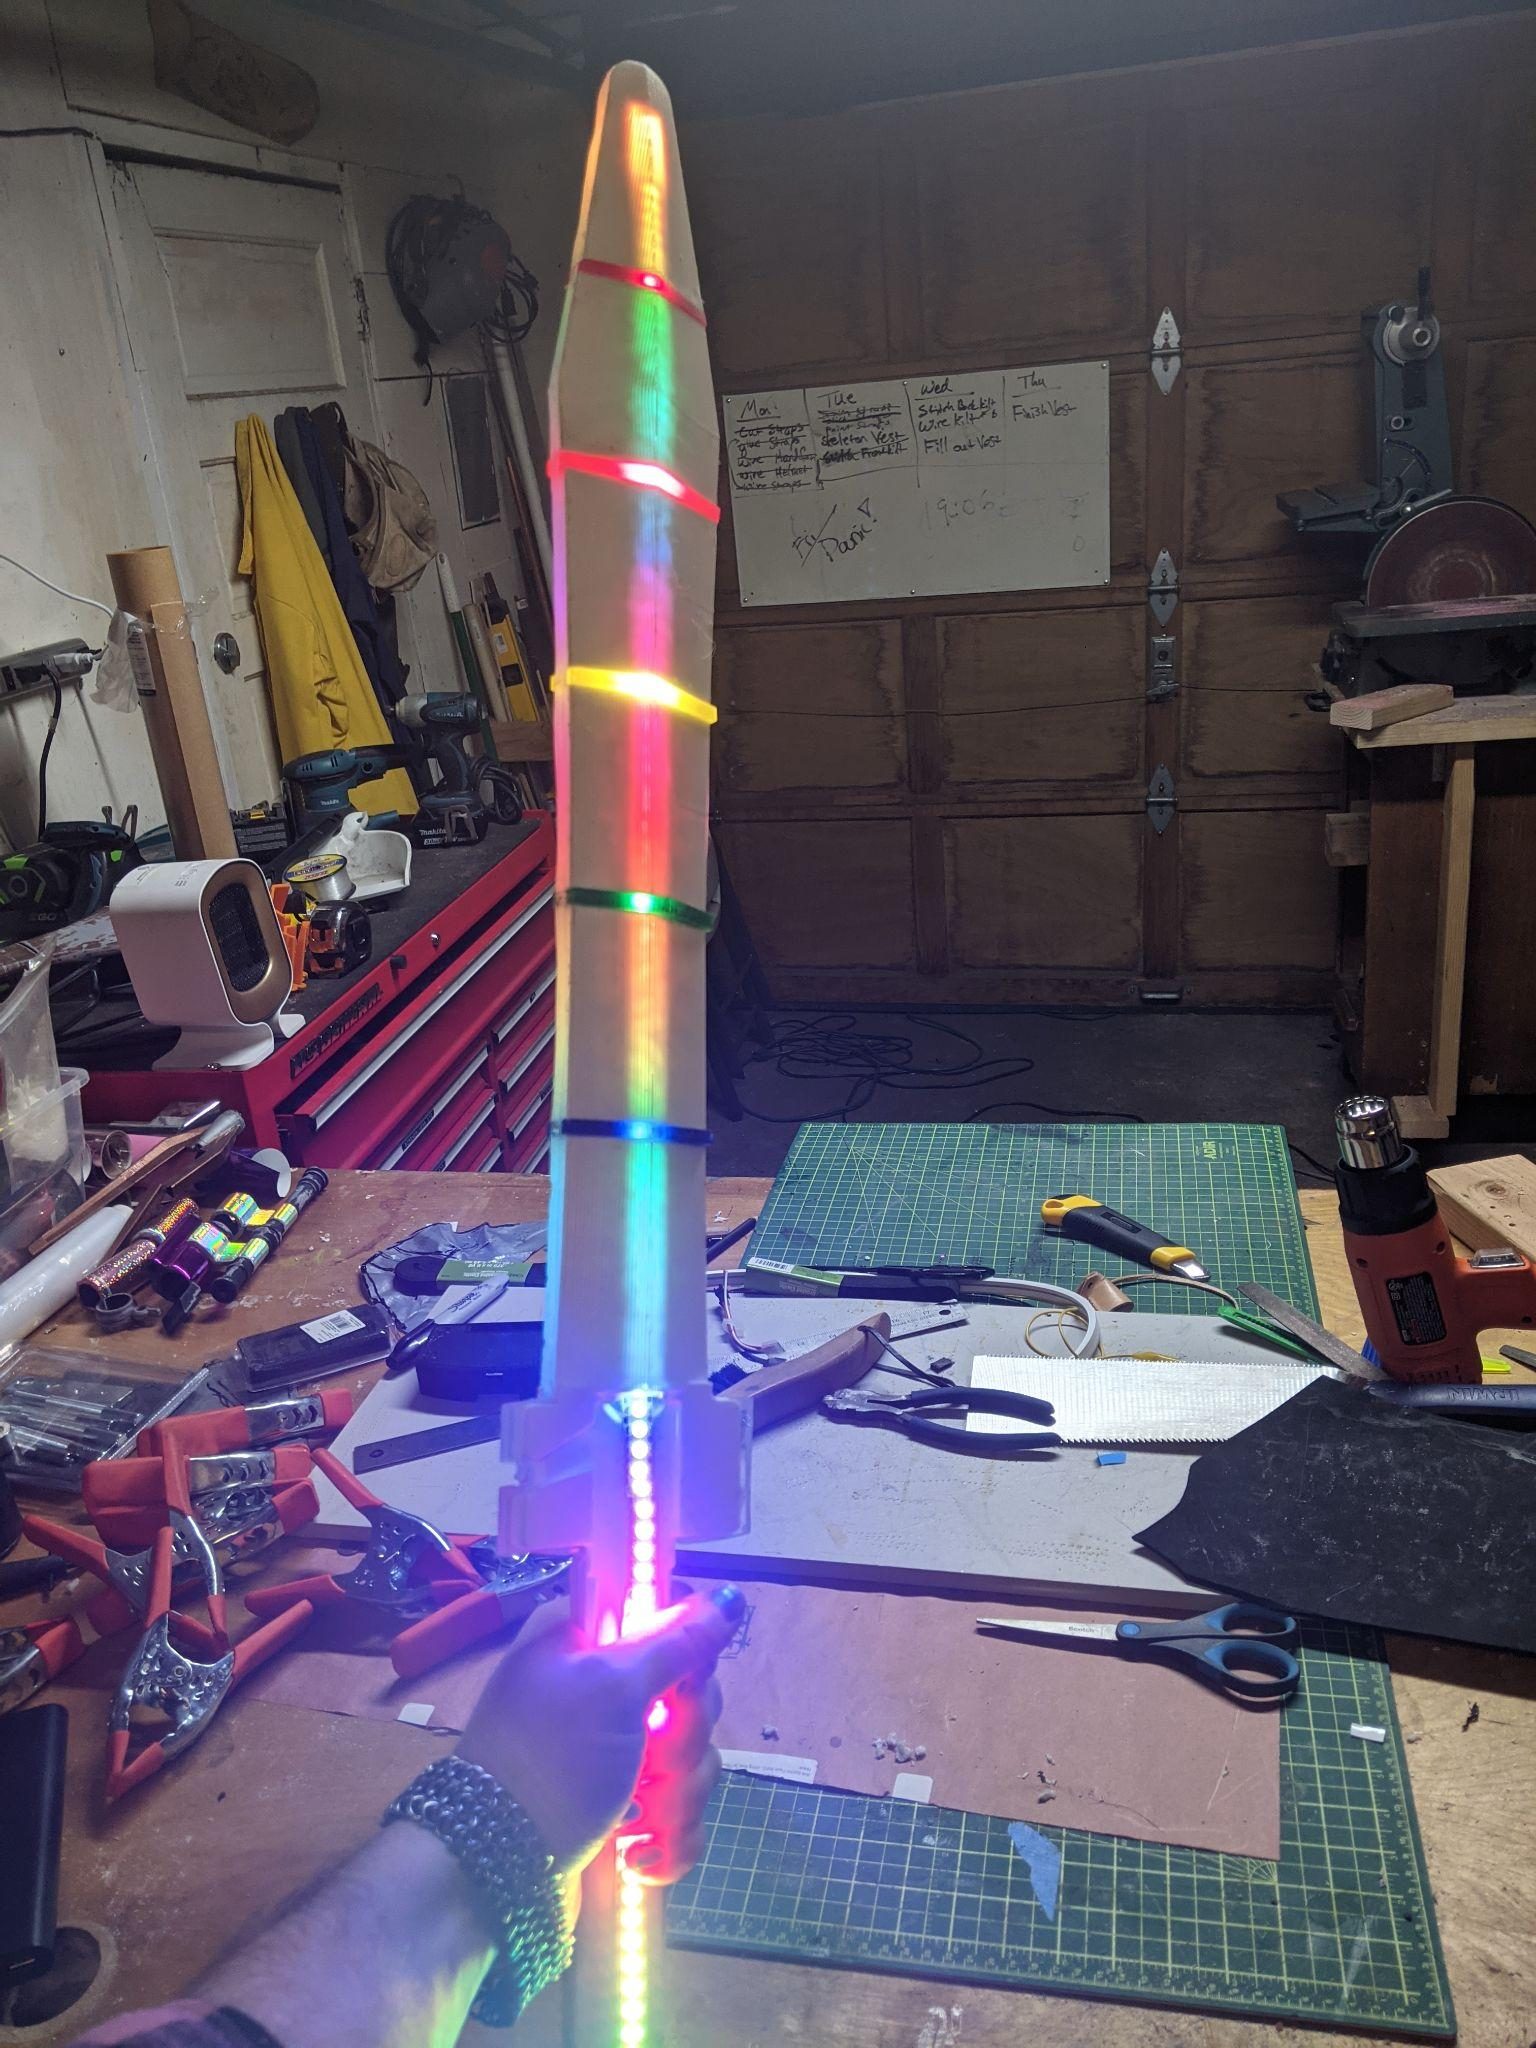
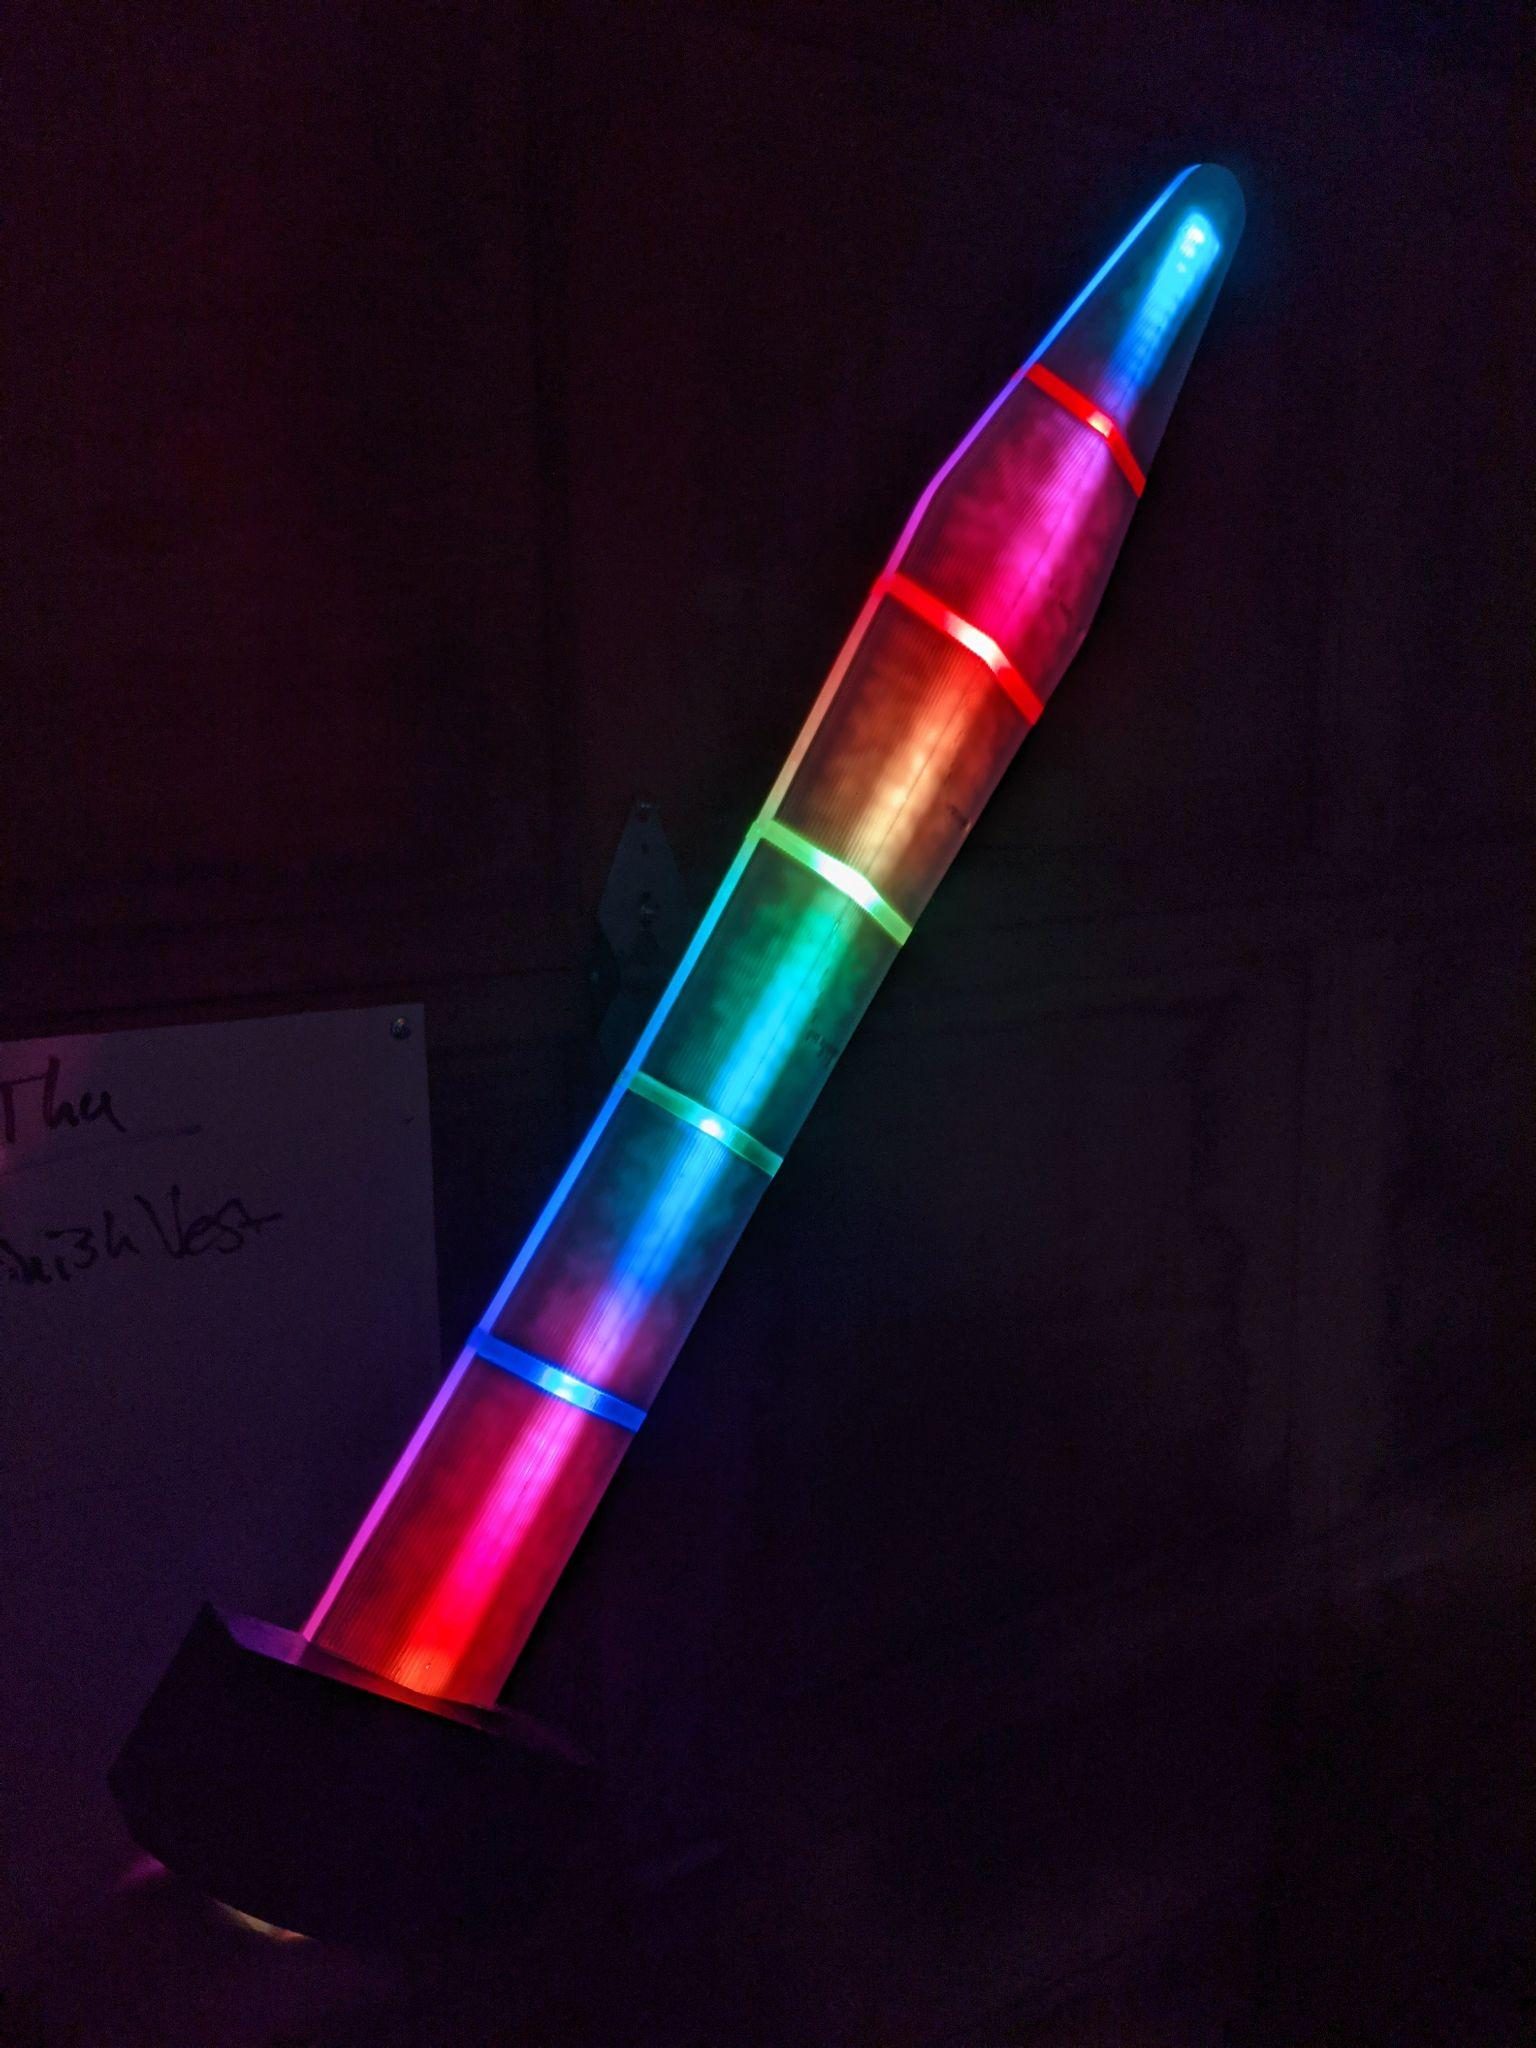
The hilt holds a battery pack and the controller as well as the magnetic reed switch that connects with the shield. The hilt has one pound of lead to help improve the sword's balance. The handle is wrapped in leather.
06 Build book
Kilt
Reversible leather, with the light pointed down instead of out.
- Construction
- Leather panels, wires sandwiched between layers
- Reversible
- Silver metallic, or rainbow and lights
- Light direction
- Underglow, deliberately
The kilt is made out of leather panels. The top layer is a silver metallic finished leather and the back is painted veg tan leather. I ran strings of LEDs down each panel, sandwiching the wires between the layers of leather.
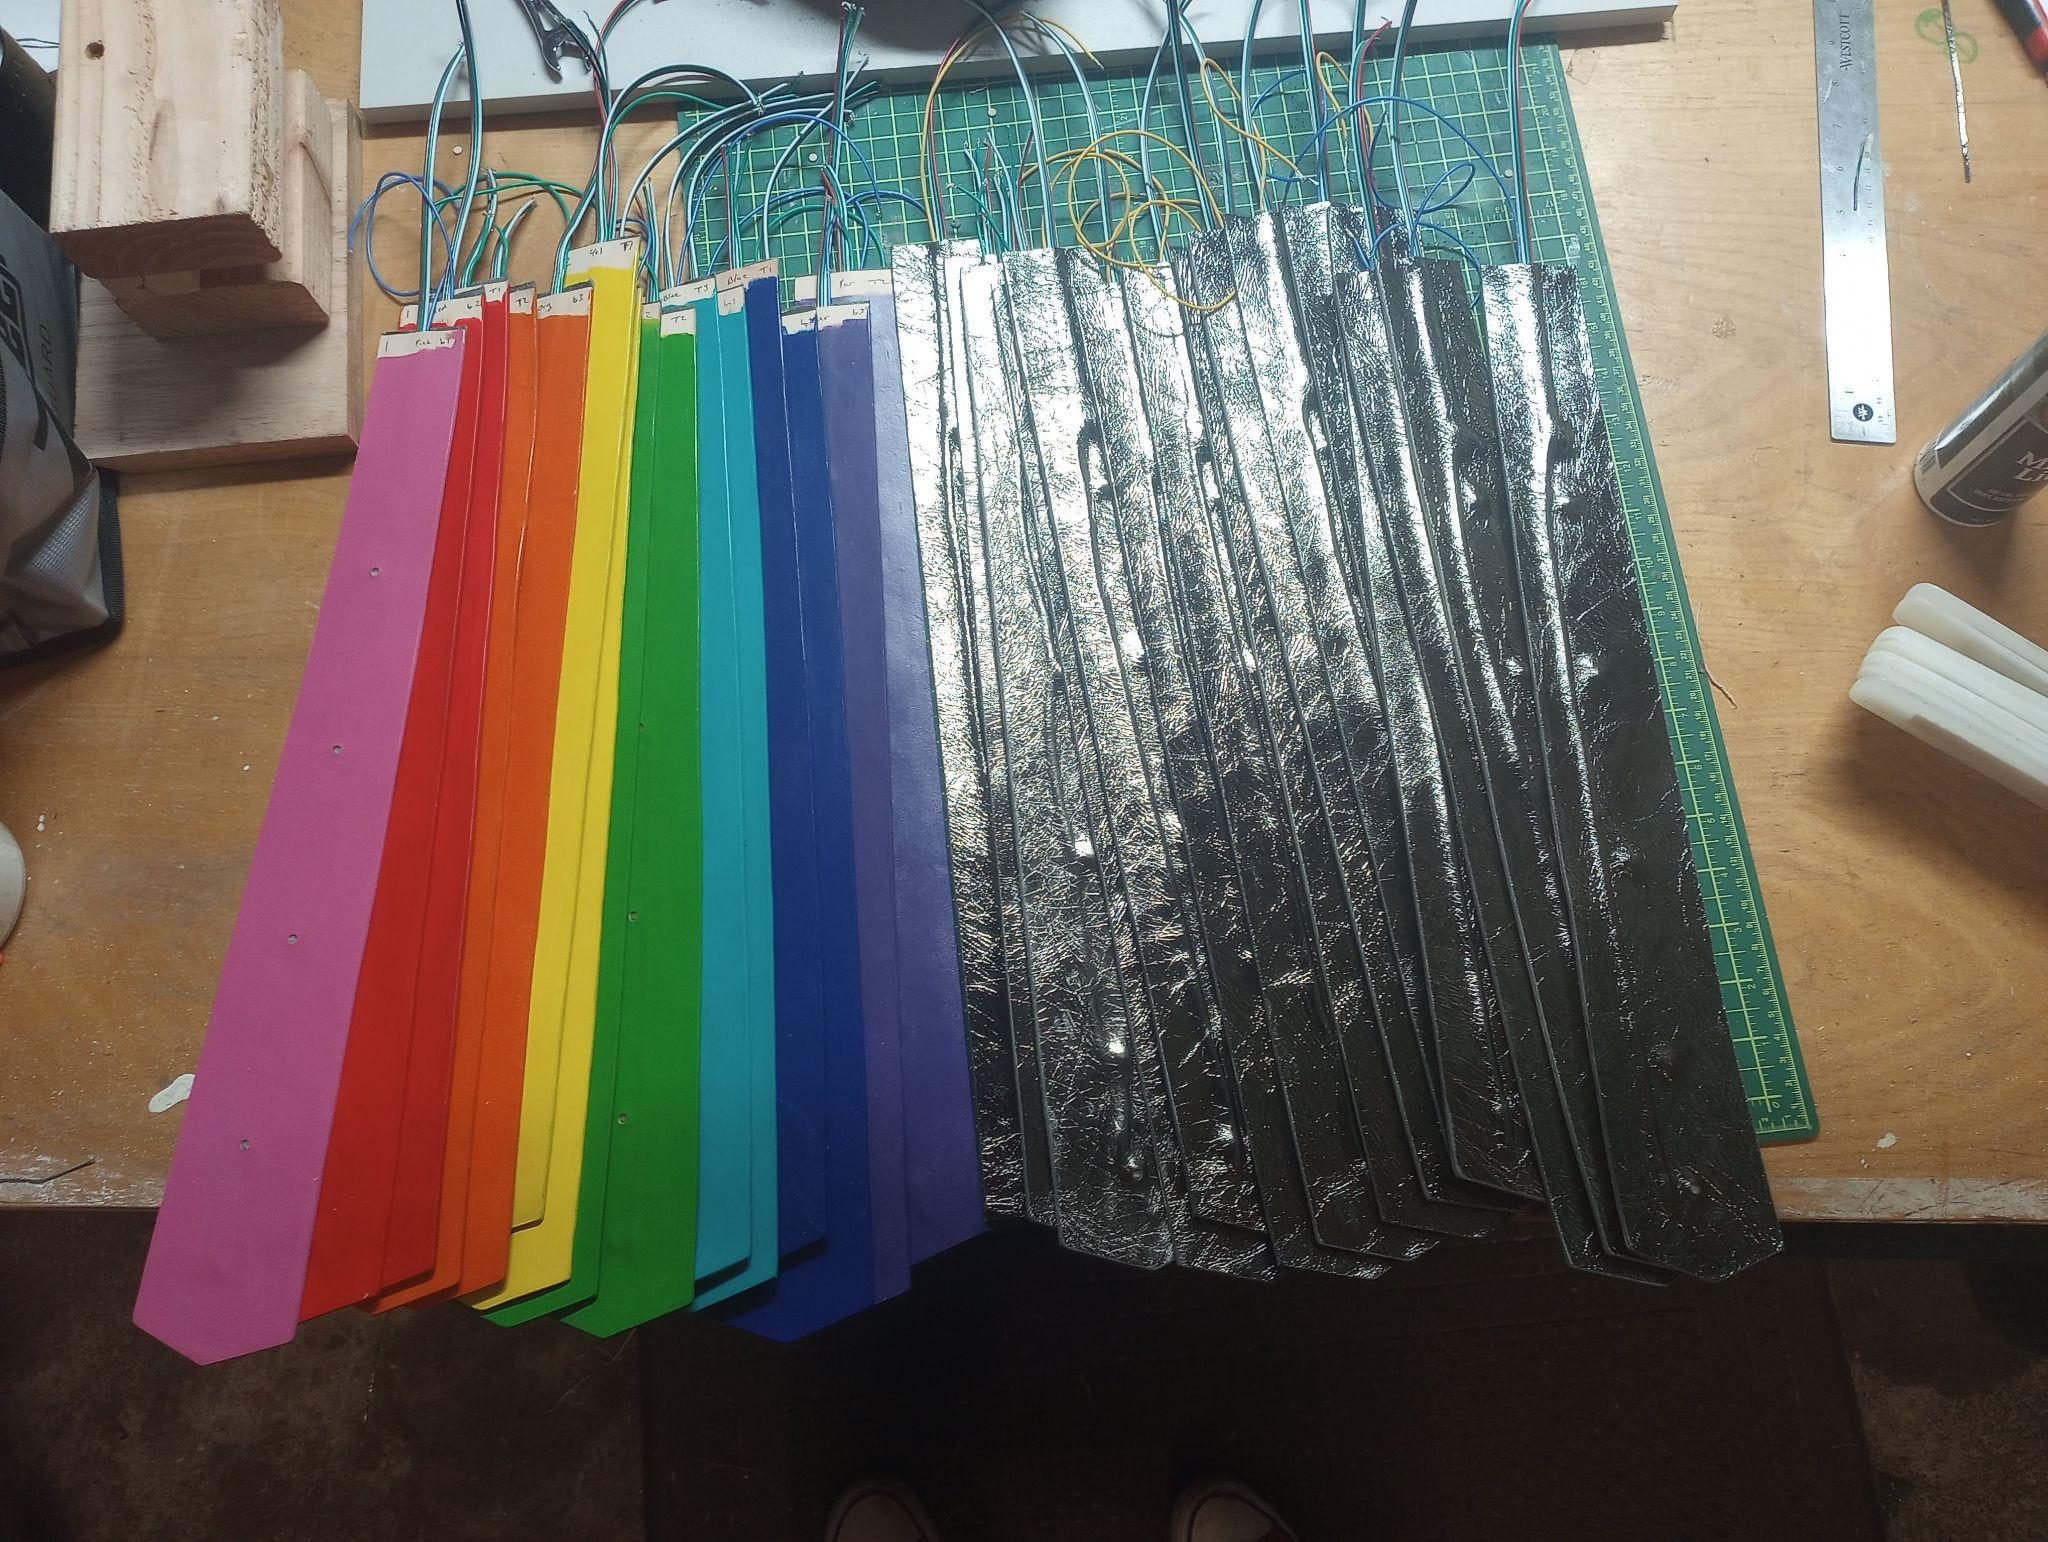
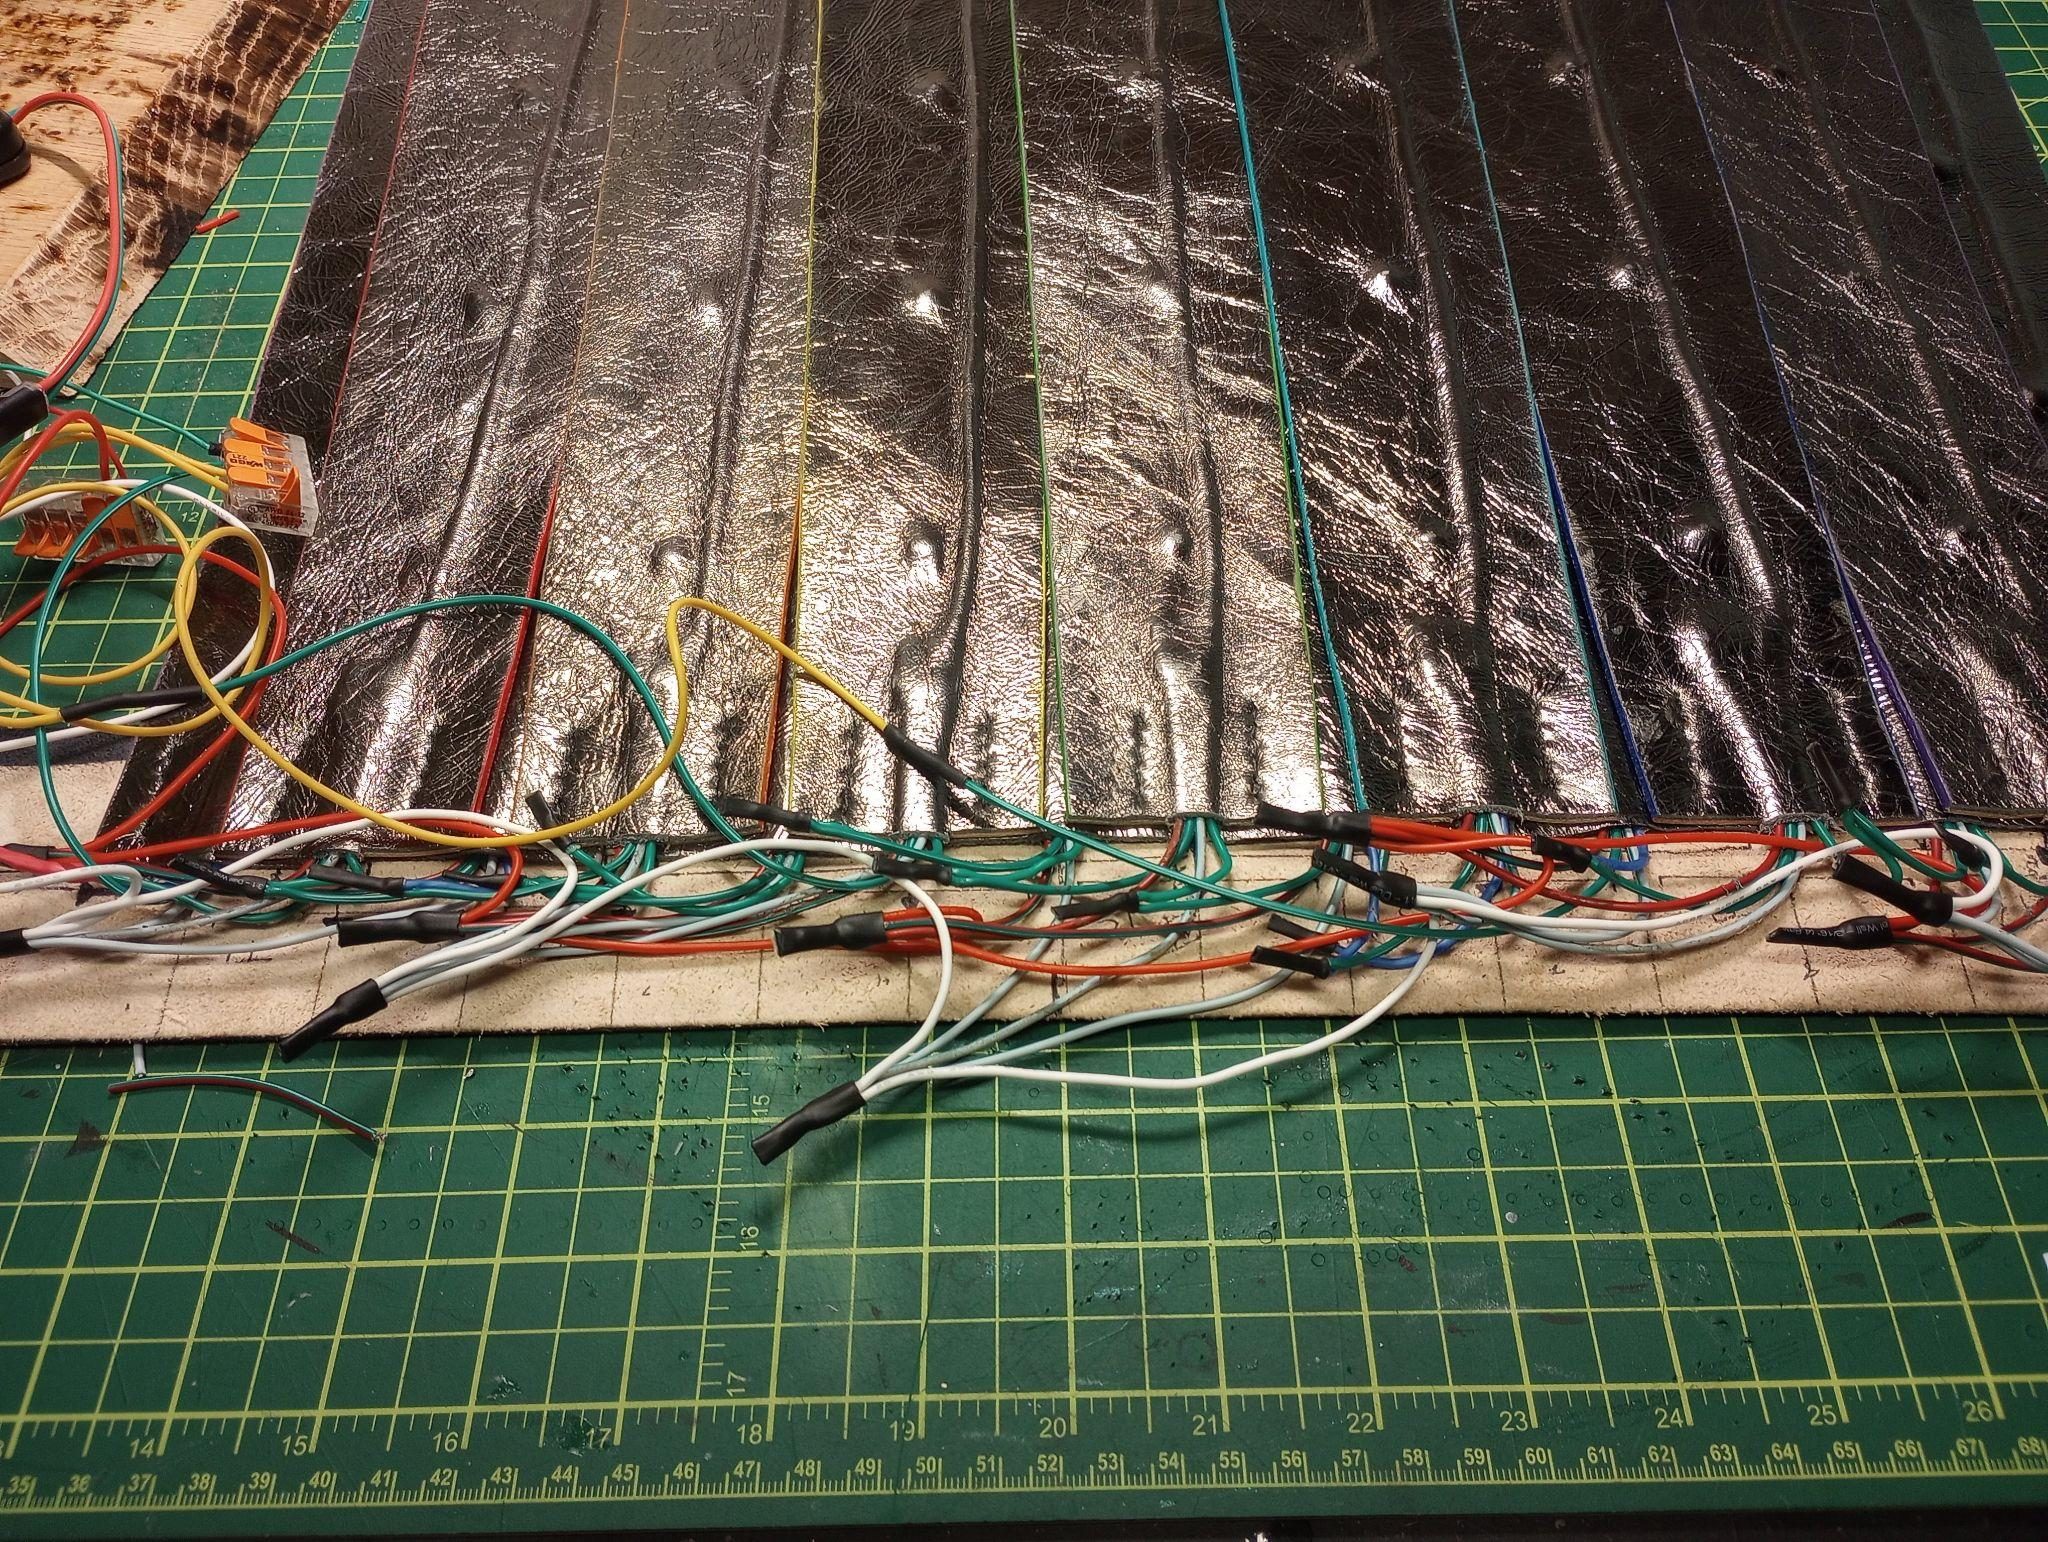
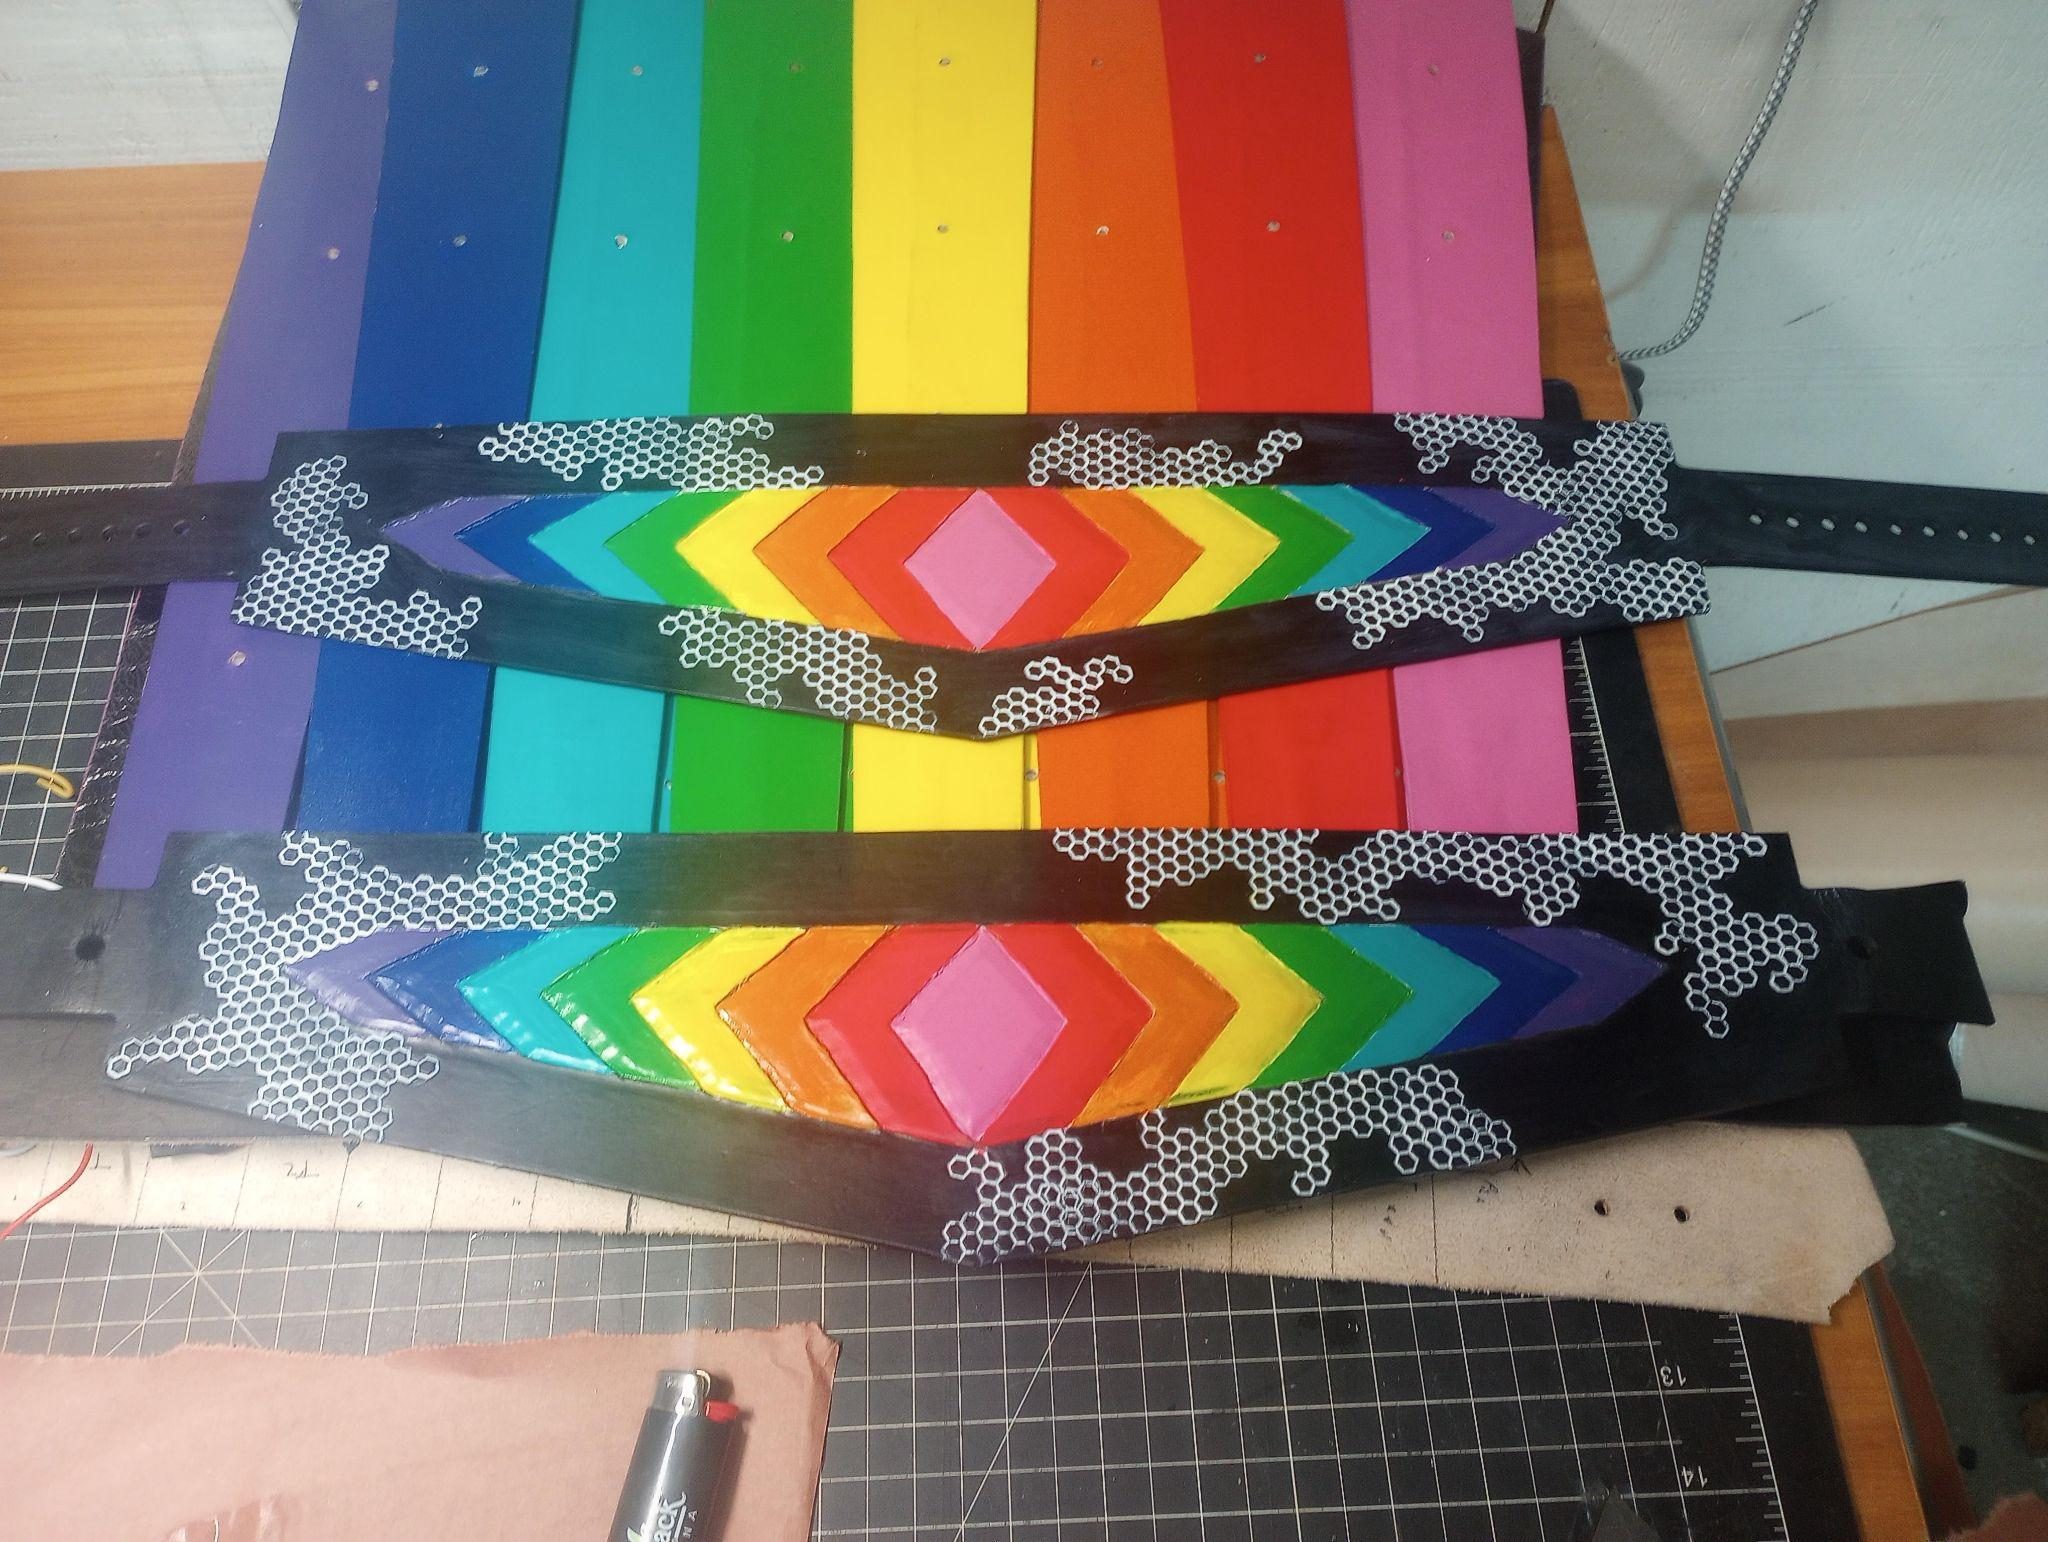
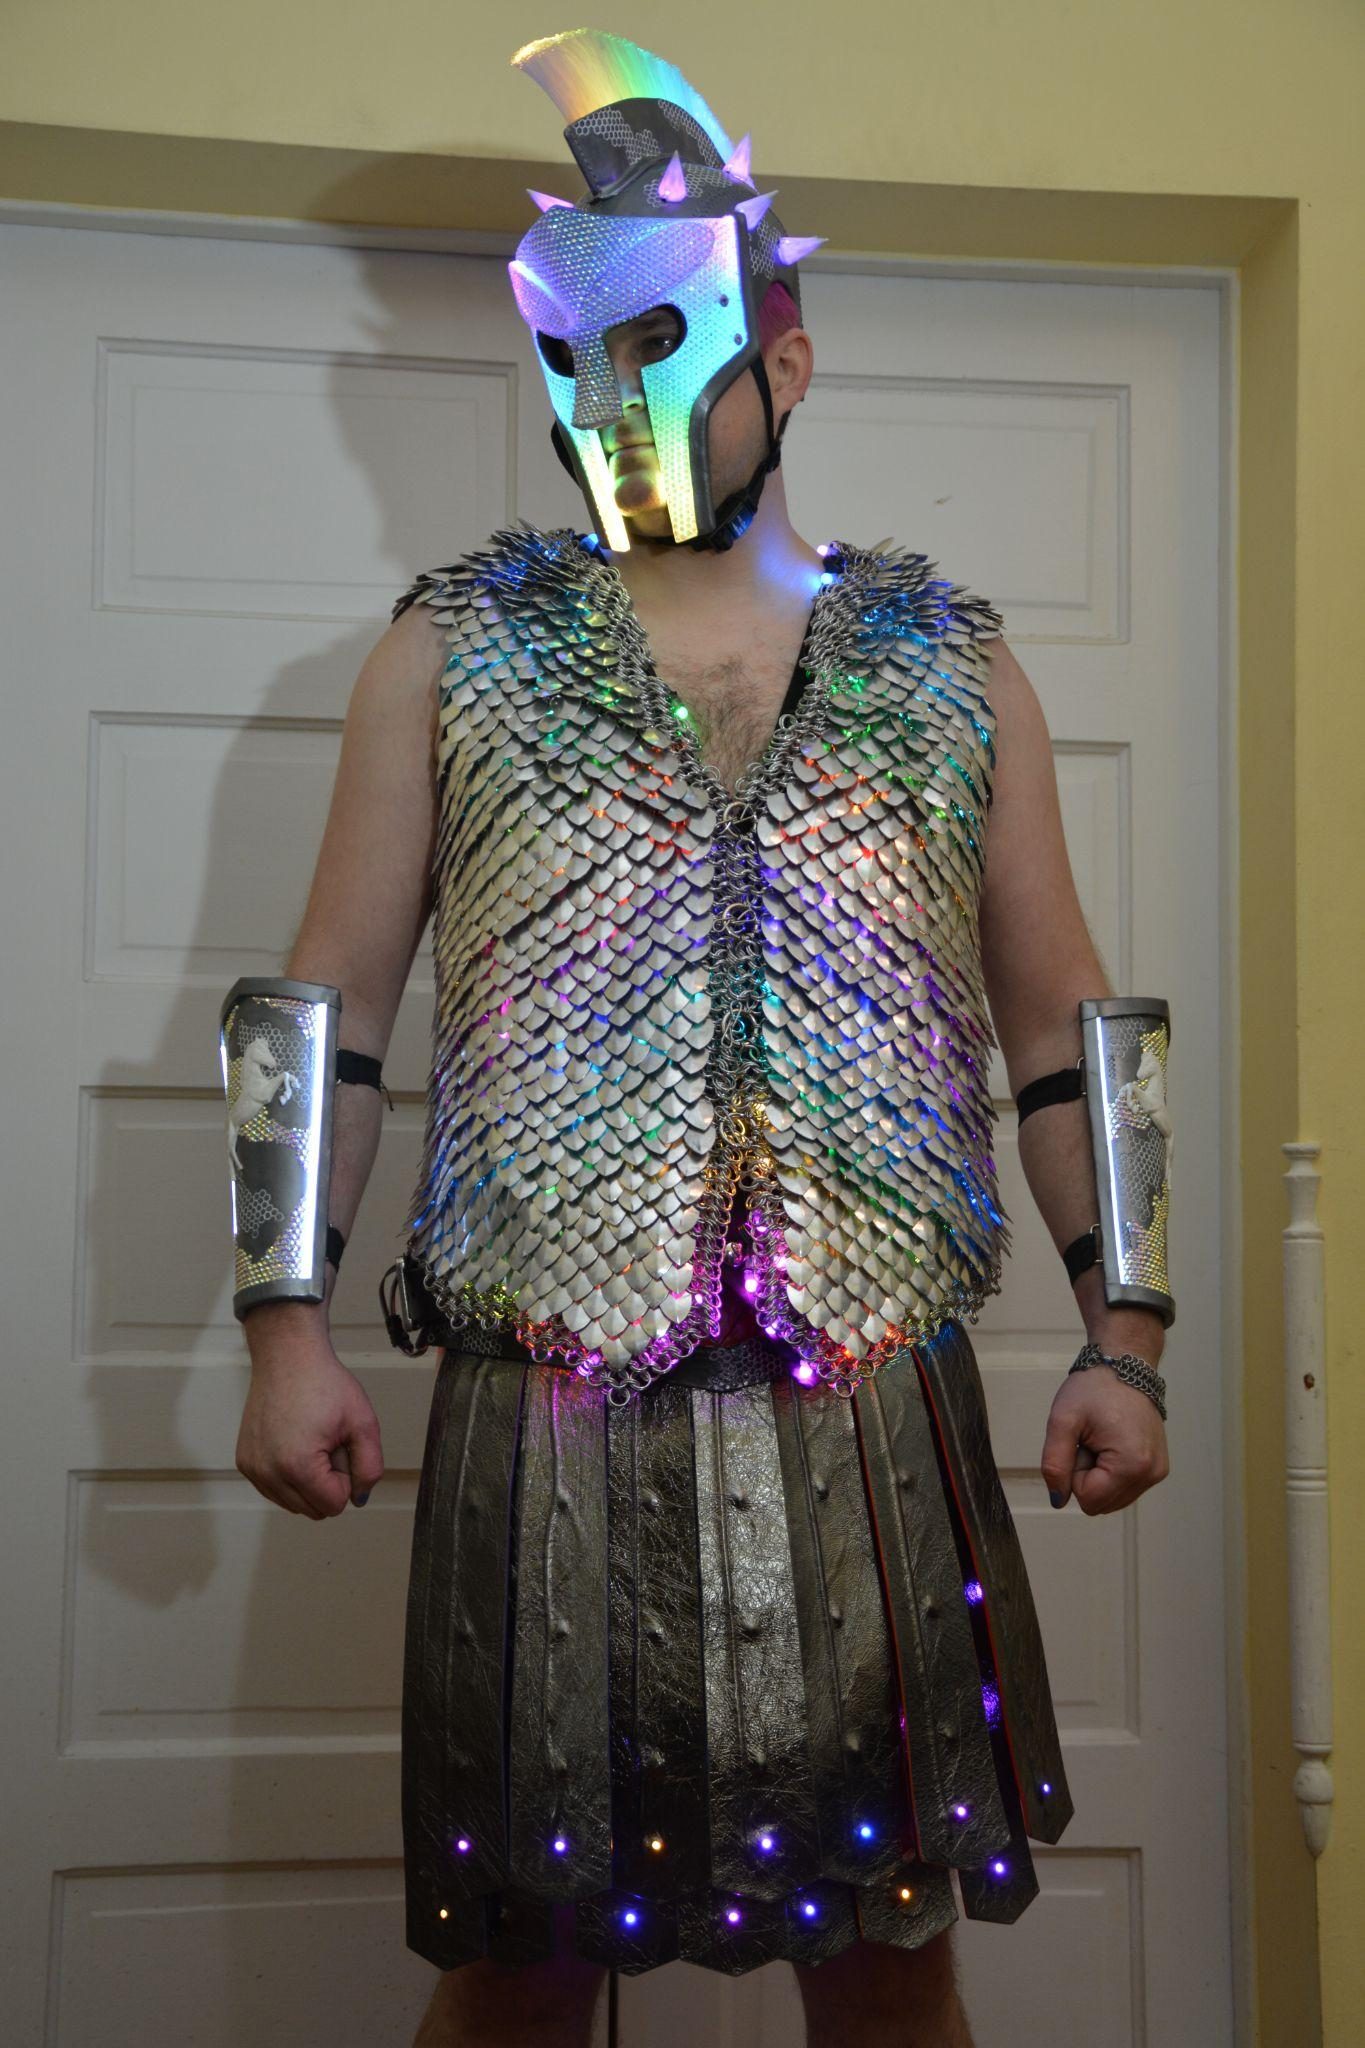
The wires were hidden in between the belt layers and connected on one side. The belt was stamped and painted in rainbows to match the lights. I added most of the LEDs to the underside of the kilt to give myself an underglow instead of creating a sheet of blinding lights. I made the kilt reversible so I can switch to the rainbow and lights side to fit my mood.
07 Build book
Bracers, Greaves, and Shoes
Where the film's iconography went, once the vest had to stay clear.
- Motif
- Maximus's horses, moved to the bracers
- Greaves
- Rhinestone filigree, after the film's armour
- Power
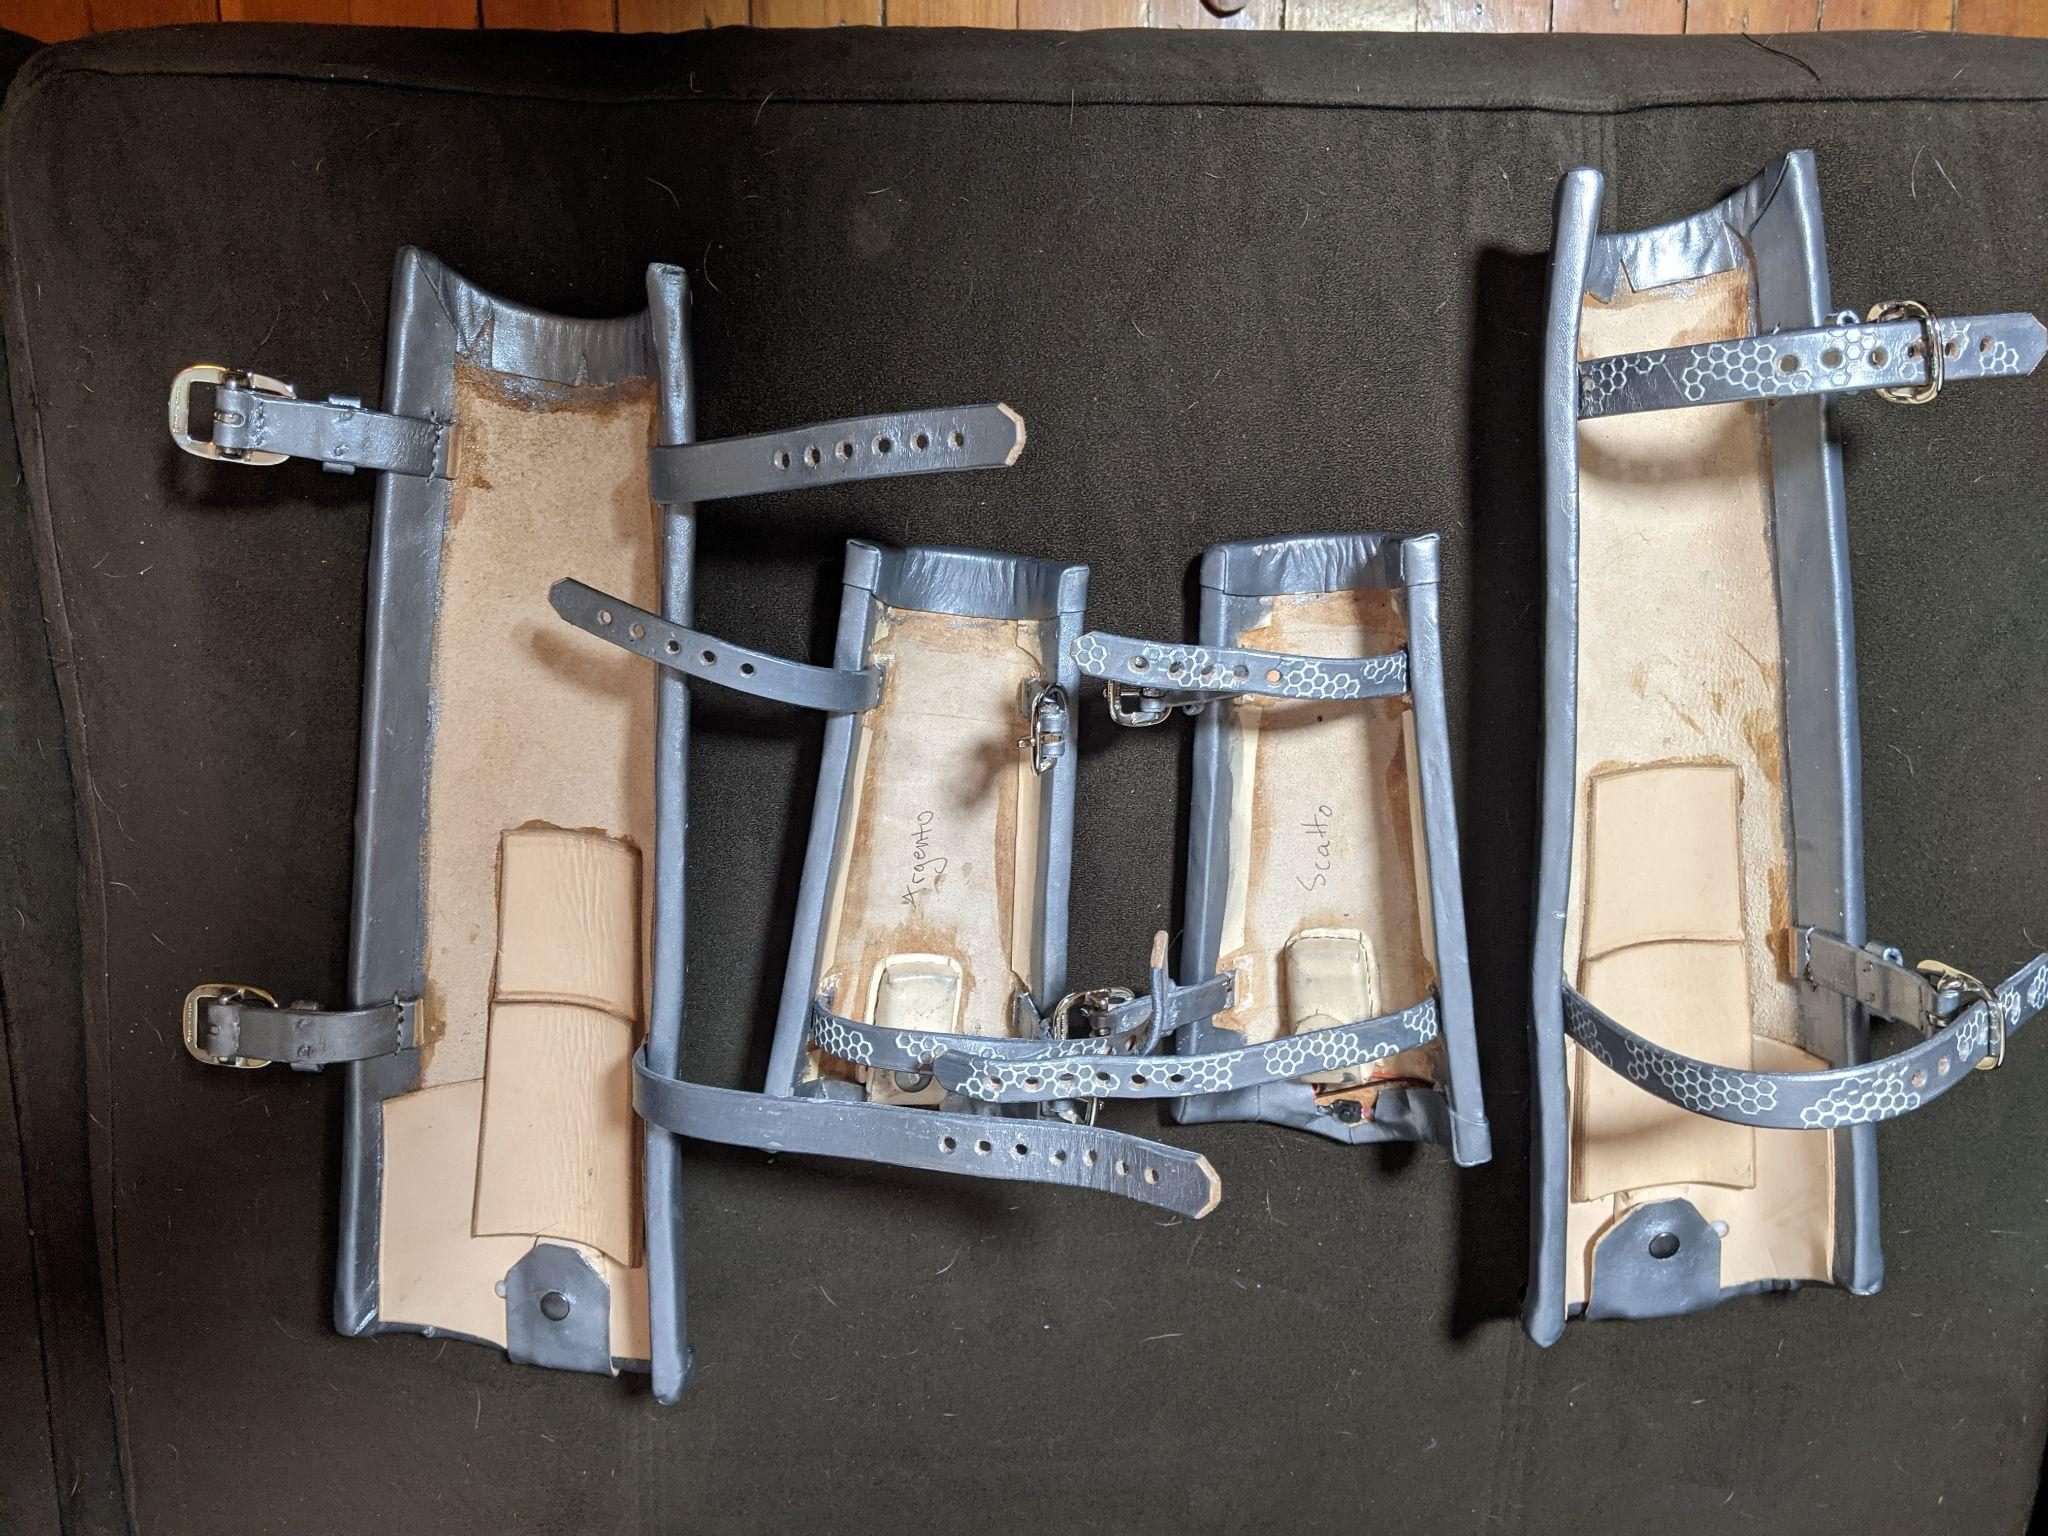
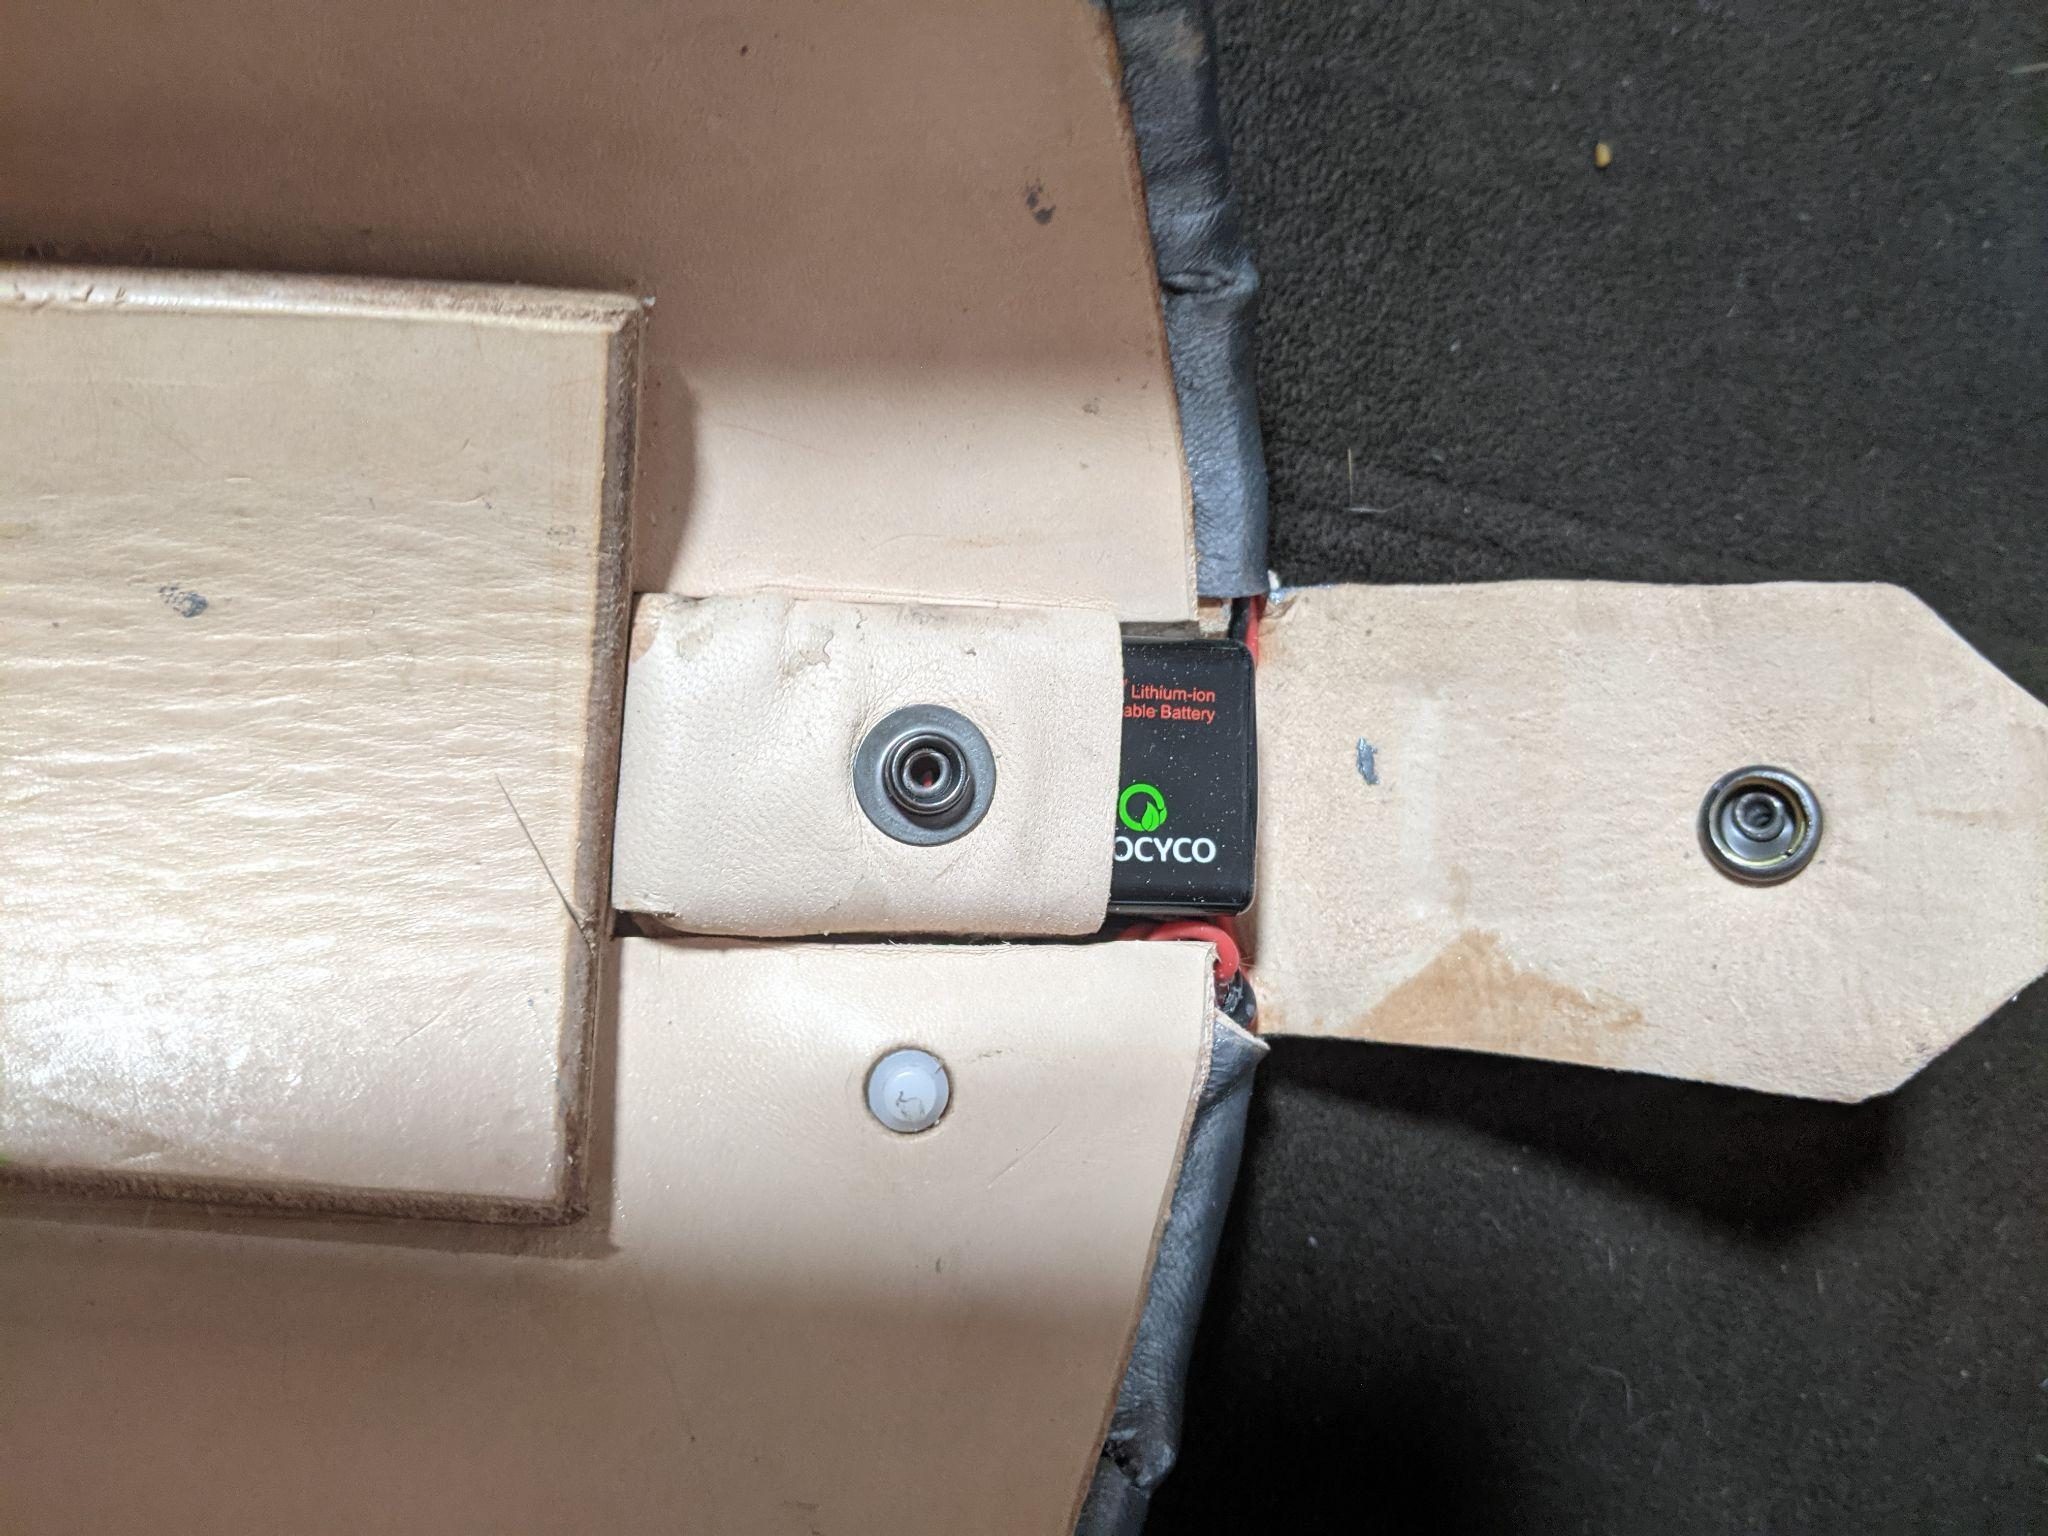
- A 9V pouch on the back of each piece
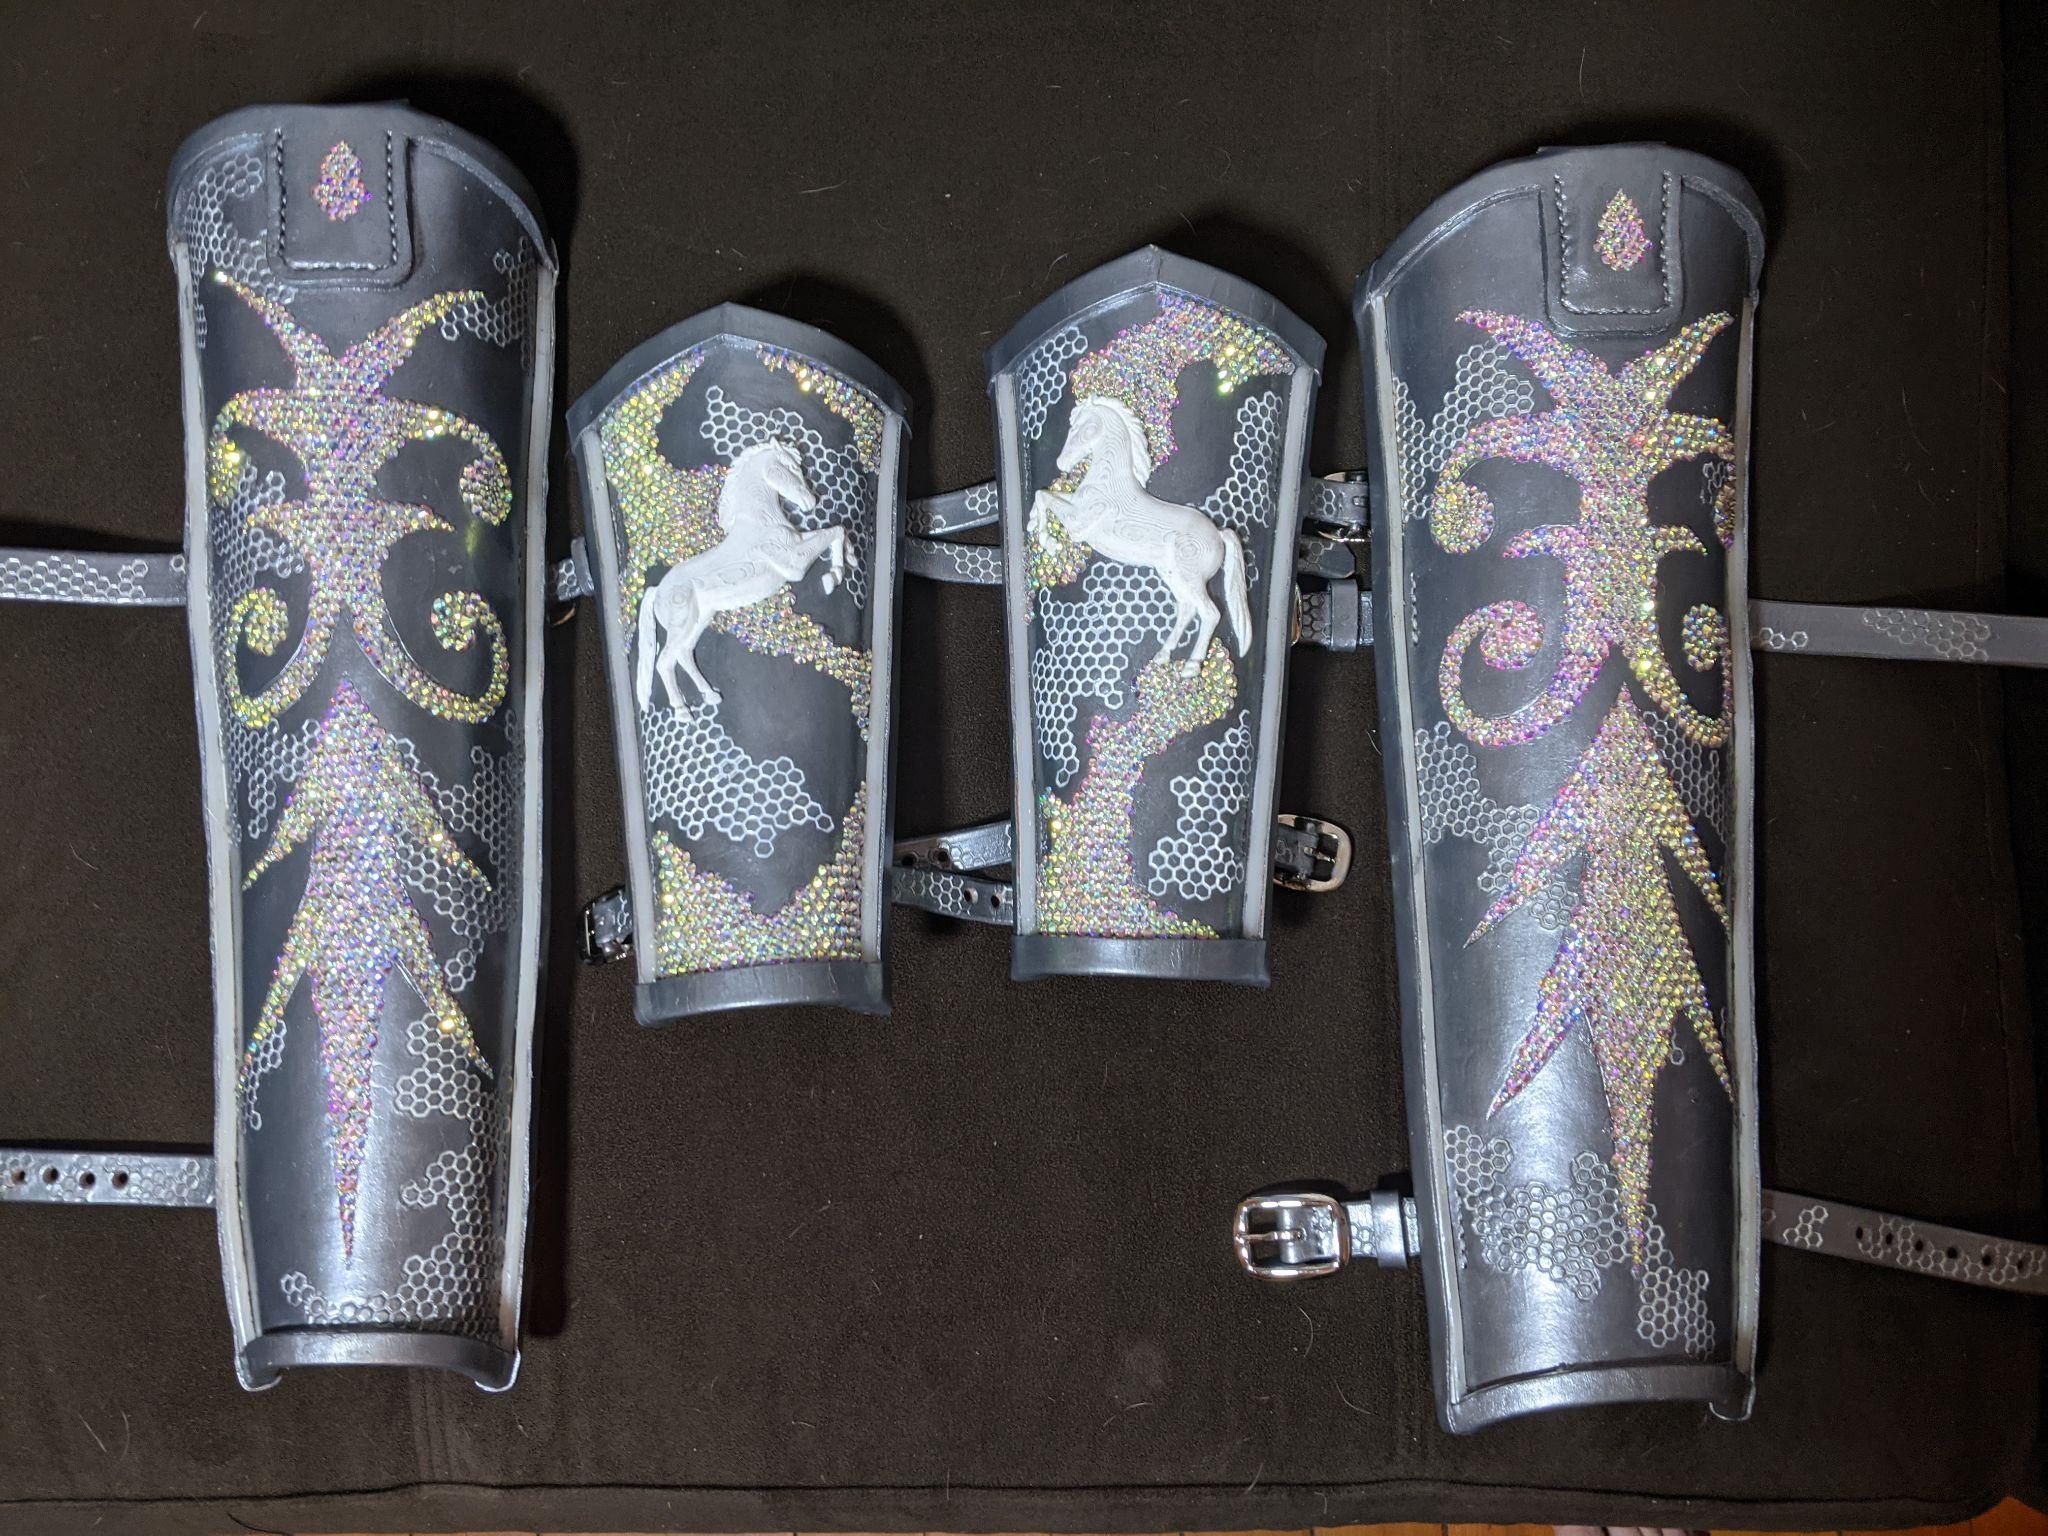
The bracers and greaves are made out of the same leather, stamps and rhinestones as the helmet. In the movie, Maximus describes the horses on his breastplate to the son of Lucilla. I decided to incorporate those horses on my bracers instead, since they are iconic to the character but I didn't want to obstruct the light vest. I also made the rhinestone designs of the greaves pattern after the filigree used in Maximus's armor. I included pouches for 9v batteries on the backs of each piece.
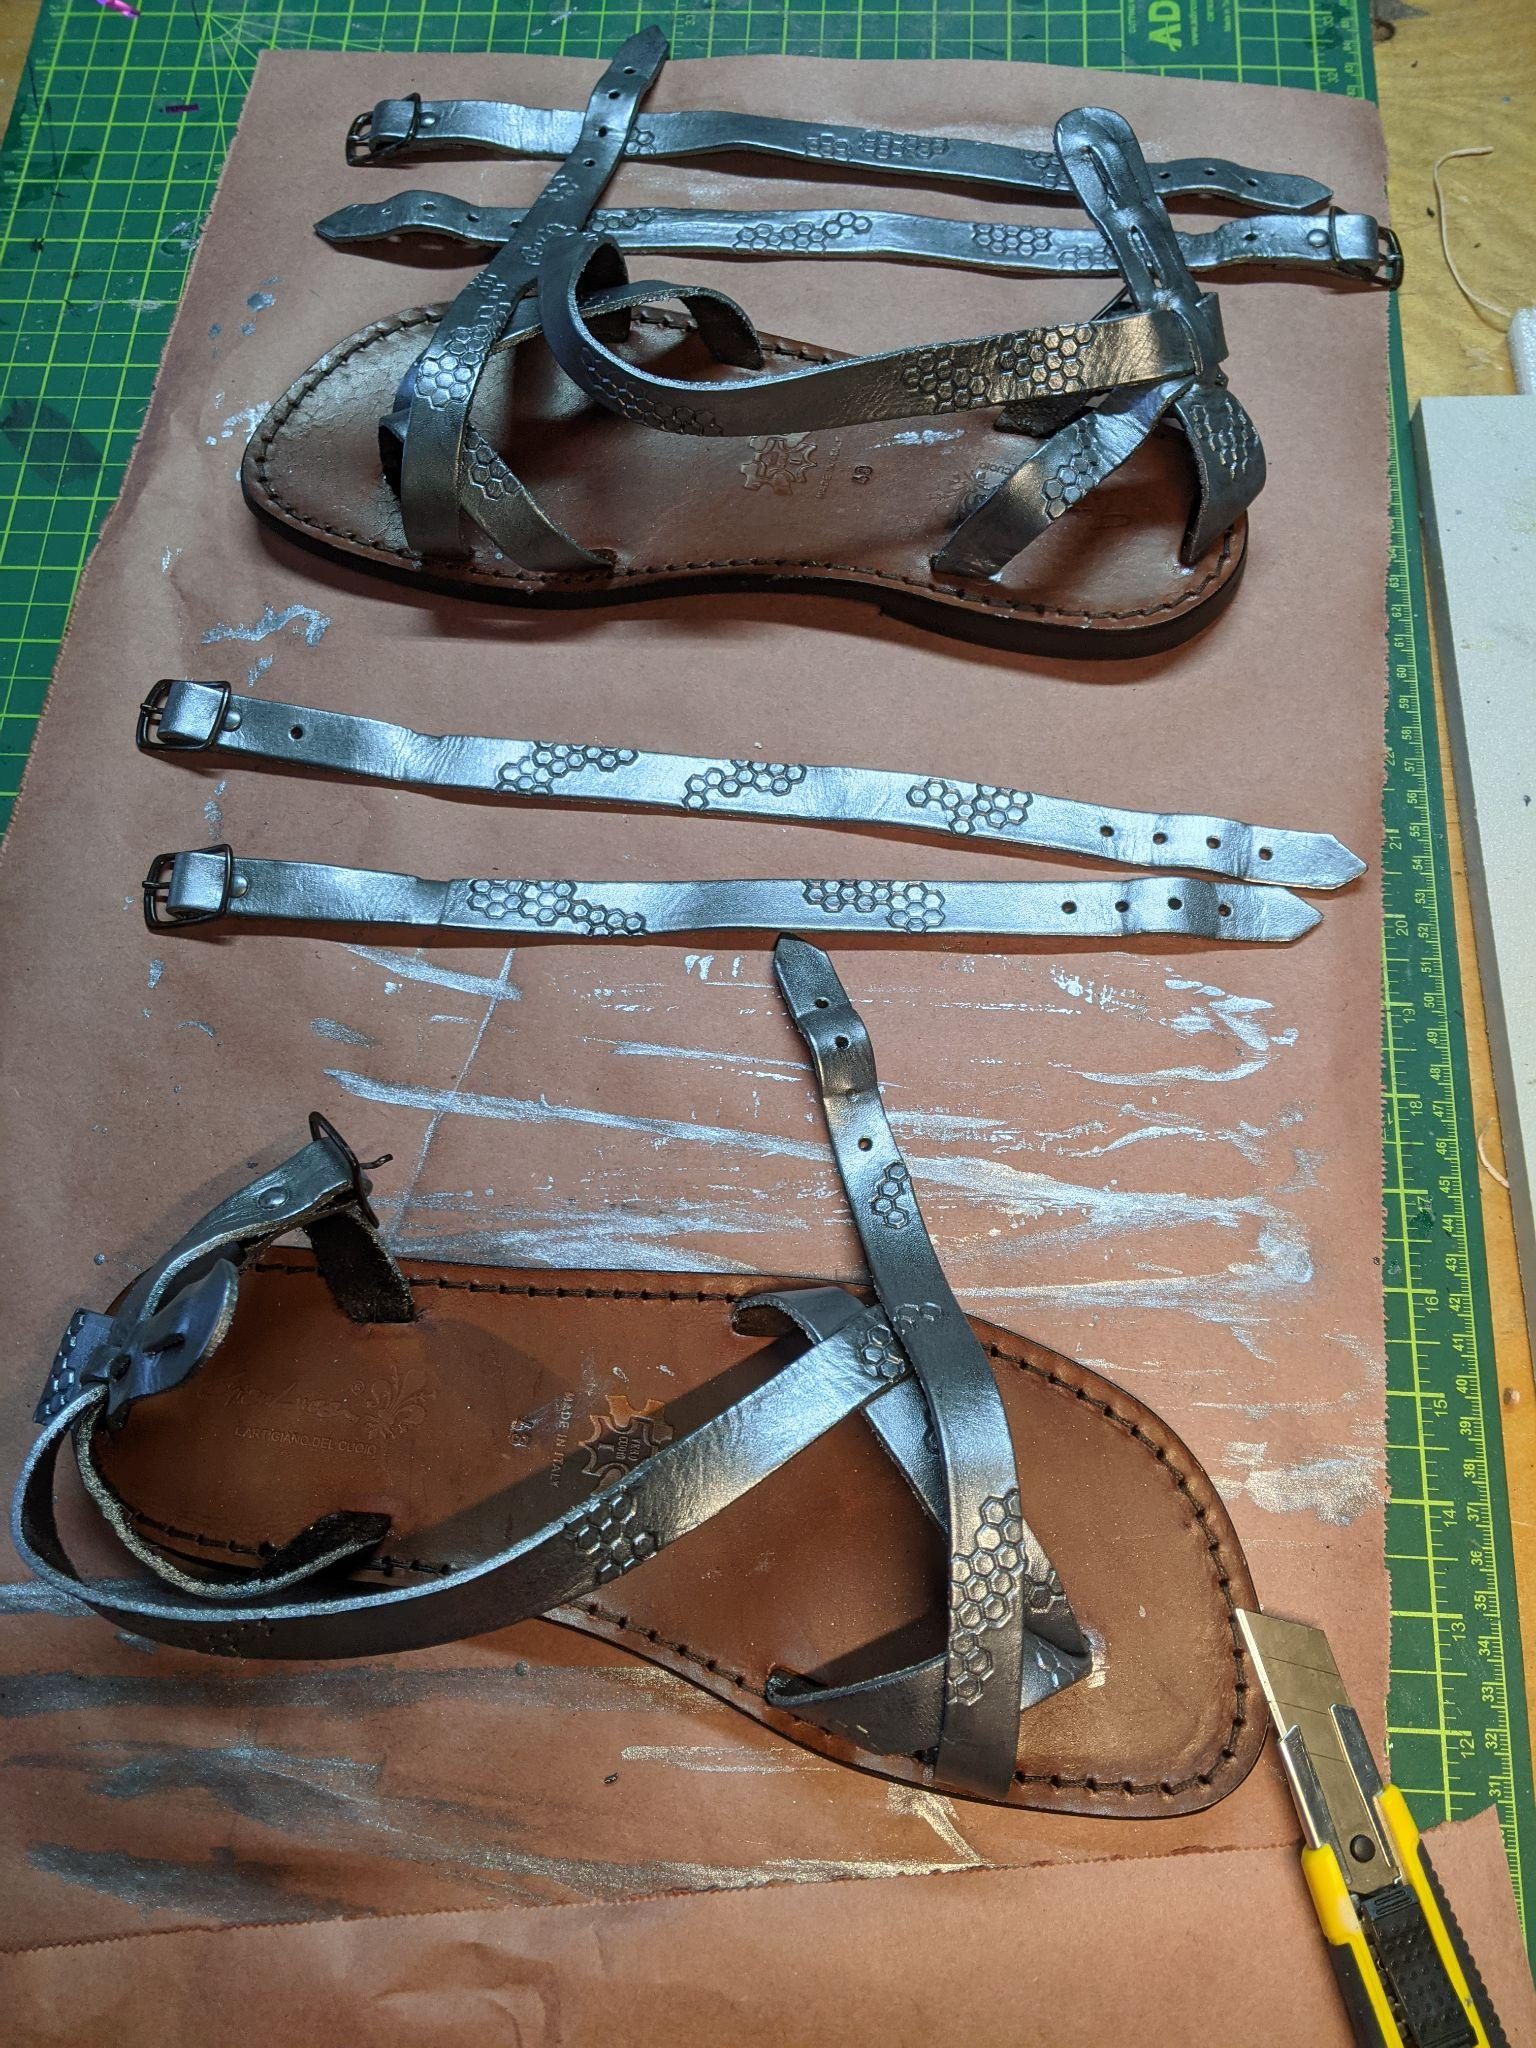
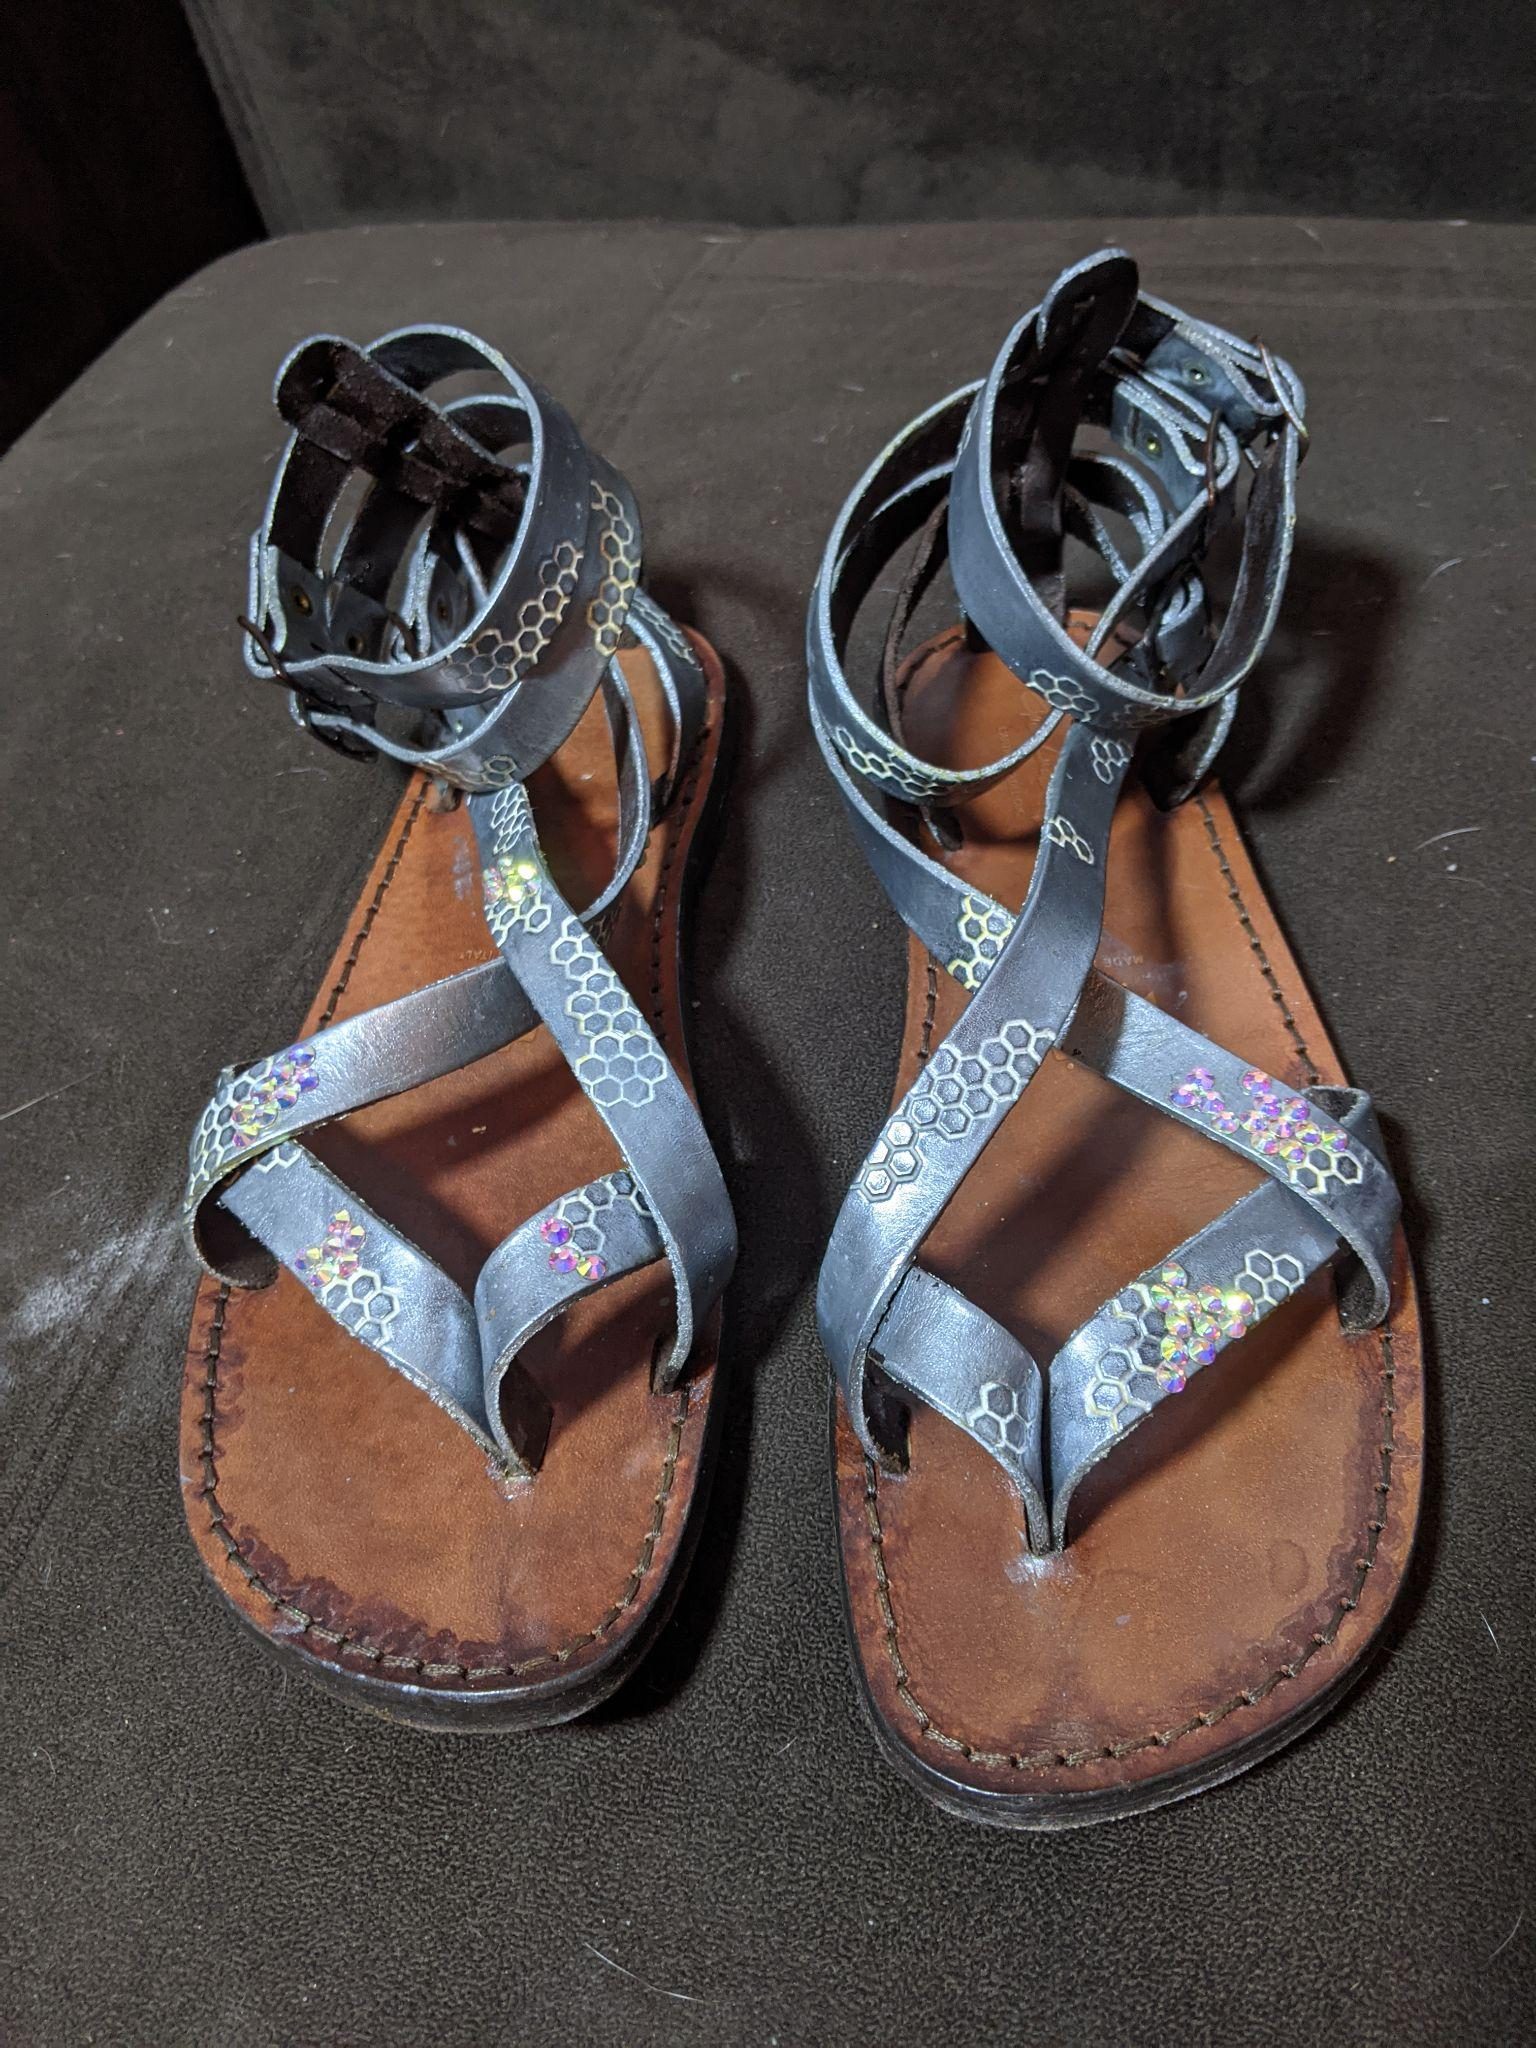
The shoes were purchased in a roman style brown leather. I added the same hexagon stamps and painted them silver with white and UV lines. I also added a few rhinestones for continuity.
Selected work
Back to Russell Glow.
Character studies, fabrication details, and the illuminated final build.
Make something unreasonable
Have an object that needs light, metal, or both?
The best projects usually begin before every detail is sensible.
Start a conversation